Hi! I hope you guys are excited for lots of inspiration today. I’m so excited right now I’m just bursting at the seams with joy. Why you ask? Well, this post is chalk full of goodness. First, I have my Christmas cards to share with you. Then, there are a total of 35 silhouette projects in this month’s link up. 35! That’s just amazing! I’m just so happy to be a part of this group. And finally, this is my first ever giveaway. I’ll save that for last, but let me just tell you, I’m so thankful to be able to do this. Onwards and forwards to the crafting!
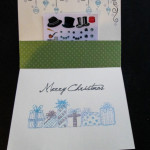
Oh wait, story time first! This will be the third year that Earl and I hand make our cards. We started doing this the year after we got married. I’m not really sure how it happened, but I’m so glad we did. At that time, we weren’t living together, and so Thanksgiving weekend was one of the longer times we had together. So, we decided to make cards for Black Friday. Since then it’s become a tradition in our little household. This is the first year that we designed our cards entirely ourselves without relying heavily on other crafted cards. In fact, I don’t even really have any inspiration to share with you how we got started on this one! This was the very first project I had planned for my silhouette (even before I had it!), because I really wanted to do a Christmas card with stickers, and so I did! Here’s the card!
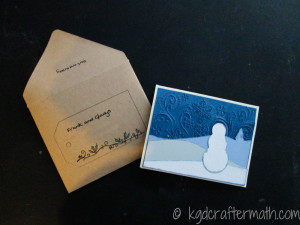
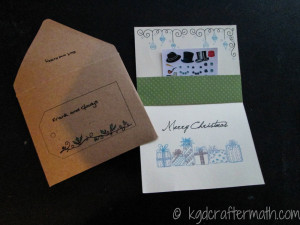
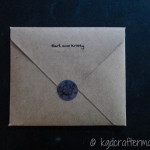
Now, there are so many parts to this card, I’ve decided to break it up into four separate tutorials. Yes, four! Today I’ll show you how we did the front of the card. Then, I’ll do separate posts on the envelope, the stickers, and assembly of the card for the next three days. Each part involves the silhouette, but I’ve also used some other fun tools like our envelope punch board. Ok, with all that said, let’s get this tutorial started!
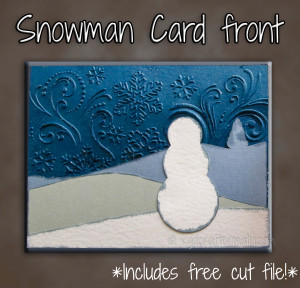
Materials
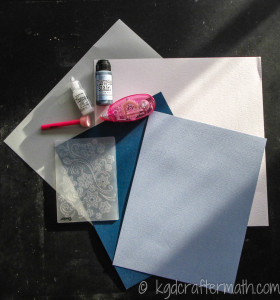
1 8.5×11 sheet light blue paper (Bazzill Basics Stonewash – makes 6 hills with tree)
1 8.5×11 dark blue sheet (Bazzill Basics Nautical Blue Dark – makes 4 rectangular backgrounds)
1 12×12 white sheet (Bazzill Basics White Prismatic makes 16 snowmen and 12 small hills)
1 12×12 grey sheet (AC Cardstock Stone) (makes 12 medium hills)
Snowflake embossing folder (Darice Snowflake Swirl)
Tim Holtz distress stickles (Clear Rock Candy)
Tim Hotlz distress stain (Stormy Sky)
Foam pouncer
Double sided tape
Free cut file (includes .pdf files and .studio files for the front, stickers, and envelope (no .pdf))
I also used my silhouette machine (you can print and cut from the .pdf in the download if you don’t have one) and an embossing machine.
Step 1: Cut out all your pieces
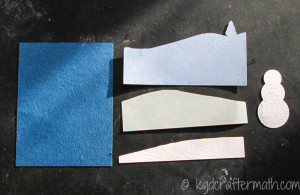
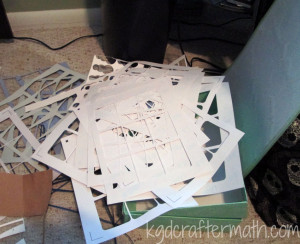
To make the pieces for the front, I used the same process in my Photoshop Magic 1 tutorial to trace out some pictures of actual hills. The snowman is just 3 circles merged together. Then I imported those into Studio and traced them to create the cut lines. Since we were making a ton of cards, Earl and I figured out what the best size sheet was and how many we would need. Cut out as many as you need for each color. If you are using the .pdf files, print on the back side of your page. Below are all the pieces needed for a single card cut out. Pay particular attention to the texture of your paper. The light blue I used had texture on one side that I didn’t like, but the other side was plain. I just placed it texture side down on the cutting mat. Conversely, I wanted to keep the texture for the white, so I kept the texture side up for those cuts.
Step 2: Distress
All of the pieces except the dark blue should be distressed using the distressing stain. What I love about these stains is that there is a cloth sponge right at the top of the bottle, so you don’t need any other tools! First, you’ll want to dab it down on some other paper to get it started.
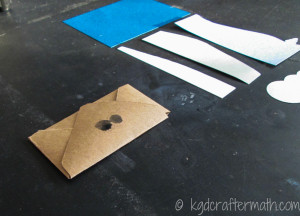
Then, just brush the tip gently along the edge. You’ll want to pay attention to the side you’re marking, but you can always distress both side if need be.
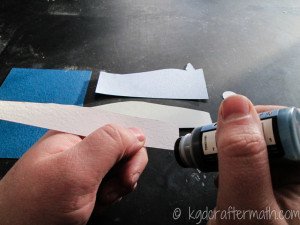
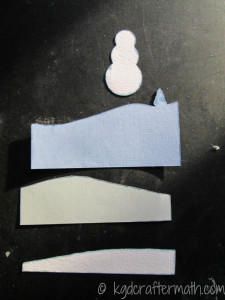
Do this around all sides of the smallest hill and the snowman as well as the top and two sides of the larger hills.
Step 3:Emboss
This is pretty easy to do if you have an embossing machine. Just center your dark blue in the embossing folder and send it through the machine. I won’t go over how to use an embossing machine (since there are several kinds), but basically you put the folder in between two pieces of acrylic and then press a button which feeds it through some pressure rollers. There are also manual ones where you hand crank the folder through.
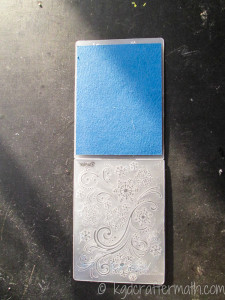
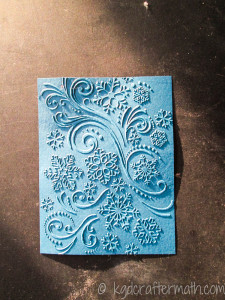
Step 4: Stickle
Next, you’re ready to add a bit of shine to those snow flakes! We decided to keep the sticky out part of the embossing facing out. To add a subtle bit of glitz, we spread some stickle on a pouncer and then pounced it around the embossed part. It’s hard to see in the pictures, but it adds just the right amount of sparkle to the snowflakes. You can save some of your stickles by sticking to only the top half of the card, since the bottom half will be covered later on.
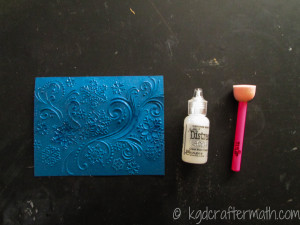
Step 5: Assemble! Now that all the layers of the card are ready, it’s time to put them together. This is where your tape comes in. I just ran around the edge on the back side and pressed them on one at a time.
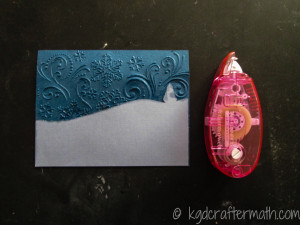
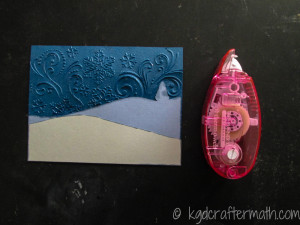
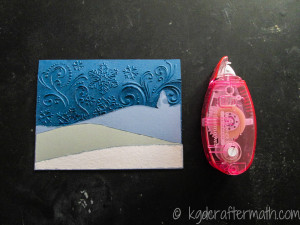
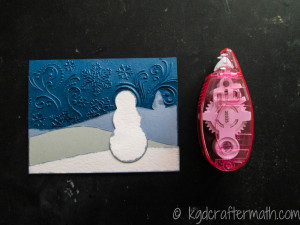
Congratulations! You’ve finished the first part of the card. Give yourself a pat on the back.
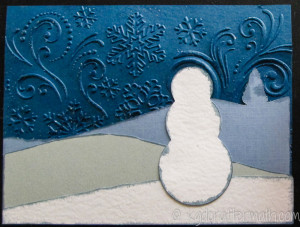
Well now, that was productive! I hope you’re ready for more inspiration, because here it comes!
Want to Check Out More Silhouette Projects?
My Silhouette Challenge buddies and I are all sharing projects on our blogs today, so peruse the projects below for a wealth of Silhouette inspiration!
- 2013 Snowman Christmas Card by Please Excuse My Craftermath…
- Christmas Hoop Art by Lil’ Mrs. Tori
- Silhouette Nativity Advent Candle Box by One Tough Mother
- Christmas Party Photo Booth Props by unOriginal Mom
- Another Stenciled Tea Towel by Cutesy Crafts
- Silhouette Gift Tags by Rain on a Tin Roof
- Snowflake Pin / Ornament by Coley’s Corner
- State Sign Couple Gift by It Happens in a Blink
- Mason Jar Christmas Ornaments by Vintage News Junkie
- Merry Christmas Wall Decor by One Artsy Mama
- Deer Head Holiday Banner…featuring Santa’s Reindeer by The Thinking Closet
- Restore your UGGS (with PAINT) by From Wine to Whine
- Monogrammed Snowflake Ornaments by Architecture of a Mom
- Christmas Countdown Sign by The Girl Creative
- Elf Chalk Sign: “The Best Way to Spread Christmas” by Weekend Craft
- Glittery Christmas Subway Art by The Turquoise Home
- Sketch Pen Labels by Sowdering About in Seattle
- Snowflake NOEL Sign by My Favorite Finds
- DIY Holiday Hostess Gift by Everyday Paper
- Folding Nativity Backdrop by Chicken Scratch NY
- Recycled Glass Jar Advent Calendar by Nearly Handmade
- Reindeer Card: Double-Sided Print & Cut by GetSilvered
- Personalized Block Ornament by Suburble
- Paper Medallion Christmas Tree by Create & Babble
- Mini Mid-Century Homes by Tried & True
- Glitter and Vinyl Minecraft Christmas Ornament by A Tossed Salad Life
- DIY Countdown to Christmas Refrigerator Style by My Paper Craze
- Reversible Recipe Holder/Block Frame by The Sensory Emporium
- DIY: Lettered Christmas Pillows by The House on Hillbrook
- Simply Charming Christmas Ornaments by Life After Laundry
- No Glitter was Worn by GiveMeAPaintbrush
- Make Easy Ornaments from Paper Circles by Bringing Creativity to Life
- Cutting Machine Embroidery Applique by Terri Johnson Creates
- “Believe” Christmas Banner by Daily Dwelling
- DIY Christmas Nativity Card by Pitter and Glink
Do you have a Silhouette machine?
Looking for Silhouette inspiration, support, trouble-shooting? Interested in joining us for our group posting event next month? Then, we’d love to have you join our Silhouette Challenge Facebook group. To join, simply fill out the new member request form, and Lauren from The Thinking Closet will get you squared away.
$155 Amazon Gift Card Giveaway!
And if that isn’t enough, I get to partake in my first *ever* giveaway! What does that mean? Well, you can use the rafflecopter widget below to enter to win a $155 Amazon gift card. That’s more than enough to get your own Silhouette portrait! Or, if you’re not hankering for a portrait, than you can put it towards whatever your heart desires. This giveaway is made possible by 31 amazing bloggers, which means you have 31 opportunities to enter. Just follow the instructions in the widget below to enter. And guess what?! If you already like me on Facebook, that’s one chance to enter already taken care of for you! And if you don’t, it’s really easy to start now. Don’t worry, I won’t take over your facebook wall with my insanity. Or will I?
Ok, before I give you the widget, I need to get some nitty gritty details out of the way. The giveaway runs from Monday, December 9th – Monday, December 16th at 11:59p eastern and is open to anyone 18 years of age and older, and this is an international-friendly giveaway! The winner will be contacted by Lauren from The Thinking Closet by email and will have 48 hours to respond; so, make sure to watch your spam folders! Ok, that’s good. There are some other terms, but you can read those in the widget I’m going to share with you right now!
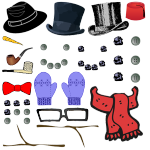
Isn’t this just the best Christmas season ever?! I’m able to continue a new tradition, share the card with all of you, be part of an amazingly creative group of crafters, *and* give you the chance to win a bit of money. Well, there was a lot to that post. I hope you’re not all tired out! Don’t forget to come back tomorrow for the next part of the card tutorial or your snowmen will be all cold without their hats and scarves! Oh, and please do be careful of the craftermath on your way out. Thanks for stopping by!
2013 Snoman Christmas Card
Constructing the Front <– You are here!
Making the stickers
Assembling the Card
Making the envelope (Coming soon!)


I love these! The colors are so pretty, and the details are adorable!
Thanks Carrie! I always say it’s all in the details!
What a cute card! I love the blues!
I do too Coley! We tried to make it so that the hills looked like they were dissappearing into the background, kind of like real hills do!
Oh my goodness! What a labor of love. I’m a softie for traditions so this post is right up my alley. You cards turned out beautifully! And the embossed results are awesome!!
Thanks Dee! We love this tradition, it’s a great way to spend some time together after enjoying time with friends for Thanksgiving. Plus, since our family is so far away, it’s nice way to incorporate them into our Thanksgiving.
What an adorable card…I love it!! You put a lot of work into this, but it turned out so beautifully!
Thanks Monica! I’ve got to say, the ‘worst’ part was all the sketching we did. It was/is more time consuming than anything else. I’m glad you like it!
Holy gorgeous! I love it! Pinned!
Aww, thanks Tara!
SO cute!!! I’ve been working on some Christmas cards myself and this one gives me a little inspiration. Thanks for sharing your great ideas and Merry Christmas to you and your family!
I’m glad to share, and so happy that it inspires you! Merry Christmas to you and yours as well. I hope you post a photo somewhere when you’ve got your cards done!
Love your card! I can’t wait to see the other tutorials.
Thanks Glenna! I was going to do them all in one fell swoop, but think that even I wouldn’t have the attention span for that!
These are great. I love that you used the embossing with the pattern. I’m very impressed that you do handmade holiday cards! That’s a lot of work, and I can’t imagine being that organized.
Thanks Emily! We have a ton of fun doing them. I’m not sure I’d call us organized though! I think we even had a few craft supply runs that weekend….
This looks great – looking forward to the rest of the tutorials.
Thanks Pam! The second one is up today, and the rest will come shortly!
Such a cute card. Thanks for the inspiration. I’m going to try to make Christmas Cards for the first time this year and I know my Silhouette will play a big part in their making.
Good luck Breena! I (mostly) had fun with using my silhouette for this project! Too much sketching though…. I’m still sketching some of my cards!
Very cute! And what an awesome tradition! I was going to make my own this year, but ran out of time. Maybe next year.
Thanks Brooke! We love the tradition, though this year we might have gone a bit out of hand…. The whole point of making it a tradition was to set aside a single day to make the cards, and we’ve been working on them for almost two weeks now. Oops! Time to scale it back I think!
I love your black Friday tradition! Your cards are adorable. I love snowmen!
Thanks Tori! We love the tradition too, any my mom LOVES snowmen! This is the second year we’ve done a snowman card. Ha! She loves them because they are more of a winter decor instead of a Christmas specific decor, so she can leave them out all winter long. I’m finding that I tend to like snowflakes, I wonder if there isn’t a bit of that in me too?
This is adorable! I especially love the embossed background!
I thought the embossed background would add just the right touch, and from all the comments it seems I was right! We actually tried two different embossing folders (the other one was a Tim Holtz one), but the swirls on this one set just the right tone! Plus, it made it easy to consistently place the snowman (notice his head is in the middle of a swirl? Yeah, that’s on purposes.)
I love the layering! Great job!
Thanks Randi! We love the layering too, it’s meant to look like the hills are fading in the background. Hopefully we captured that well!
What a gorgeous card! I love the embossing and the gorgeous rich blue. Very pretty!
Thanks Kirsten! Man, all these positive comments are starting to make me feel pretty awesome. I’m so glad that you all like the card! Blues are my favorite as well, we spent way to much time looking at colors in the paper store (or so says Earl, I think it was totally worth it).
This is beautiful! It almost makes me ready to do Christmas cards again.
Aww, thanks Rachel! You should! It’s fun! And people seem to really like them. I love that we do hand made cards because there are some people (like my aunts and uncles) that I just can’t gift to anymore. So making them cards is my way of sending a little something their way.
I love this! The embossed paper in the background is just lovely!
Thanks Bethany! The embossing really did end up making a big difference. It’s really pretty easy to do as well! I used my electric machine, but we also have a texture boutique that’s hand powered and was relatively inexpensive (we even got it on sale half off). It brings in a lot of bang for your buck!
Holy Moly! My kids would LOVE to receive a handmade sticker card! Heck! I’d love to receive one! This is so amazing! I hope everyone who was lucky enough to get one knows how special they are now, I MUST shop for an embosser asap! So much inspiration! Thank you!
*Blushes* Gee thanks Janice! Now I kinda wish you were on my Christmas card list! Good luck with finding an embosser you like! We have two, a small hand crank one and the Tim Holtz Vagabond. I love the vagabond because it also does die cuts, but then again, I got that before I had my silhouette! There are many different options in between as well, and there are all sorts of fun embossing folders! Plus, embossing folders all work the same, so you don’t have to stick to the brand of embosser that you purchase for the folders (in my experience).
Oh my word, this might be my favorite handmade Christmas card ever! You get to decorate your own snowman (or woman)?! I’m in love! And you’re smart to divide this up into multiple tutorials. Otherwise, I could see this being more like a novella than a blog post.
Sooooo thankful that happed upon my blog and that we’ve become blog buddies, Kristy. You are a wealth of knowledge and inspiration, and also a dose of sunshine on dreary days. (Sorry, it’s the holidays that make me sentimental.) Thanks for helping to make this month’s Challenge & Giveaway possible!
You are so sweet Lauren! Favorite card ever?! That makes it worth all the work. Next year we will be scaling it back (I hope…), but I also hope that the results will be just as awesome! Not that we have a plan for next years yet. (Seriously, we don’t).
I am also so happy to have found you and this little (or not so little!) blogging tribe. And sentimental is great! It’s been a tough season for me, and having you all around (blogging and on facebook) has really helped keep my spirits up, which is where they should be for the holiday season!
This is so incredibly cute!
Thanks Melanie! Having comments like yours really makes my day, I really appreciate that you took the time to stop by and say hi!
So cute and detailed. I love the embossed piece. Great job!
Valerie recently posted…DIY Holiday Hostess Gift
Thanks so much Valerie! I love the embossed piece too, though I was a bit hesitant at first to use the swirly one. I’m so glad I did!