Yesterday I shared with you how to make the front of the card, and today I’ll be showing you how I did the stickers! The stickers are my favorite part of this project. I knew that I wanted to make stickers the moment I thought about making a card with the silhouette. As a reminder, here is what the front of the card looks like:
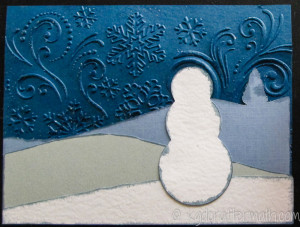
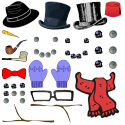
Even though I wanted stickers for the snowman, I also wanted the front of the card to look great on it’s own. Most of the people we send cards to don’t have children, and people like our grandparents probably won’t be able to use the stickers due to dexterity issues. I think we accomplished that! Oh, but the stickers, the stickers are my way of having fun with the cards this year! I collected some royalty free images from some of my favorite sites (http://www.clker.com/ is one of my favorites) and sized them appropriately. In addition to the typical top hat, scarf, and mittens I added a fez, bow tie, glasses, and a fedora. I hope someone has fun with these (bow ties are cool people)!
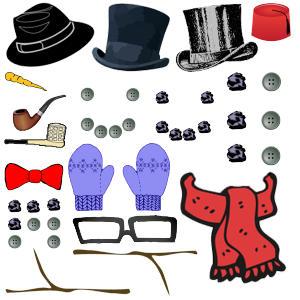
To make the cut file (which you can download here along with all the other files), I imported the image into Studio and traced all of the images using the trace function. Then, I used the offset to create some white space around the objects. This is what my finished silhouette cut file looks like:
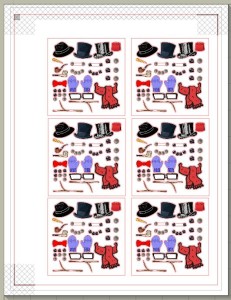
Now, you’re probably wondering, “Kristy, what do I do with this cut file?” That’s what I’m here to tell you all about today! Lets get ready to make some stickers!!
Materials
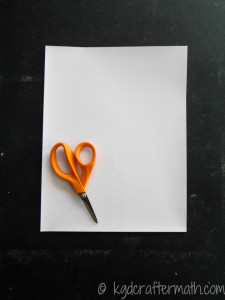
Sticker paper (I used clear silhouette sticker paper)
Scissors
Free cut file
You will also need a silhouette and a printer. Simple materials here!
Step 1: Print
First, go open the file in Silhouette studio and make sure that the registration marks are showing (those are the hash marks you see in the file above). If they aren’t, you can go to File-Registration Settings to fix that. Then, print out your file using your ink jet printer.
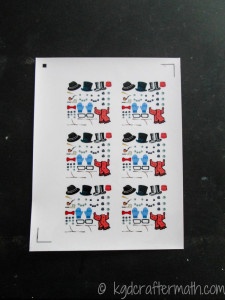
Step 2: Cut
Put the printed paper on your silhouette mat, print side up. I used the following settings: Blade 3, Speed 4, Thickness 18. This is different from the factory settings, but it produces a kiss cut. Basically, it cuts your sticker paper but not the backing sheet. This is exactly what I wanted for this project! I always watch my blade as it registers, and find that it can be pretty obvious if it’s registering wrong. For example, if it’s registering one of the marks and it’s outside the paper, it’s doing it wrong. This way I can pause and cancel right away if I need to. Another thing you can do is shine a light on the paper to help the machine see (thanks to the Silhouette Challenge Facebook group for that gem!). Here’s what you get when you’re done:

Step 3: Hand Cut
Finally, there are 6 sheets of stickers to a page. I’ve already gone ahead and scored a box around each sticker sheet. I just use my scissors and follow those lines. Easy peasy!
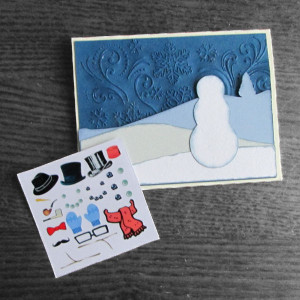
That’s it! Can you believe that it’s really that easy to make stickers? I know I was astounded! As a matter of fact, I don’t even have any craftermath related to this part of the project. What the what?!?! Well, now that we have a scarf to keep the snowman warm (since when do we want to keep snow warm anyway? Oxy moron much?), next up is adding a greeting to the inside of the card and assembling it. That’s all sketch pen and double sided tape my friends. Come back tomorrow and I’ll show you how I did it!
Oh yeah, and don’t forget to check out the giveaway going on right now! You have until Monday, December 16th at 11:59p eastern to enter the giveaway for a $155 Amazon gift card! And it’s all thanks to the bloggers below. If you like my facebook page (which you can even do in the widget below), you get 1 entry! You can get even more by liking the other bloggers who helped make this possible! Good luck!
2013 Snoman Christmas Card
Constructing the Front
Making the stickers <– You are here!
Assembling the Card
Making the envelope (Coming soon!)

I like to link up here.
Affiliate links help me keep this blog running. Thanks for using them!
All opinions expressed on this blog are always my own.

I had to come back to look at this because I didn’t notice the stickers before. I love this even more! SO SO cute!!!
How did I miss this post??!! I need to cut them for Jo.. she’ll have a field day making a sticker snowman!!
I’m sure she will! The stickers are a bit small, but you can always make them a little bigger. And if you really want, let me know and I can give you a larger version of the .jpg image I created. I hope you two have a blast with these!