Last week I did my first Cameo tutorial, but I still haven’t gotten to telling you about my first experience with it! So now I’ll share my first contact with the software, my first cuts, and the problems and fixes I encountered during my first use. Once all that is out of the way, I’ll give you a quick tutorial on one way to re-stick your mat. I’ll do all of this across a few posts so that you don’t get overwhelmed by one really long post. They will probably not be all today, but spread over the next few days.
Installing the Software
The software was really easy to install, even though it didn’t work on my Surface (Win 8). I’m hoping that their customer support is as awesome as everyone says (spoiler – it is), but for now at least I still have the desktop (Win 7). There is a cd that comes with the software or you can download the software from their website. The silhouette comes with 50 free designs, which is pretty cool. Note that to get those designs you need to hook your cameo up to the software and then download them, so don’t worry if they don’t show up right away. I downloaded the software from the website, so this may not be true if you use the cd. There is a premium version of the software, but I don’t know if I need it just yet. I am sure that I will want to do more than just what you can do in studio, but for now I’ll work with what I have.
Connecting your Online account with your software
First you need to create an account at their shape store. Once you’ve done that, go to File – Download Pending Orders. Your library will pop up on the left and a screen will pop up on the right prompting you for your email and password. You also have the option to remember your password and to automatically check for pending orders when the program opens. I have both clicked, this way if I purchase something online it will automatically download and I won’t have to wonder if I’ve downloaded the files or not.
Downloading the free shapes
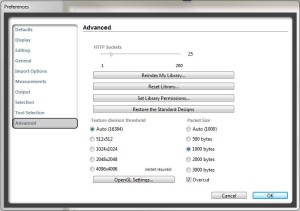
This was really easy. Just go to File-Preferences and choose advanced in the pop-up window. Then hit “Restore the Standard Designs”. I had already registered my Silhouette before I did this, so you may need to do that first.

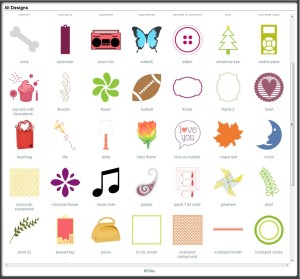
Here is a sample of the free shapes you receive. Everything but the flourish was included in my free downloads. (Please Note: These were the designs I received with my cameo. Your designs may vary.)

Purchasing Shapes
Even though the cameo comes with a number of shapes, they are all pretty basic and I wanted to do a project that would be a complete project to start with. Plus, it came with a $10 gift card to buy files, so it was only reasonable that I take advantage of all the wonderful projects already there! I don’t expect to be doing to much purchasing of projects, but I figured why not. The Silhoutte Online Store was really easy to browse, and you can even browse within the studio software which I thought was pretty cool. I purchased 3 projects and 1 sketch for a total of $6:


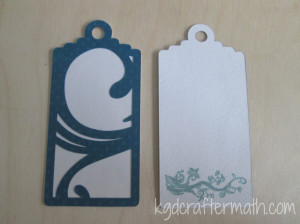
6 flourished small tags and a Flourish Sketch
As you can see, I made all three of the paper cuts, but I’ll only be going through how I made the tags. You can visit the Ashbee Design blog for detailed instructions on how to make the other two. Most of the designs are $1 or less, but the 3D ones are a bit more complicated and so are fairly priced a bit higher. I also really like that you can purchase commercial licences for some of the designs right through studio, which were also reasonably priced.
Once I purchased the shapes and connected my software to my online account, they downloaded right into my Studio software package.
Ok, I think that’s a good stopping point. For the next post I’ll walk you through working with the tags in the software.
This post is part of my First Cuts Series! Want to read the rest? Here’s the whole group of them!
Silhouette Cameo: The Unboxing
Silhouette Cameo: Installing the Software and Shapes
Silhouette: First Contact with the Software
Silhouette: First Cuts
Silhouette: Trouble Shooting

I like to link up here.
Affiliate links help me keep this blog running. Thanks for using them!
All opinions expressed on this blog are always my own.

Thank you so very much for taking the time to do this. I found it invaluable – and was unable to locate this info anywhere else!
Yay! I’m so glad that you found it helpful. I remember trying to figure out the free shapes thing, and every time I thought I had figured it out, I realized that I hadn’t!
Thank you so much for creating this site. It it so helpful. With your guidance I was able to download my free items!
I’m so glad you found it useful! Good luck with your silhouette creations, I’m sure you’ll be hooked as quick as anything.
I’m just wondering if you have any suggestions as to why my 50 free shapes won’t download? I can’t seem to get it to work!
The first thing I would check is that you’ve registered your machine and that you are logged in. I have my program set up to log me in automatically, but I think you manually log in where you check for new downloads. If all else fails, don’t hesitate to contact customer support. They’ve always been super helpful and are pretty good at trouble shooting these types of issues.
Thank you alot, i kept searching for it alot you made it easy thumbs up