You’ve decided to jump all in and make your own envelopes, eh? Well, you’re in luck because I have a TON of resources here. Well, they’re all online, so they probably don’t *actually* weigh a ton, but you get the idea. This is one of those things where you should read all the way through first before jumping in. (Don’t worry, I won’t have an instruction that says to ignore all the other instructions. It’s just there is a lot of information packed onto this page.) Let’s get started.
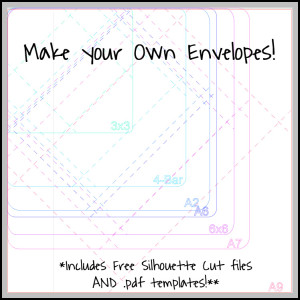
Download your free files HERE! Or, follow the instructions below to create your own custom sized envelopes!
Papers
You may be wondering what type of paper you can use. Pretty much anything you want. I suggest a lighter weight paper, like scrap booking paper (for that patterned flair) or colored printer paper. You can pick up the later in bulk at your local office type store. I have also used cardstock (see my Christmas card envelopes), and find that to work perfectly well. It’s really up to your budget and creativity. If you are sending the card in the mail, you might want to steer clear of delicate papers that might rip (like handmade papers.)
As for paper sizes, you can make an A2 or smaller from an 8.5×11″ sheet. Anything larger than an A2 requires a 12×12″ sheet. And of course, there is a limit to what you can fit on a 12×12 as well, but as long as you’re sticking to US post office sizes, you should be ok. If you have an envelope board (like the Martha Stewart large scoring board or the envelope punch board, definitely use that! It will give you the measurements you need and you don’t need to do any of the steps below! The Christmas card envelopes post uses the punch board if you’re looking for a how to on those.
If you are using a 3×3, 4-bar, A2, A6, A7, A9, or 6×6 card (basically anything I showed you on the Choosing Your Card Size page). You’re in luck! Download the .studio and .pdf templates here to make your envelopes. (Note: Only 3×3, 4-bar, and A2 templates can be cut or printed on 8.5×11″ paper). Read the Quick overview below and then skip ahead to the section titled “Assembling the envelope” to see how it’s assembled. When using the Silhouette templates, remove all but the size you want. Double check that the number is set to no-cut (should be by default), and proceed to cut. You may want to cut the inner dotted line at a lower depth to just score the page.
Making the envelope – quick overview
So that you can visualize what’s going on, basically you’re going to cut a square and fold in the corners like so:
Ok. Now that you’ve got the general idea, let’s go over how this will actually go down.
The Size of your box
The first question you might have is, how to I figure out the size of this? It’s not too difficult. First we need to determine the size of square. (I’ll dazzle you with my math skills, but you can ignore that if you don’t really care how the number is generated).
**WARNING: MATH AHEAD**
To do this, we can go back to our elementary school days when we learned that the square of the longest side of a right triangle (with a 90 degree angle) is equal to the the sum of each other side squared. Or, in equation terms, a2 = b2 +c2. Notice how we have 2 different sized isosceles right triangles above (2 of the sides are the same length)? And that their shorter edges always combine to make the side of the square? Good. Let’s define the side of the square as “x”, the shorter edge of the smaller triangle as “a”, and the shorter edge of the larger triangle as “b”. We also need “h” – the height of the card – and “w” – the width of the card (which are the longer edges of our isosceles triangles). With all this information, we can do this:
a= sqrt(w2/2) and b=sqrt(h2/2)
x= sqrt(w2/2) + sqrt(h2/2)
Add a little bit of a buffer and:
x= sqrt(w2/2) + sqrt(w2/2) +1.5 (or x= sqrt(w2/2) + sqrt(w2/2) +3.8 for metric)
***END MATH***
All of that too complicated, but you still need to make your own custom envelope size? No problem. Just use this handy dandy piece of JavaScript I put together for you. (Feel free to round up a bit if you get a weird number).
Calculate US
Calculate Metric
Square Size:
Adding in the fold lines
I’m going to show you how to do this using Silhouette Studio, because I know a number of my readers use studio. If you don’t have a silhouette, that’s ok too! Use the same instructions below, paying attention to the **, and use your card as a guide plus a ruler and pencil. Just make sure you are lightly marking the side of the paper that will be your inside. (Note: I use designer and am not sure of what is available in the free version. You may not have all the options that I do)
First, make a square that’s the size you need as determined by the widget above. (I’ll be doing this with an 4-bar envelope). (Tip: go to Object – Transform – Scale Options to set the dimensions of your square.) (Tip: For rounded corners, draw your square with the rounded corner square tool.)
**If you’re using pencil and paper, cut out your large square from your envelope material now.**
Next make a rectangle that’s the size of your card. Go to Object – Transform – Rotate 45 degrees clockwise.
Select both objects, and go to Object – Align Center-Middle.
**If you are using a paper and pencil, place your card in the center of the page and eyeball it.**
Now, with the smaller shape selected, go to Object – Transform – Scale Objects and scale the rectangle up to 110% (the extra space will create room for the sides to overlap).
**If you are using paper and pencil, use your ruler to draw lines on the sheet below and extend the line outwards towards the edge of the larger square, leaving a little bit of extra space around the card.**
Next draw some lines that extend the box outwards to the edge of the square, and delete the inner square. I have turned the lines to a perforated line here. You can cut out the little triangles if you want, or just overlap them in the final fold. This overlap allows you to glue the pieces together.
When you cut – make sure to use the “Perforate Edge” cut style for the smaller rectangle. Alternatively, you can set the line style to a dotted line or use your sketch pens to mark the lines. You may also want to use a shallow depth for the inner rectangle so the blade does not go all the way through.
Assembling your envelope
First you need to crease your fold lines. You can do this with a scoring board, cut it with the silhouette, or just fold along the drawn line. Whichever floats your boat.
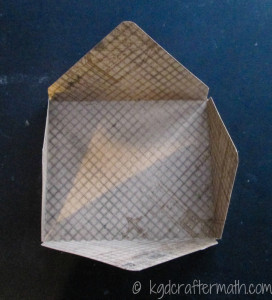
Next, fold the bottom flap inwards. This will be one of the longer flaps. Add some double sided tape to the bottom edge of the two shorter flaps and press them onto the bottom flap.
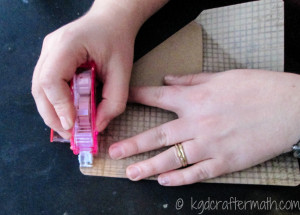
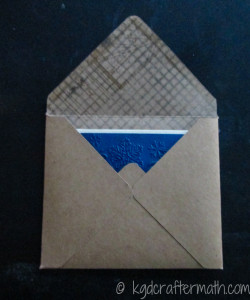
For the top flap, you can either use double stick tape or glue when you’re ready to send it, or you can use envelope gum. Envelope gum adheres wet, but can dry and be re-moistened later.
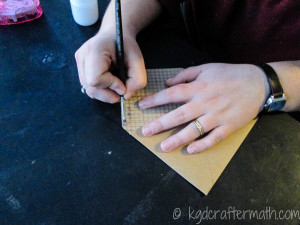
That’s it! It’s a lot of information, I know. And I contemplated splitting this up into 3 pages (the intro, custom sized, and assembly). For now I think I will leave them the same, but if you have any strong opinions about separating them out, let me know in the comments!
____________________________
Show me how to line an envelope!
I just want a little bit of envelope embellishment.
**None of the links in this post are affiliate links. They are just products I use.

I like to link up here.
Affiliate links help me keep this blog running. Thanks for using them!
All opinions expressed on this blog are always my own.

