The silhouette software was pretty easy to learn, but I assume that has a lot to do with my familiarity with software packages in general and art based software in particular. As I mentioned before, I’ll be taking you step by step through how I made the flourish tags with the sketch. Originally, I had planned to do blue with a silver flourish. I also made white with purple and white with turquise and polka dots. I’ll put the pictures for all three in the next post. The white ones were all made with the extra paper from the wall hangings I did. Here are the steps on how I went through the software to get to the cutting stage, and here’s a link to the silhouette files I used for this project: Flourish tags and flourish sketch.
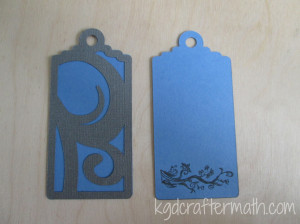
1. Go to File – My Library and open up the flourish shape.
When I opened the flourish tag shape, all 7 shapes were in the same block. Since I am cutting on two different colored peices, I wanted to make it so that only the swirls were in the first file. I also thought I could fit a few more than what is there to maximize my paper usage.
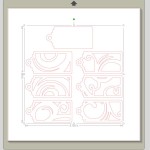
2. To separate the shapes use Object – Ungroup
This separated the 7 shapes into individual objects.
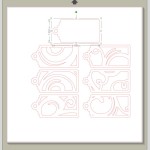
3. Select the blank tag and copy it into a new document.
To copy it, you must first go to File-New to open up a new cutting board.
4. Arrange the boxes so that you can maximize the space.
I select all of the remaining tags (all of them will have grey boxes) and moved them to the right top of the page.
Hit Ctrl+C and Ctrl+V to paste a new set of 6 tags. You can also use Object – Replicate to do this.
Reposition the tags so that all 6 are within the white paper range. Use the green dot to rotate the images. As you can see, I comfortably fit 12 tags on one 12×12 page.
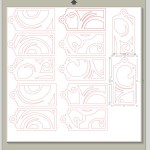
5. Go To File-Save As to save your file under a new name. You can also save directly to your library in the File menu.
6. Set up your blank pattern.
Copy and paste the blank pattern as many times as you had the swirl patterns in your previous file (I had 12). Got to File-Save As to save your file.
7. Open my flourish pattern from the library and clean it up a bit.
Move the flourish outside of the working area to see it better. It had an outline that I didn’t want, so I went to Object – Ungroup. Then I clicked the outside border. It looks like the whole thing is selected, but don’t worry, it’s not. Hit delete to remove that line.
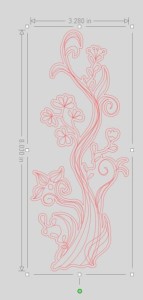
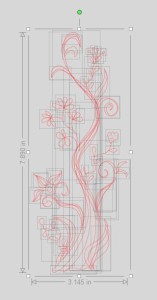
To group everything back together, click and drag your cursor to select all the component pieces again. Then go to Object-Group. to group them together again.
8. Fit the flourish to the tag.
Drag the flourish back onto the page, resize it, and position it to fit one of the tags. I set mine up so that the grey border delimiting the space of the flourish sat along the tag’s border.
Duplicate as many flourished as you need to fit your cards.
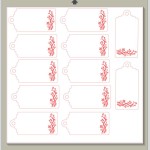
9. Put the flourish in it’s own file.
Now, we need to put the flourishes in a third file since we don’t want to cut them out with the machine. So select all of your flourishes only.
Hit Ctrl+x to cut the images. Go to File – New and open another file. Hit Ctrl-V to paste the flourish. This will keep it in the same place as it was on the tags.
Go to File-Save As and save this new file. (You can also change which lines are cut through the cutting menu, but I was using an SD car originally, so I couldn’t do that here.)
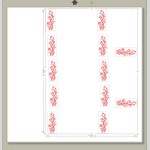
10. Save to SD or send to print.
Since I don’t have room near my desktop to do this in the office, I had to use an sd card for the first time. So, I plugged in my SD card, emptied it out, and went to File-Save to SD for each file. I always empty my SD or flash cards if I am using new technology just in case there is something that doesn’t get along. Also, I really liked this feature. It detects the SD card for you so you don’t need to know the drive letter.
Overall, I would say that’s a pretty decent first contact with a software. As you can see, I was able to figure things out without too much trouble. Un-grouping was the big thing that took me a while to figure out. I tried a couple of different options first that also worked until I found that command. If I had the machine hooked up to my computer I could have put all this into a single file and just change the “cut” and “no-cut” option for each shape, but at the time there was just no room on my desk, necessitating the SD card. Up next I’ll send a “First Cuts” post your way.
This post is part of my First Cuts Series! Want to read the rest? Here’s the whole group of them!
Silhouette Cameo: The Unboxing
Silhouette Cameo: Installing the Software and Shapes
Silhouette: First Contact with the Software
Silhouette: First Cuts
Silhouette: Trouble Shooting

I like to link up here.
Affiliate links help me keep this blog running. Thanks for using them!
All opinions expressed on this blog are always my own.
