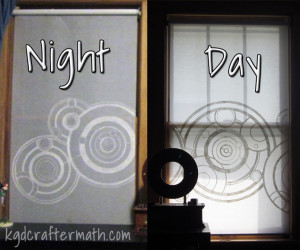
I don’t think it’s any secret that I have a bit of geekery in me. Well, maybe more than just a bit. I am also an apartment dweller, but I have one of the best landlords ever. Every so often I try to do something to the apartment that is a) not permanent and b) adds a little bit more of me to the room. A while back, I found myself wishing that I could have some of the outside light during the day, but with a little more privacy. Window film was out because I need to be able to open the windows. Curtains and shades block too much light. Finally, I decided on a bit of a compromise: Ikea enje blinds. These blinds filter the light in for less glare. During the day you can’t see a thing inside the house, but you can see through at night. This bothered me a bit, so I wanted to create a bit of an illusion of privacy. I have seen one or two other people painting the blinds, like Steph’s tree blind below.
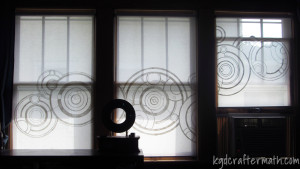
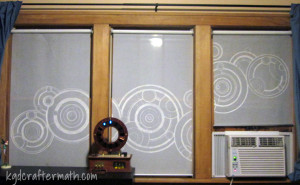
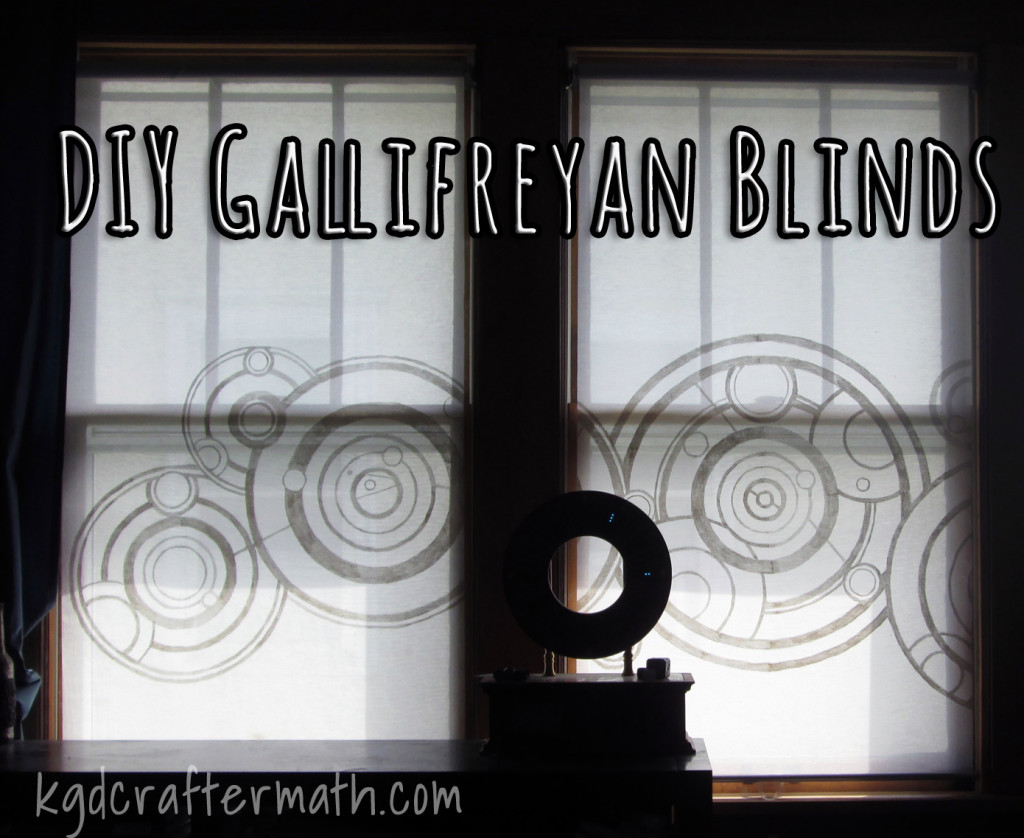
I really liked the idea of adding a distracting pattern, and what better geekier thing to do than the Dr.’s name! If you don’t know who Dr. Who is, go wikipedia it for a brief primer. Basically he is a traveler through space and time who encounters all sorts of issues and usually saves the day through some hair brained scheme. There is a lot more to it, but I’m just hoping you know what I’m talking about by now. If you haven’t seen it and want to watch some Dr. Who you can do so on netflix. The Oncoming Hope has a really good article on which episodes you should watch if you have never seen it before. Or you can just start at the beginning of the 2005 reboot. That being done, you should know that the doctor comes from a place called Gallifrey. Gallifreyan script is really pretty and composed of overlapping circles. In the episode “A good man goes to war” we have the pleasure of seeing the doctors name on the side of his old cot. And so, the idea was born to paint the doctor’s name in Gallifreyan script as a triptic across my brandy new ikea blinds. And now, with this nifty tutorial, you can to!
Update 8/30: If you find yourself trying this project yourself and want to ask questions, feel free to email me at [email protected] or catch up with me on facebook. I’d love to see how yours come out!
Materials
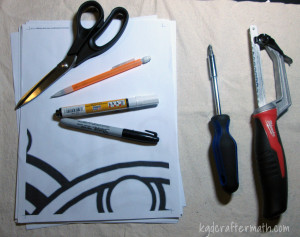
Handsaw
Fabric scissors
Screwdriver
Fabric pens
Pattern
Blind
Step 1: Cutting the blinds to fit
No pictures here, since I wasn’t blogging then and Earl surprised me by cutting them one day when I wasn’t home. It’s pretty easy though. Ikea sells the enje blinds in a variety of sizes. If they don’t happen to have your size, you can always buy one size up and cut it down. Here is how to do it.
1. Measured for length. Mark the amount you need to remove on both rods.
2. Remove one side on the top and the bottom. slide the bottom out.
3. Cut the fabric to the correct length with your scissors.
4. Use your hacksaw to cut the rods down to size.
5. Replace the bottom rod.
6. Screw your ikea mounts into the window frame and mount your blinds.
If you want pretty pictures of how to do this, I would suggest you go Door Sixteen, she has some nice pictures and goes though the process in detail.
Step 2: Create your pattern.
I used Photoshop to separate out the script into 3 equal parts, since I have 3 windows. Then, I re-sized each image to 29″ wide, which is slightly thinner than my blinds. You can do this in your choice of graphics program. If you want, you can use the file I created. It is hosted on Google Drive as a .pdf here. It is sized for 3 29″ windows, so if you are using a different sized shade you will need to re-size it appropriately in a graphics program first.
Step 3: Print your pattern.
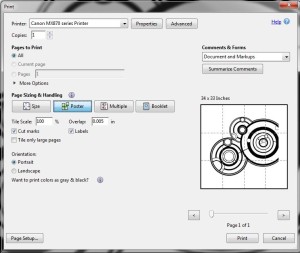
I saved my pattern as a .pdf so I could use the ‘poster’ print settings. Use the settings above when you print your pattern. This will print your pattern out at full size across multiple pages, I had 36 printed pages total. Don’t bother to try and tape them together, rather leave them separated for the next part.
Step 4: Trace your first blind.
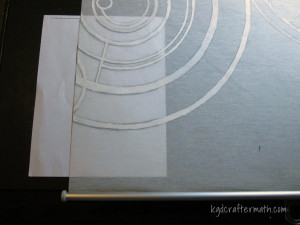
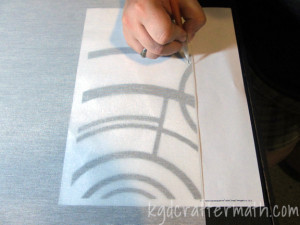
Because the Enje blinds filter light through, you can see through them to trace your pattern directly onto the blind. Starting with the right blind and lower left page from your printout. Align your page to the side of the blind leaving some breathing space below the paper. Trace all the lines on that page in light pencil. Now, align your next page with the lines you traced on the blind. Continue this process until you have traced an entire blind.
Update 9/21: Reader Malin had a great idea, use tailor’s chalk on the blinds! It will erase easily if you are trying to center the image and need to re-position.
Step 5: Trace your second and third blinds.

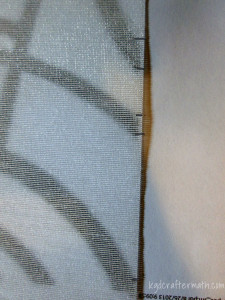
To align your second blind to the first blind, arrange them so that the bottoms are even and overlap the side slightly. Make a mark for each mark on the traced blind. Use these lines to align the paper on your second blind. The middle blind might require you to extend your lines a little bit. Complete tracing this blind as you did the first. Then use these sames steps for your third blind.
Step 6: Paint your blinds
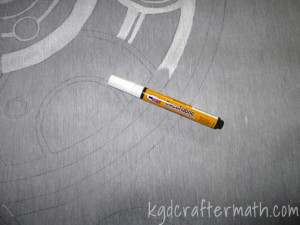
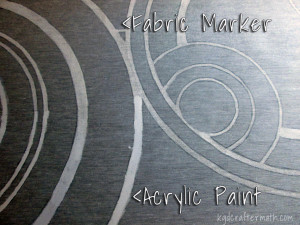
To paint the blinds, I used both regular acrylic paint and a fabric marker. The fabric marker wasn’t as thick and I had a bit more control, so I ended up using that. It took me 12 markers in total to complete the blinds. As soon as I realized that I would need a few, I bought them in bulk. I have since learned that you can re-fill the pens with fabric paint. If I ever do this again, I’ll make sure to do it that way.
Update 8/30: Tip: Try to keep your strokes going in the same curve as the circles. Do medium to long strokes and overlap your sections. Don’t create vertical or horizontal lines, as those stick out at the end. If you look at the middle curtain closely you can see where I made some vertical guide lines.
8/31 Tip: I found it easier to have the blind hang over the edge of the table, pull it tight, and then paint the part in the air. That way the paint didn’t seep through onto the table.
8/31 Tip: If you are using several markers, vigorously shake them before opening them. When you open a new one, blot it on a paper towel just in case the first bit of paint is runny. It should thicken up quickly. Some of my markers were very watery, and I ended up having a big blob on my right blind I had to clean off.
8/31 Tip: If you need to remove the paint, use a paper towel with isopropol alcohol and lots of elbow grease.
That’s it!
This project probably took me a month and a half to do, but only because did it sparingly in my free time. You could probably finish this in a weekend if you dedicated your weekend to it. Since I did the project over a long time and because there isn’t much mess, there is no craftermath. However, I hope you enjoy these photos of the finished project from different views!
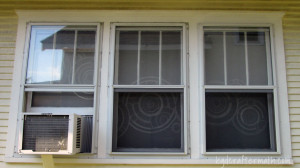
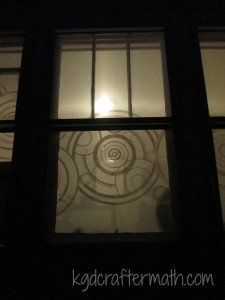
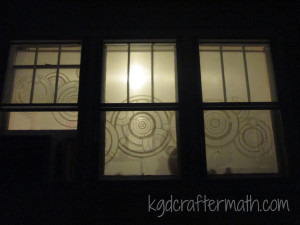
Update 8/30: Here’s another picture, this time from the outside at night. You can see how the shade allows you to see what’s inside, but the pattern obscures the view and draws your attention. You could still see inside if you really wanted, but it keeps the casual passer by from getting a birds eye view of your house. I wouldn’t walk around in my knickers though, just saying.
Thanks to everyone who has featured this post!
Do you like nerdy home decor?
You might also like some of these other projects that I’ve done!

I like to link up here.
Affiliate links help me keep this blog running. Thanks for using them!
All opinions expressed on this blog are always my own.




Like the design on your blinds!
Thanks Missy! One of the things I like about the design is that it’s neat even if you don’t get the Dr. Who reference.
[…] know you’ve got a penchant for Time Lords. You can make these yourself following these step-by-step instructions that even include pictures of the process so you’ll know you’re on […]
Sweet tutorial. Now I’m torn between getting blinds or painting a pop art of the Daleks this weekend. Decisions. Decisions.
Thanks Donna! That is quite the quandary you have there. Let me know what you decide, I’d love to see pictures of whichever you do!
That’s really pretty! I love how you used the script from the side of the cot, it adds that little bit of trivia more than generic Gallifreyan script would.
Thanks Lex! I have to admit, it hadn’t occurred to me to use anything but. I saw somewhere that one person hoped it said “window”, that would have been cute too! It helped that the name worked so well with the dimensions of my windows. It’s just around a third of the height.
[…] how at the Please Excuse My Craftermath […]
I really like your how your blinds turned out,and it gave me a project idea for my sister. She is a dedicated Whovian, and I think making a wooden wall piece using your design is perfect for her.
Thank you for the inspiration
Awesome! Let me know if you post pictures online, I’d love to see it. And I’m sure that your sister will absolutely love it.
[…] have a VERY long project to-do list, and as soon as we saw these blinds from the amazing Kristy at Please Excuse my Craftermath (the blog that got us hooked on Loot Crate!) they jumped up into the top 5. How great are these? […]
I love these! I wish I could do them, but I only have one window in my room): Maybe I could do it from top to bottom? I’ll have to think on this(:
You could certainly switch it so that it was vertical! I’ve got another blind with some Vulcan script going across it that takes advantage of the vertical nature of the blinds. The trick is to figure out what height you normally let your blinds sit and set the top of the pattern so that it makes sense in that space.