Monday: The Crafting Hour
I’m switching this series of posts to Mondays for one major reason: they are the easiest for me to write, and therefore to edit. Since Monday is my busiest day, and I tend to leave teaching stuff till way too late, it seems best to do these posts on Monday. So keep your eyes peeled for some Monday hourly updates!
Wednesday: Mid-Week Inspiration
These posts will still probably be from the web, but this allows me to add other media inspiration as well. And who doesn’t need a bit of a pick-me-up come Wednesday?
Friday: Finished Object Friday.
I like the alliteration here. Also, by switching from tutorials to finished objects it allows me to showcase items that I can’t do tutorials for. Some of these will be projects that were completed before I entered blog land. Others will be projects that rely on patterns or directions from other sources to an extant that I am uncomfortable doing them as hourly progress updates. Additionally, I can show of some of the finished hourly projects (like my socks) where you would probably get bored from a second iteration of the first. I’ll still do tutorials when I can, this just expands the possibilities. Finally, since I do my tutorial stuff on the weekends, this gives me a week to be able to write and edit the posts, hopefully making for a better reading experience overall.
Ok, business aside, let’s go on to see some crafting hour goodness!
Today’s crafting hour is all about a paper craft I made. There aren’t too many pictures, but that’s because it’s a really easy project. I recently sold some wedding jewelry I received with my dress, and I wanted to add a little something special to the package for the recipient, but I didn’t really want to spend any money. During our wedding, Earl managed to rip my dress (still not sure how he managed that one…). It was only through the amazing preparedness of Melissa, one of my brides maids, that it was an easy fix. She may not have been the only one with a sewing kit, but I am sure glad she had it!
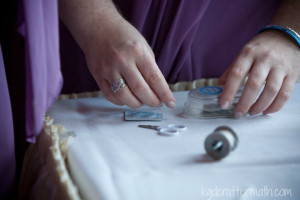
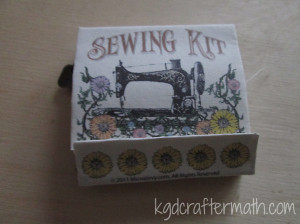
I thought that making a small sewing kit would be appropriate for all occasions, and I happen to have all sorts of thread, needles, and the like around my house. When thinking about the shape, I lit upon the idea of a small folding matchbox with some thread and a needle inside. I have some old matchboxes from our wedding around, so I thought I could use that for a template if I needed. I couldn’t be the first to think of this idea, so checked around online first to see if there was anything out there. Lo and behold, Jivvy from microjivvy.com not only created an amazing matchbook sewing kit that was way cooler than what I could have done, she provided us with the .pdf file to make our own for free!
Matchbox sewing kit. Source: microjivvy
If you are so inclined, you should really check out more photos of her final product over by clicking on the link above.
This project only took me 2 hours, so here is the breakdown.
Hour 1: Editing frenzy
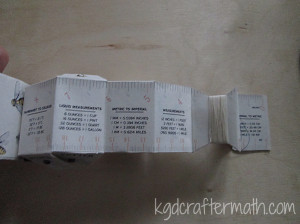
I was insistent that I wanted to use my silhouette to cut my paper. I don’t know why, I just was. New toy syndrome maybe? So, I created a cut and print file in Silhouette Studio. I cannot tell you how much in love I am with cut and print files right now. It places markers on the page so you can print something (like microjivvy’s awesome layout) and then the silhouette will know where to cut. I have also made a paper Tardis for Earl. There are so many paper cut files that this could work amazingly with….. Gushing aside, once I had the layout down, I decided that I didn’t need the black cut lines (or dotted fold lines) from the original file, so I spent some time cleaning those out. Because some of the fold lines are not associated with the outline of the box, I also added in a few cross cuts to help locate those folds later. I used some of my calligraphy paper for the project, since cardstock would have been too heavy. Here is what it all looked like printed out:

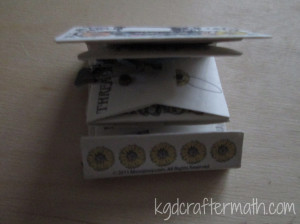
Hour 2: Assembly
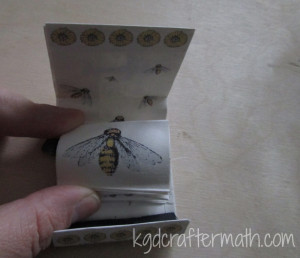
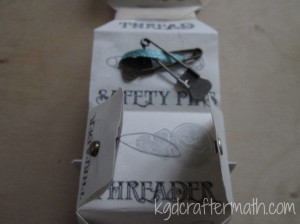
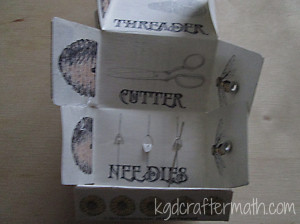
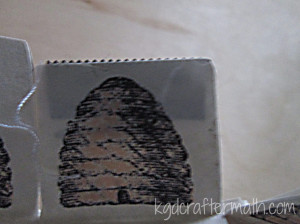
Assembling the paper was really easy. First, I assembled all the parts: two colors of thread, a needle threader (preferably one of those cheap ones that are easy to disassemble), three needles, a small bit of ribbon, and safety pins (I added 2).There are a few parts that need to be glued to the paper: the cutting apparatus, the threader, the inserts for the thread sections (I used card stock here), and I also did the brads ahead of time to hide the back side of those. Jivvy had the most amazing idea for a thread cutter: part of the ripper from an aluminum foil box! Brilliant! Then you adhere the back and front together, for which I used double sided tape, and fold the matchbook into shape (also adhering along the way). I used my scoreboard to help with the folds, but I don’t see why you couldn’t do it by hand. Now, add your sewing materials and the rivets for the parts that close, glue the inside to the outside so it pulls out like an accordion, and viola! A really cute matchbox sewing kit. (Sorry about some of the poor quality photos, they were taken with the puffy bandage on).
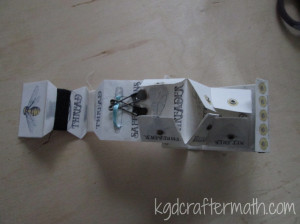
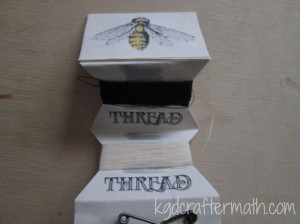
Had I done the cutting by hand, I probably would have finished this in around an hour, including gathering the supplies. So it makes the perfect crafting hour post!
]]>Everywear Tails: Free
Pattern from Your Style Rocks
For today’s inspiration, I wanted to start with this pattern. It is one of my favorites. It comes from a British based site, Your Style Rocks, where they feature patterns made by their readers. I have made it before and lined it so it was reversible. That probably wasn’t the best decision as it made the vest super bulky. It didn’t help that I was using upholstery fabric and wool for the two sides! I’d like to make it again, but not quite as bulky this time. With the right fabric, it would be perfect for those few occasions where I dress up. While I really like the brown, I would make a slate blue for the imaginary outfit I’m currently considering.
Kimono Tabbard Shirt: £4.95
Pattern from Ralph Pink Patterns
I think this loose shirt from Ralph Pink Patterns would pair well with the waistcoat above. The straight neck -line doesn’t clash too much with the collar of the vest. Depending on the season, I might modify the sleeves so that they were long sleeve though. A collared shirt or non-button up could work as well, but I think I would keep it white as a light pop to the whole ensemble. That way it wouldn’t take too much attention.
Basic Pant: Free
Pattern from Modern Sewing Patterns
Since I don’t wear skirt or dresses, a pant is a must. Thankfully Modern Sewing Patterns has a nice basic pant that will pair with almost anything I wear! I have made pants before, and it’s really important that you pay careful attention to your measurements. It may take a few botched pairs if you aren’t super careful, but once you have a nice go to pattern, you’ll be set! Then you can make them in whatever color you want! For this outfit, a nice dark grey would work well.
Melford Messanger Bag: $8
Pattern From Charlie’s Aunt Etsy Store
I’m not much of a purse person, but I do travel quite a bit. I also have to drag things too and from the lab on campus as well, particularly my Surface Pro. And this bag fits the bill for that just great. I love the vintage look of this bag by Charlie’s Aunt, and the plaid and brown wool give it just the right tone. I have also made this pattern, though I altered it to have a central pocket divider in the main compartment. The front pocket also has a zippered section and several separated pencil spots. I plan to make it again, but just a tad deeper, with a larger flap for the top, and a second magnetic closure for a bit better security. For this particular pretend outfit, I would make the bag either in a similar blue plaid or a green much like the one in the picture here with a grey pocket.
Newsboy Cap: Free
Pattern from Clevergirl
To ‘top’ it all off, I’d add a wool newsboy cap. This pattern from Clevergirl.org is meant for a kid, but I could probably size it up just a bit. I think the colors here would go just great with the slate blue, dark grey, white, and pop of green.
Using the magic of Photoshop and my awesome box and oval drawing skills, here is a look at the color scheme I would use.

There you have it. A whole outfit put together from the patterns on my current pinterest board. If you are interested in seeing more clothing patterns, visit my pattern board. You can also check out my sewing projects board, which has projects other than clothes, or take another perusal through my scrap fabric board.
And now I know what my next clothing projects will be! I promise that I’ll share the results with you when I eventually get around to them, though I can’t promise that will be any time soon. Oh yeah, and I need to find a reason to wear this, though I guess it would make a great first day of class impression!
What clothing projects do you have on the horizon?
]]>
Ok, now onto the fabric inspiration. There are a ton of generic fabric scrap ideas out there, so I’m going to focus my blog choices to things that have a bit of a geeky flare to them today. If you want to see some of the more mundane ideas, head on over to my pinterest board for inspiration there.
Steampunk Softees
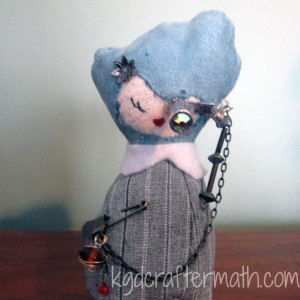
These are pretty awesome if you ask me. This is one of two steampunk softees that I’ve made myself. She is made with left over suede from a pillow (the hair) and some suiting that Earl used to make one of his suits (the body). This is cheating a little bit since all the patterns are available in Sarah Skeate and Nicola Tedman’s book: Steampunk Softies: Scientifically-Minded Dolls from a Past That Never Was. I figure it’s ok though, since Make: featured the bookand they posted a free pattern to make Marvaletta O’Houlihan, who just happens to be the softee I made above. They require a bit of hand stitching and a few findings, but I think they are pretty awesome way to use up those little fabric scraps that are always left over at the end of a project. And they make awesome stocking stuffers or birthday presents for the right person.
Make a Quilt Block
Weeping Angel from Whims and Fancies
Quilt block are really multi-functional. You can use them to make a quilt if you really want, or you can just make a single block and frame it as a photo. Or you can add some heat-resistant batting to it and use it for a pot holder. Or you could frame it with terry cloth and turn it into a towel for your bathroom. Or you could integrate it into a simple bag. Ok, I’ll stop now. But my point is you can do lots of stuff with quilt squares. And there are a ton of really cool and nerdy patterns out there. This beautiful weeping angel came from Whims and Fancies. I also suggest going to Fandom in Stitches and checking out some of their free patterns. They have patterns for Lord of the Rings, Dr. Who, Harry Potter, and even The Muppets.
Make a Tribble!

Tor.com : A tribble!
This one only works if you have furry fabric from something, but still, tribble. You could also cut up an old stuffed animal that you don’t want anymore. I’m not sure why, but the idea of cutting up a stuffed animal to make a tribble seems somewhat cannibalistic. Torie at Tor.com has an awesome step by step tutorial on how to go about making the pattern, cutting your fabric, and sewing it all together. All in all it’s pretty easy and I suggest you go check it out and make a tribble (or several hundred, they do breed worse than rabbits you know).
Make a Dalek pincushion
Dalek Pincushion: Craftster.org
This wicked cute Dalek pincushion was part of a craft swap at craftster.org. No pattern, but I think the idea is really great and I imagine if you were sewing inclined you could probably improvise. The best part is that you could make your Dalek with whatever color leftover fabric you have!
How about a Brain Pincusion?
Brain Cushion from Tiny Little Life
This tutorial at Tiny Little Life makes use of a piece of scrap fabric, some piping cord, and the Hilbert curve to make a brain pin cushion. It looks so cool. I also love that she used math to make brains. It’s just so… apropos.
Make a minion
Punk Project’s Minion Phone Cozy
Everyone needs minions, right? If you have the right colors, you could make this minion phone cozy to keep with you all the time! She uses felt, but you could use some regular cotton and line it with batting if you wanted as well. The tutorial goes step-by-step through the process and if you are using felt it’s really pretty easy. Check out her archives as well, she’s got some pretty cool stuff there. Her Angry Bird Ornaments also fit the bill for a scrap fabric project.
I hope you got some inspiration from these posts! Fabric scraps can be used for some pretty awesome small projects. If you want to see some more fabric scrap ideas don’t forget to check out my pinterest board for scrap fabric ideas. What do you do with your scrap fabric? Let me know in the comments below, and thanks for tuning in!
]]>Ok, let’s get onto the tutorial! I chose to do dog beds this week because I had a problem to solve. I have a queen sized “feather” bed that I have no use for. I was unable to find anyone that wanted it, and I wasn’t sure if I could donate it, so we decided to salvage the stuffing for other projects. The first thing that came to mind was dog beds for our Jack-Russel: Bug. Without further adieu, I present to you my very first tutorial.
Time: 30 min
Familiarity Needed: How to sew a basic straight stitch.
Materials
1. Cutting Mat and Straight Edge (optional)
2. Pins
3. Coordinating Thread
4. Rotary Blade (optional)
5. Scissors
6. Felt (I used 2 yds and made 4 beds)
7. Stuffing (you really don’t need much)
Directions
Step 1. Cut the Fabric to your desired size. Our crate is 24×18. I wanted the bed to be a bit small in the crate and we’ll be giving the beds some loft, so I cut my original pieces to 24×18 with my rotary blade.
Step 2. Place your two matching rectangles together and cut out a 2×2″ square in each corner of your fabric.
Step 3. With the wrong sides together, sew all four straight edges of your two pieces together. Leave an opening in the middle of one of the straight sides. (Alternatively, you can sew all the sides together here and leave one corner open in the next step)
Step 4. Grab the inside corners of the cut out squares and pull out so that they make a single seam. Sew each corner flat like these. (Make sure to leave one open if you did not leave a gap in one of the sides).
Step 5. Turn your fabric inside-out so that the seams are on the inside.
Step 6. Now it’s time to stuff your bed. You don’t want the bed to be too full. I stuffed mine so that there was a thin layer of stuffing about equally distributed. I would say it was maybe 1/4 as full as I would stuff a pillow.
Step 7. Now that your bed is full, it’s time to close up the bed. You could hand stitch it closed so that the seam doesn’t show so much. I machine stitched mine because it’s a dog bed, and it doesn’t bother me if the dog bed has an open seam.
And here it is, all finished and in the crate with Bug modeling how much he likes it!
Well, there it is, my first tutorial. It’s really simple, but I figured it was a good place to start. I hope you enjoyed it. Let me know in the comments if there is anything that you want me to make!
Oh yeah, and I almost forgot….. Here is the craftermath!
]]>