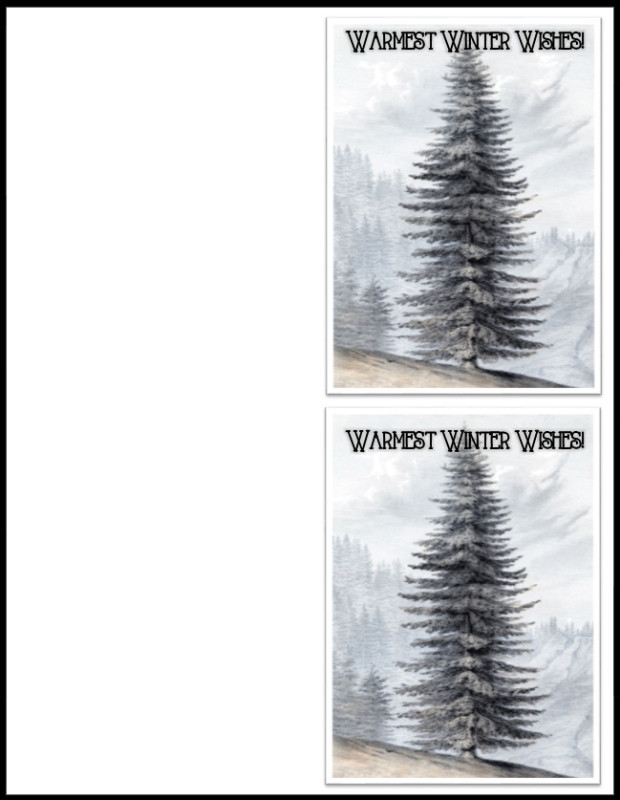
You want sweet and simple you say? Well, than this is the method for you. You can incorporate printed images into your cards in a variety of ways. If you are using the A2 card size (4.25×5.5), you can just set up your page so that your card prints out in the two front spaces, cut your page in half, fold it, and voila! Your card is done! Plus, many printers can print on cardstock or coverstock, so you can get a nice heavy duty card this way. Sound intimidating? Don’t worry, I’ll give you a few tricks and tips below to help (plus a free download or two).
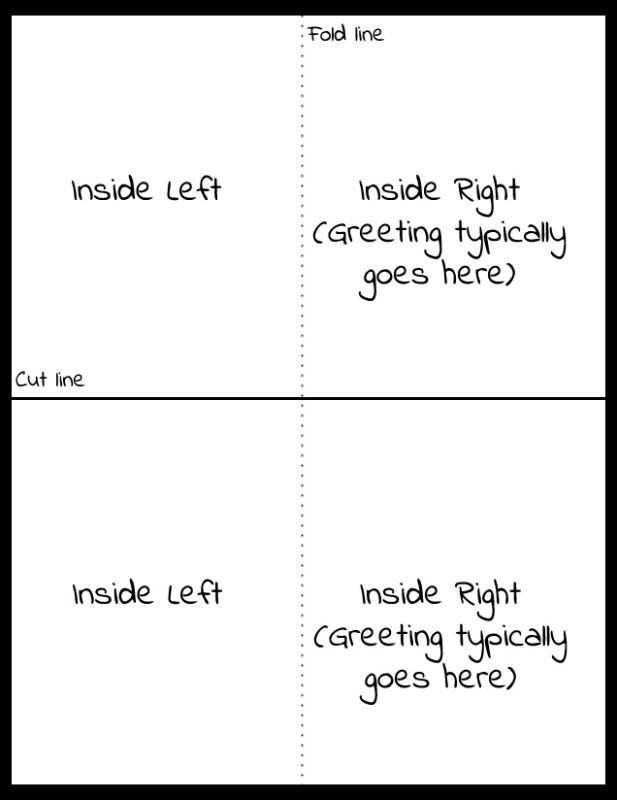
Ok, ready for the layout? Here’s what you need your page to look like if you are printing 2 A2 cards. I’ve added in a fold line and a cut line, but you don’t need to print those out. This is just to get an idea of how to lay out your card. I won’t be going over graphic editors here, but you can do this in any editor you want (and even in word!).
So, now that you know the layout, it’s just a matter of putting what you want where you want it. Remember that your card’s dimensions are 4.25×5.5. So that’s the size of the front of your card. Here’s a card I designed really fast in word. You can download the word file here. To make it, I just used a custom margin and set the left margin to 4.25. Then, I pasted the image in and set it the wrap option to “behind text” and added a border. Typed in the text (centered and formatted that), and duplicated the whole thing in the box below. That’s a really quick and dirty explanation, but since I’m show casing the option of printing your cards as opposed to a software tutorial, I hope you will all forgive me. Oh yeah! And that awesome tree image comes from the Graphic Fairy. She’s got one of my favorite places to go for copyright free images.

If you know how to do a double sided print with your printer, you’re in luck! Here’s what the layout of the card will look like for the second page (which will print on the back).

If you don’t want you’re whole card to be printed, but want to add a bit of printer pizzaz, you can always print out an image, trim it, and layer it on your card. (Psst… if you have a Silhouette, this is a great use of the print and cut feature).
And that’s printing! Pretty simple right? And of course, you can always jazz things up to make them more difficult, but I just want to give you the basics to get you started. As you begin to make more cards, you’ll start playing with more ways to incorporate different elements.
____________________________
Ok, I’m good with the whole printing thing. I’m ready to tackle pens now.
Let’s go back and take a look at all those decorating options again.

I like to link up here.
Affiliate links help me keep this blog running. Thanks for using them!
All opinions expressed on this blog are always my own.
