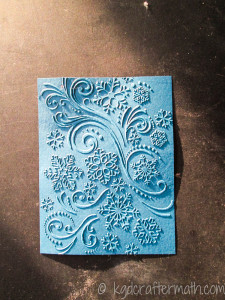
Embossing your papers adds a texture to the paper. It’s not difficult to do, but does require a bit of equipment. Let’s start with an embossed piece:

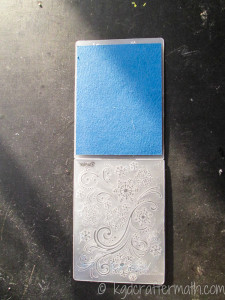
This is just a simple piece of paper that’s been run through an embossing machine in an embossing folder. The folder has ridges where the design is. Before you run the paper through the machine, you line it up with the folder like so:

There are plenty of different embossing machines out there. I have two. The smaller one I have is the Sizzix texture boutique. This little machine is a hand crank, and is a nice machine if you just want to do embossing. Plus, the investment isn’t as much as some of the other machines. On the other hand, I also have the Tim Holtz Vagabond. The vagabond is motorized and can also do die cuts in addition to texture. It’s a bit more of an investment (and to be honest, it’s probably a bit more than equivalent machines because it’s a vagabond), but it’s well worth it for the die cutting capabilities, especially if you don’t have a silhouette. Of course, if you do have a silhouette, it’s kind of hard to justify the purchase of a die cutting machine over just an embossing machine. I’m still waiting for the day that I can buy my Tim Holtz shapes in the silhouette online store.
Oh yeah, the card I’m showing here is my snowman Christmas card. The part of the card you see here incorporates embossing, layering, and inks. It’s a good example of how you can incorporate different methods into a single card. (P.S. The reason this card took me so long was the sketch pen interior, not the part you see here).
____________________________
I’ve got an idea for combining a cut out, show me that again.
You said something earlier about heat embossing, what’s that?
Let’s go back and take a look at all those decorating options again.

I like to link up here.
Affiliate links help me keep this blog running. Thanks for using them!
All opinions expressed on this blog are always my own.
