I’ll show you how to make the whole card at the end of the post, but I want to talk first about one special technique I used. I created my own cut files to go with my stamps! It’s not too difficult to do and worked great for cutting out all those little bees and the path behind them. Ready to learn how to make your own custom outlines? Let’s get started! {Just want the free cut file for the card shapes? You can download it here. I’d love it if you followed me on one of my social media outlets!}
Step 1: Stamp and Scan
First, we need to get a version of your stamp into Studio that’s to scale. The easiest thing for me to do is to stamp it on a peice of paper and scan it. If you don’t have a scanner, you could also take a picture (making sure you’re taking it from directly above and straight on) and make note of the scale.
Step 2: Import and Scale
Next, import your image into your library by going to File-Import to My Library and then add it to your work space. Alternatively, you can drag and drop the image from your desktop onto the work space.
If it imports too big, don’t panic! You can re-size the image using the Object – Transform – Scale Options. This is where having the scale is useful. I happen to know that the width of my scanner is 8.5, so I can set the width of my image to match.
Step 3: Trace
We’re going to do a relatively simple trace here, since all we need is the outside. Use the selection box to create a box around the outside of the stamp. Turn of “High Pass Filter” and increase your threshold until all of your stamp is outlined. Then choose “Trace Outer Edge”.
Step 4: Offset
Ok, so the trace just gave us an outline that’s pretty close to exact on the stamp. We want a little bit of padding around the outside, just so that the stamp doesn’t have to be perfectly aligned. Select your stamp image and add an offset of .04 inches. This will be our cut line at the very end. (Note: See that extra interior line on the bee? If you get something like that, just select the line and choose Object Release Compound Path. This will let you delete the interior line.)
With the dotted line, it looked like all sorts of crazy circles overlapping at first, but after the offset it applied, these circles are automatically welded together by the program.
Step 5: Create an outline
A cut line is great, but we need something to tell us where to stamp. I’ll be using the print and cut feature to do this. At this stage, I delete the underlying picture, as it’s no longer needed.
Next, I create 2 more offset lines. Each .02 inches from the previous line. I’ve set these lines to have a line color of black for visual reference.
Now, select the black lines around the bee. This can be difficult to get just the black lines and not the red, but go ahead and use your zoom option to help. Go to Object – Make Compound Path and fill the resulting object with a black fill. Do the same for your other stamps. This will create a shape that will print in the next step.
Step 6: Place and Print
Before you print, make sure that you add in your registration marks. I made a small print area using the registration mark margins so that I didn’t waste the whole sheet. I also increased the thickness of the marks to 1mm. I find this helps the machine detect the marks better. If you’re having trouble with detection, you can also try to shine a light on the machine. Once you’re happy with your layout, go ahead and print it.
Step 7: Stamp and Color
Now we’ll be adding our stamp to the mix. Go ahead and stamp your image as close to center on the image as you can. If you plan to do any coloring, do it now. And don’t forget to make sure you’re using the right type of ink for your markers, or your stamp might bleed the way mine did!
Step 8: Cut
And we’re ready for the cut part of the print and cut! First, make sure you only have your cut lines set to cut, and not your outlines.
Set your paper setting to what works best with your paper (double cutting if necessary), and set your cut to go! Don’t forget to make sure it’s registering those marks right off the bat. If it’s not, hit the pause button to cancel the print. I find that if it’s not registering, turning the machine off and on resets it’s interaction with the program so it registers the second time around. Ready to see the results?
What a cute little bee!
Want to make the card I made?
Here’s a quick rundown of the card making process.
Materials: (Some of these links are affiliate links. Thanks for supporting my blog!)
Ink
Technique Tuesday Simply You stamps
Lawn Fawn Gnome Sweet Gnome stamps
Xyron sticker maker
Fiskers 4 stamp block set
Thermoweb XL tape runner
Pop dots (not shown)
Paper Source brush stroke orange paper
Paper Source brush stroke cream paper (2 pieces cut to 1.5″x3″)
Paper Source 4-bar card (lake)
Paper Source curry coverstock
Moxxie Perserverance paper {I used this for the envelope with my envelope punch board}
Scissors
Free Studio cut file - Do you like my free cut files? I’d love it if you followed me on one of my social media outlets!
First – prep and cut all your layered pieces. (Tip: for the paper source papers I used the following cut settings – Speed: 9, Thickness: 15, Blade:2 and a newish blade). Use the thermoweb tape for everything but the dotted line, for which I used the xyron sticker maker.
Then, everything is just layered. I used the thermoweb tape for everything but the bee and the saying. For those, I used pop dots to give it a bit of dimension. (Tip: add the tape to the card instead of to the softer paper when layering the fibrous paper onto the cardstock).
And add your stamps to the inside and back!
And did you catch my awesome custom stamp I purchased from RubberStamps.net? I’m really excited about it, and so happy with how it came out! I feel like I’m finally getting the hang of this branding thing.
Want to Check Out More Silhouette Projects?
My Silhouette Challenge buddies and I are all sharing projects on our blogs today, so peruse the projects below for a wealth of Silhouette inspiration!
1. McCall Manor // 2. The Turquoise Home // 3. Creative Savings // 4. Sandpaper and Glue // 5. The Thinking Closet // 6. Sowdering About in Seattle // 7. Persia Lou // 8. From Wine to Whine // 9. Dream a Little Bigger // 10. Please Excuse My Craftermath… // 11. Play. Party. Pin. // 12. Everyday Paper // 13. Practically Functional // 14. A Tossed Salad Life // 15. My Favorite Finds // 16. The House on Hillbrook // 17. Adventures in All Things Food // 18. A Glimpse Into Barb’s Life // 19. TitiCrafty // 20. The Experimental Home // 21. feto soap blog // 22. Creative Ramblings // 23. The Stamp Doc // 24. Ginger Snap Crafts // 25. Simply Kelly Designs // 26. Whats Next Ma // 27. unOriginal Mom // 28. Bringing Creativity 2 Life // 29. Cutesy Crafts // 30. My Paper Craze // 31. Create & Babble // 32. Grey Luster Girl // 33. The Sensory Emporium // 34. Lil’ Mrs. Tori // 35. Black and White Obsession // 36. Mama Sonshine // 37. Weekend Craft // 38. Creative Carnival // 39. Peace, Love and Joyce // 40. Tried & True // 41. The Frill of Life // 42. Dragonfly & Lily Pads // 43. Get Silvered // 44. Minted Strawberry
]]>Labels have anatomy, right? Well… not really. I just like calling it that. The reason I’m talking about labels and anatomy is that I’m sharing my extract labels with you today. These are really easy to do, if a bit messy. Of course, you don’t need to age them, which would save you the mess.
The Labels
First, let’s check out these labels! Earl and I had a ton of fun creating these. We decided to use the periodic table as inspiration; thus, the discussion of anatomy. They’re related, right? No? Well, they are now. ’Cause I say so, that’s why. Wondering how to read the labels? Check out the graphic below!
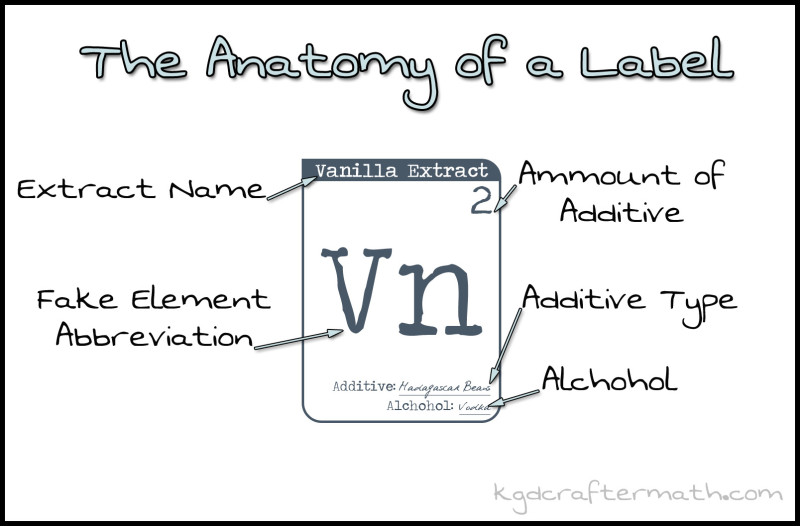
Download the free files here! If you appreciate my free downloads, I’d love it if you followed me on Facebook, twitter, instagram, or pinterest.
Remember the post I wrote about how me made the extracts? Well, if you have a general idea of the process, all you need is the label to recreate it! Isn’t that cool?!
Ready to make your own? Let’s do a tutorial! You can download a .zip file here which contains a .pdf to print and cut yourself, a .studio file to use your silhouette for a print and cut, and a .psd so that you can customize your own files! (You’ll need Traveling Typwriter, PhontPhreak’s Handwriting, and something that can edit .psd files to create your own customized labels.)
Materials
Avery full sheet labels
Instant coffee or black tea
Hair dryer or heat gun
Silhouette or scissors
Free label files (sized for 4oz Boston round jars)
Step 1: Print and cut
If you have a silhouette machine, use the .studio file I provided and use the print and cut feature. Want to know more about print and cut? Check out my stickers tutorial for a step by step.
Don’t have a silhouette? That’s ok! Just print them out and cut them by hand. I added a bit of a white border in the studio file, you’ll need to eyeball the border if you want to copy that (or you can just just use a paper cutter to add a bit of a border).
Step 2: Prep your working area
Next, set up your working area. You’ll want a small bowl of tea or coffee, some paper or plastic down to protect your table, and your drying tool out. I find that warm tea or coffee works better, so I kept some hot tea nearby for refills.
Step 3: Soak and dry
Now you can dip your labels in the tea/coffee mixture. Do a few tests with the coffee and tea to figure out how dark you want your stains to be. A full dip will give you a more uniform discoloration. You can also just dip the edges in to get a stronger color on the edge. Finally, you can drop the tea randomly on different parts for a really non uniform look. Then, hit it with your heat source (that’s the hair dryer or the heat gun) to dry them off and set the stain.
Step 4: Apply
Slap them on your bottles, and you’re all set!
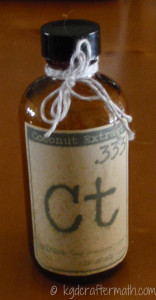
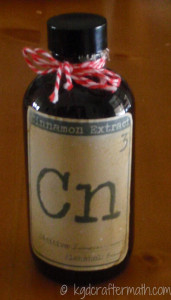
That’s it! The project is pretty simple, but I’m really happy with the design we came up with. What do you think? Does the periodic table inspiration make your inner nerd squeal?
]]>Now, here’s the thing. I really wanted to keep things interesting, so I’m setting myself a challenge. For every box, I want to use 1 thing from the box to create a craft. So for each crate I receive, I’ll give you an overview of what came in the box. Then I’ll show you the special item that I’ll be making a craft with. Sometime between the review and next months’ crate, I’ll post the craft I make. Sound like fun? I hope so! I’m sure excited about it!
Ok, onto the crate! Here’s the crate, stuffed to the gills with goodies:
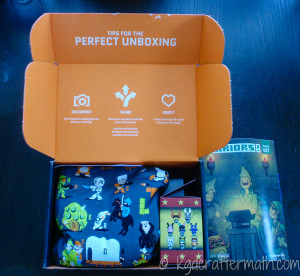
The first thing I pulled out was the really great magazine they create to go with each crate.
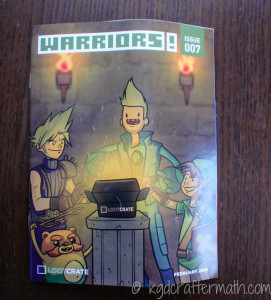
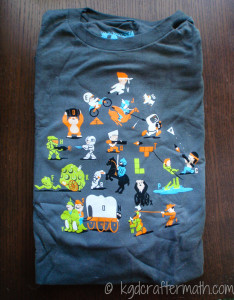
This was followed by this really great alphabet soup t-shirt. I want to wear this all the time! And honestly, the fabric was really great and makes me want buy all sorts of shirts from Woot shirt.
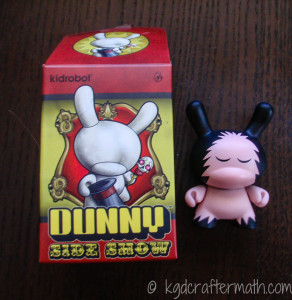
A Dunny Bunny:
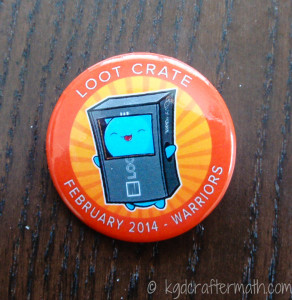
A pin (I believe these are collectible, and you get one with each crate):
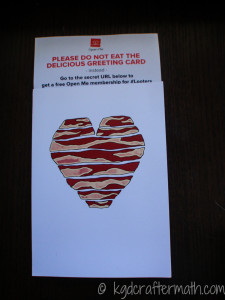
This really cool Bacon Card, and a subscription to Open Me (a pretty cool custom card group, which provides personalized e-cards and print cards):
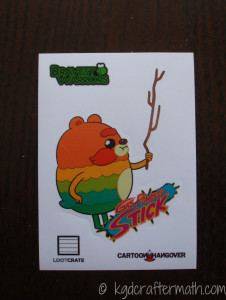
Some Bravest Warriors goodies (there’s also a gas powered stick bag that I didn’t get a big picture of, but you can see it in the picture with all the loot up above):
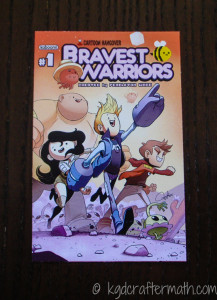
And finally, this really cool bowtie featuring Catbug. I don’t know what Catbug is, or anything about him (her?)… but I love it!
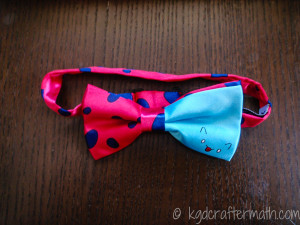
The tie is made by Black Tie Geek. They seem to be pretty new to the game (their website is just an email list to be notified when they start doing more), but this product made me want to see more of what they have. In fact, looking them up was one of the first things we did after opening the box!
I know someone is going to call blasphemy on me, but the bow tie will be my craft project. Fabric is just so fun to deal with, and I’ve got some great ideas that will keep true to the product. Plus, neither Earl nor I are bowtie people, so this is a way that I can transform it into something that I’ll be able to us it more prominently.
And finally, this post isn’t sponsored in any way. I just really wanted to try Loot Crate and share it with you. If you’re interested in getting your own, I’d really love it if you used my referral link. The boxes start at $13.37 a month (plus shipping). And they do ship internationally! With the referral link, I get credit towards future boxes. Thanks!
I have so many projects planned for this weekend! Plus, I had planned on posting about my labels earlier this weeks, but it seems I’ve misplaced my files. For some reason, that post really doesn’t want to happen! I’ll be sure get something else up tomorrow or Friday. Hopefully I can figure out where I moved those files to soon, especially since I’ve already written that post! Till then, stay crafty my friends!
]]>
The hat took me 8 hours across 3 weeks to finish. For a moment I thought I wouldn’t get it done before winter was done. Then the weather reminded me that I live in MN, and that’s a silly concern. As a friend of a friend said : “MN has 4 seasons! Winter, Second Winter, Mosquito, and Almost Winter.”
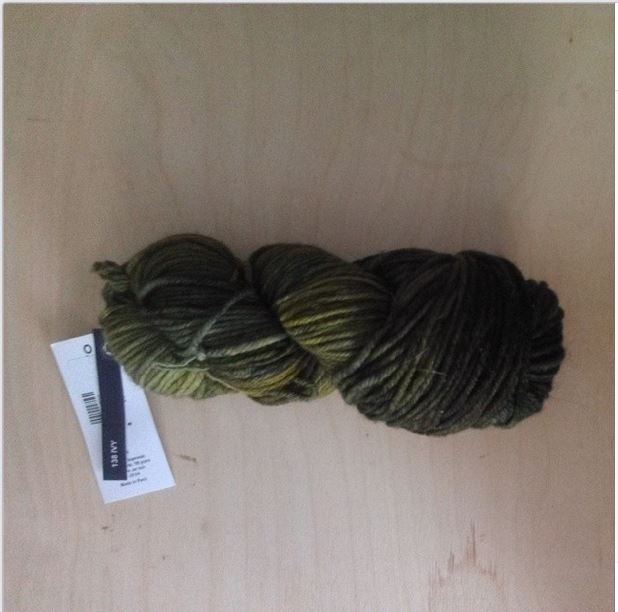
Right then. The yarn he chose was a variegated green merino wool. I lost the tag, but you can see that it’s a pretty yarn below (and that’s really all that matters, right?):
Yarn ball, made it was time to start knitting.
Hour 1: The cuff
I used my brandy new Hiya Hiya interchangeable needles (which I’m in LOVE with, seriously, can I have all the Hiya Hiya things?). The cuff always takes me so long. I think it’s the counting and the perling.
Hour 2: Finishing the Cuff
Yeah, seriously it took me 2 hours to cast on and do the ribbing. But then it was done and I got to do more fun stuff!
Hour 3: Beginning the Ribbing
Pretty! I *think* this is actually 2 hours, but I only had it recorded as one, so we’ll keep it as so. I’ll be honest, this was my first experience with cable needles. So many things I want to make now!
Hour 4,5,6 and 7: More ribbing
I could label each of these separately, but seriously, it’s just getting bigger slowly. I decided I wanted to have 7 sets of the rib. It probably would have been better if I had done 8, but it still fits him ok, so that’s good.
Hour 8: Done!
And there we have it! A finished hat! I have a picture of Earl wearing it, but decided not to put it here (I’m lazy people, sorry). :)
Ok, now let’s talk a bit about the pictures. I really like this new system I have of taking photos on Instagram and then moving them over here. It’s so easy! But it made me realize how much I hate the pictures my phone takes! I’m nearing the end of my contract, so maybe I’ll get a new one this summer. We’ll see. In the mean time, sorry about the hit or miss quality of the hourly pictures. I’ll make it a point to get good pictures of the finished projects with my regular camera.
Thanks for stopping by!
]]>
I should warn you, though I looked at a bunch of other tutorials before making my bag, I kind of winged it as I went along. So if it looks like I’m doing something funky, and you can think of a better way to do it, go right on ahead! And if you’re new to sewing, don’t worry! I’ll try to take it slow. (I do assume that you know the basics of threading your machine and sewing a straight seam throughout this tutorial).
Waxing Your Fabric
Materials
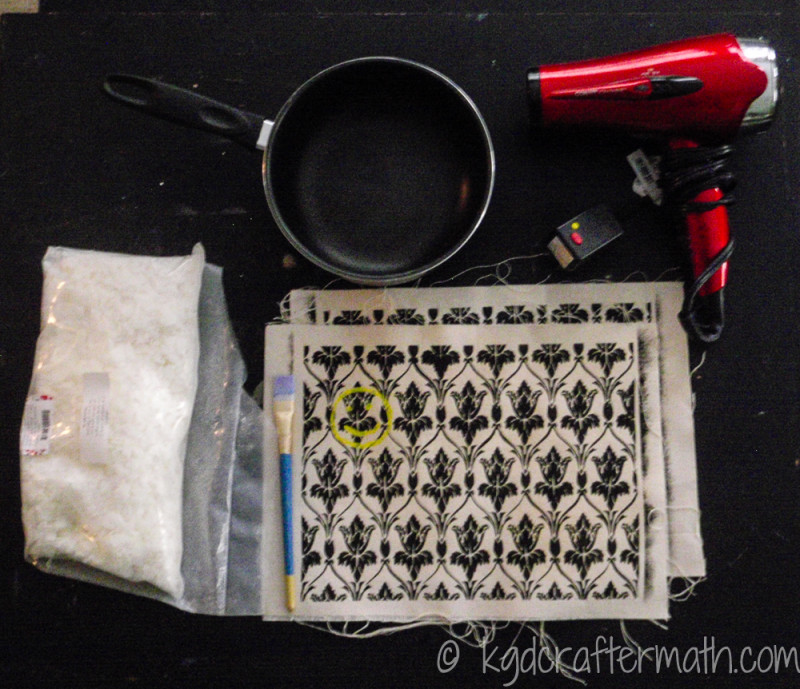
Your fabric
Some wax (I had some soy wax from making candles, so I used that. I used about 2 cups of wax, but could have gotten away with a bit less).
A paintbrush.
A pot (to melt the wax in)
A source of heat (hairdryer or heat gun)
Something to protect your surface. I used freezer paper (not shown here)
Step 1: Melt your wax
Go ahead and melt your wax on the stove. It melted for me in about 5 minutes on medium heat. You could use a double boiler, but I’ve never found the need.
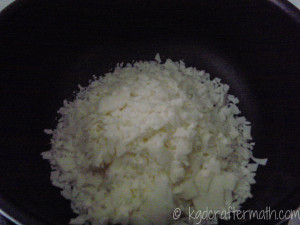
Step 2: Paint your fabric
Yep, you heard me. Paint the wax onto the fabric. Don’t worry about getting it too even, we’ll fix that later. I probably put a little bit too much wax on my fabric, so try not to over do it either.
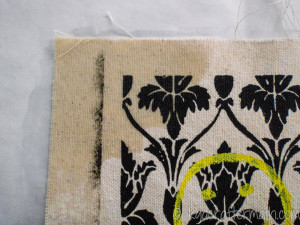
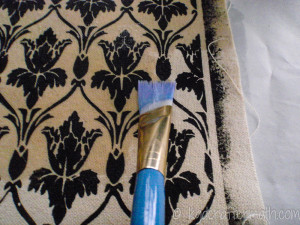
Step 3: Even it out
To finish off the wax job, you’ll be using your hair dryer to melt the wax into the fabric. Start with the side you just painted, and pay particular attention to the spots where you may have dripped. You’ll want to keep the hair dryer really close to the fabric, and use the force from the side to push out thicker blotches. Make sure to slowly go over the entire piece of fabric.
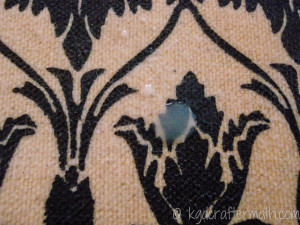
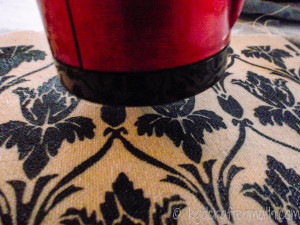
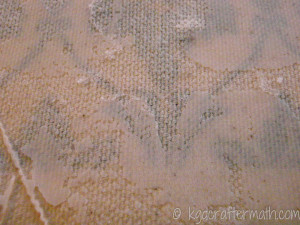
Once you’re done with the top, flip the freezer paper over (or place a new piece down). Then place your fabric down with the back side up. It’ll look really uneven. Blow dry this, flip it, and blow dry the front again. Keep doing this until you have a pretty even application of wax and there isn’t much wax seeping out onto the freezer paper. I held mine hanging for a few minutes once I was done to dry it.
Sewing the Bag
Materials
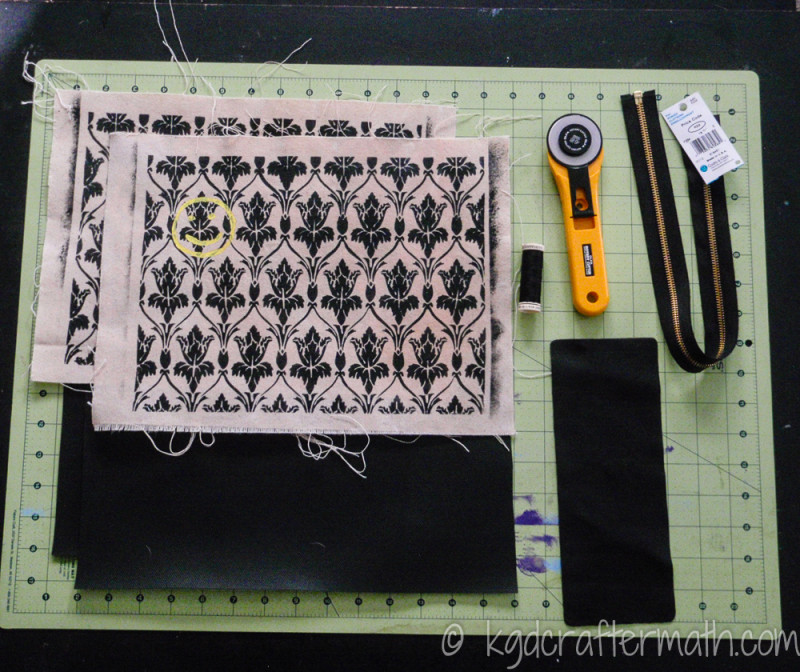
2 pieces of canvas (will be cut down to 12×9.25)
2 pieces of waterproof interior , 12×9.25 (I used a vinyl fabric)
Some soft scrap leather (I used about half of this 9×3 piece)
Rotary blade or scissors
Zipper that’s at least 10″ long
Thread
2 D-rings (not shown here)
2 rivets and a punch (not shown here)
Step 1: Trim your fabric
I trimmed my canvas so that there was a 1/4″ of white space around the fabric. I usually sew with a 1/4″ seam, so that was just the right size for me. Then I cut my interior fabric to match the size.
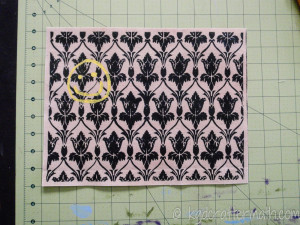
Step 2: Prepare your zipper
First, cut your zipper so that it’s the length of your fabric. Then cut 2 pieces of leather that are 1.5×2″ in size.
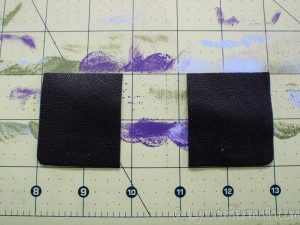
These pieces will go over the ends of your zipper. Wrap them around like so, and carefully pin them into place.
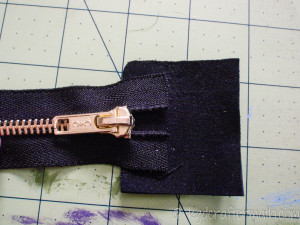
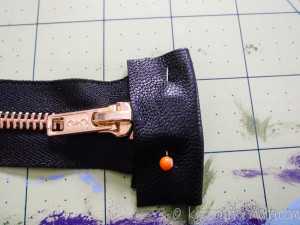
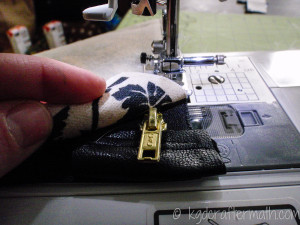
Carefully sew the leather into place, making sure not to break your needle on the metal. You may need to lift your needle and pull the zipper through a bit on the other side. I put 2 seams in here.
Step 3: Attache the zipper
Make a zipper sandwich with the canvas on the bottom (right side up), then the zipper (right side down) and the interior fabric (right side down). Pin this in place.
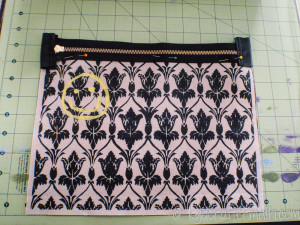
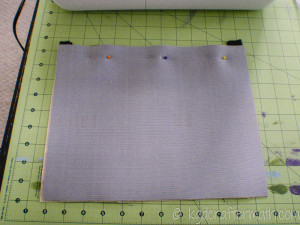
Sew along the top edge of the zipper, making sure to move the zipper once you get to it. (You may need to stop and start again if you don’t have a zipper foot).
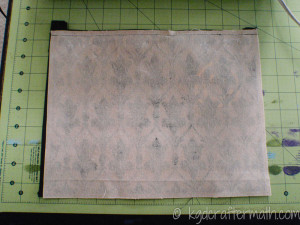
Flip the fabrics back. You can press the seams down if you want here. I didn’t. Then, tack the other side down as above to sew the zipper to the other side. Once you have both sides sewn, it your piece should look like this:
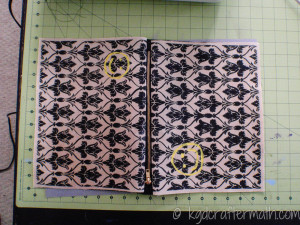
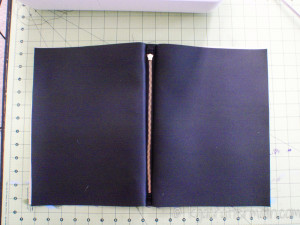
Step 4: Cut your corners
I used a basic box corner for the fabric. You could cut these out earlier if you wanted (and I probably should have), but this is when I decided to do the box corners, so the pictures make sense here. In the bottom corner of each peice, cut out a 2×2″ square.
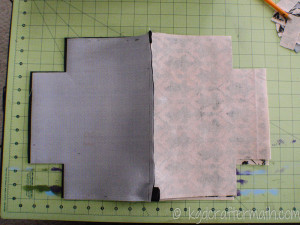
Step 5: Sew your sides together
Next, line up the right sides of your interior and your exterior. Pin these together and sew a seam down the sides, but not across the bottom.
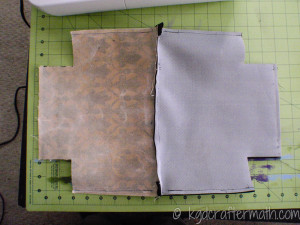
Step 6: Out then in, then out again
That sounds confusing, but let’s take this one step at a time. First, pull the fabric through one of the sides so that the right sides are showing.
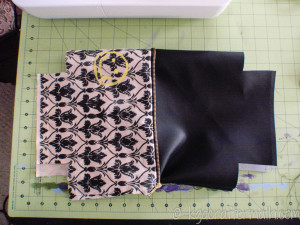
Now, pull your printed canvas through the inside of the zipper so that it appears that the canvas is on the inside of the bag. When laid out, you can only see the interior fabric like so:
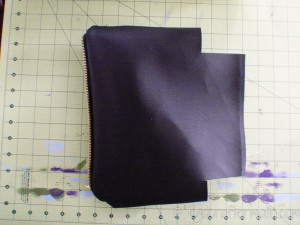
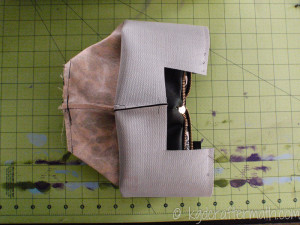
Fold the bottom of the interior fabric backwards, so that you can see the wrong side of the exterior fabric, like so:
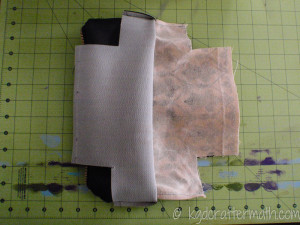
Now pin the bottom edge together and sew a seam along that edge. We’ll do the corners in a minute.
Step 7: Add your D-rings
I didn’t have any D-rings on hand (silly me for not picking any up), so I deconstructed some buckles and used those instead. I highly recommend using actual D-rings.
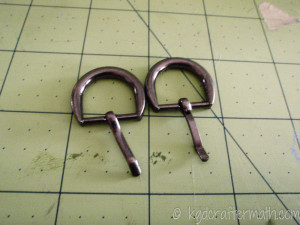
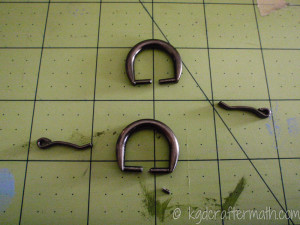
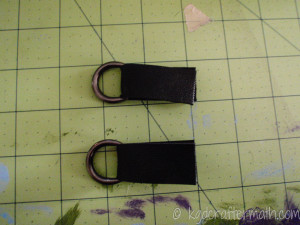
Cut 2 leather strips that are the width of your D-ring and about 2 inches long. (Mine are 3, and I feel they ended up being too long in the end). Loop these through your D-rings. You can sew a seam here to help stabilize the connection if you want. (Again, I didn’t do this, but probably should have).
Ok, now pick up your bag and straighten one of the canvas corners like so:
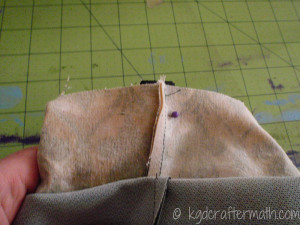
The left and right ends of the ragged edge above are the interior corners of the square you cut out before. Place your D-ring configuration in the center of the corner. You can see it peeking out a bit above. If you take a peek inside the bag, this is what you’ll see.
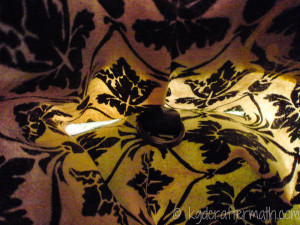
Sew a seam along the corner with the right sides facing each other. Do this for both of the corners on your exterior fabric. (Check out my dog bed tutorial if you need some more pictures on how to make the box corners).
Step 8: Flip it around again and sew the interior seams
Flip your exterior fabric back through the zipper and the interior fabric so that the wrong sides are together.
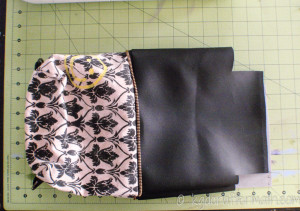
Sew the bottom of the interior together with the wrong sides together. Sew the corners together in the same manner as before, but don’t add the D rings this time.
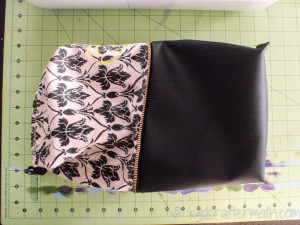
Push the interior fabric through the zipper so that it becomes the inside of the bag.
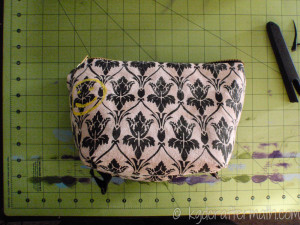
Step 9: Pull out the ends of the zipper
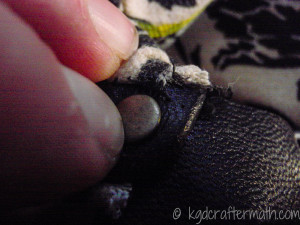
If you want to rivet a piece of leather connecting your D-rings to your zipper, you’ll want to pull out the end tabs for the zipper. This will take a bit of finagling, and might require a bit of seam ripping.
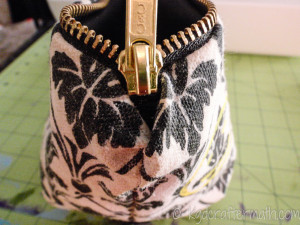
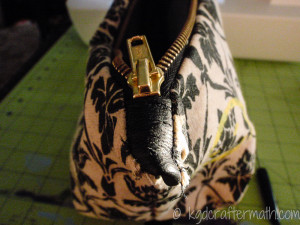
Step 10: Riveting
First you’ll want to cut a strip of leather that you’ll be looking through the D-ring and tucking under the zipper end.
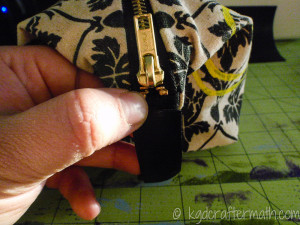
After you’ve figured out the placement and have your pieces, punch a hole in all the pieces at the same time. I used my crop-o-dile for the punches and riveting process.
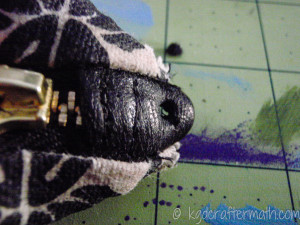
With your pieces layered you how want them, stick the tube like side of the rivet through all three holes.
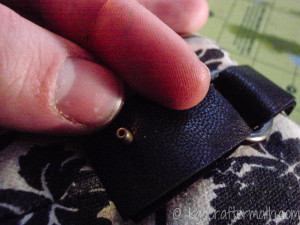
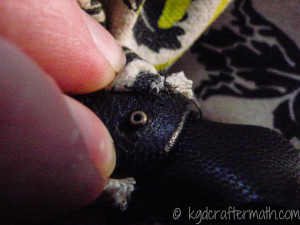
Place this on the bottom of your rivet tool. Then, place the rounded part of the rivet on top and apply pressure (either through a mallet onto the riveting tool, or by pressing down on the crop-o-dile).
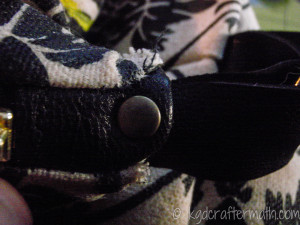
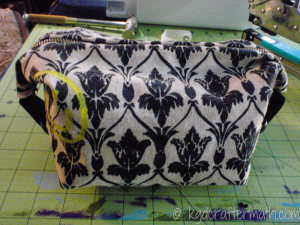
Adjust the tab to be straight if you need. Then, just box out your bag and you’re all set to go!
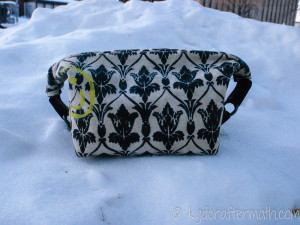
And if the light isn’t right, just take it out into the snow!
Well, there you go! I hope you found it useful! Oh yeah, I absolutely adore box corners. They’re really so easy, and quickly add shape to your project! And somehow I forgot to take a picture of the craftermath. Sorry about that! I’ll try to get two pictures next time for you.
]]>
Surprise! There’s a .studio cut file you can download! If you just want the cut file, you can download it here.
That’s it for today! Short and sweet. I’m off to make some more cards. I hope you all have a great weekend, and I’ll see you on Monday with a sewing tutorial!
]]>WinTopo
WinTopo is a freeware program that you download onto your computer. They also have a professional version, but I haven’t used that, so can’t comment on it’s capabilities. Once you’ve downloaded it and installed it, here’s how you trace the image.
Step 1: Open the Image.
Go to File-Open Image and open up your image.
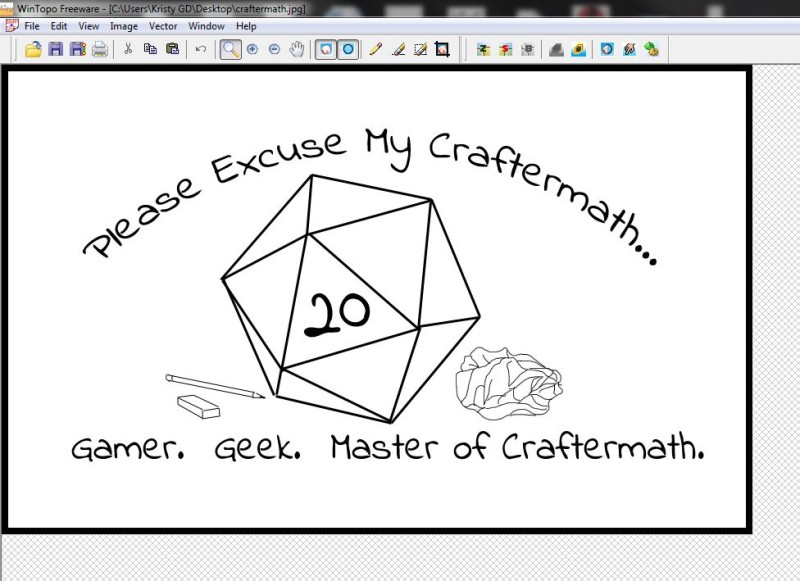
Step 2: Set your one-touch Options.
This step is technically optional, but I think it’s a useful thing to look at anyways. Go to Vector-Set one touch options. There are 2 tabs in the options box. The first tab is the Raster Thinning options. You’ll see that I zoomed up close to the letters to see how these affect the letters. First you’ll need to choose your thinning method. I liked Stentiford better.
For Vector Extraction, I kept the default for “Smooth Polyline”, but I chose to check “Reduce Polylines” and set the max displacement to 13. I just decided these by clicking around a few of the options.
Then hit ok. This will save those options.
Step 3: Convert and Save
Go to Vector – One Touch Vectorization. This will convert your image for you. It’s really rather easy! To save the vector, just go to File-Save vector as. There is a .dxf option that you can use to open the file in Studio.
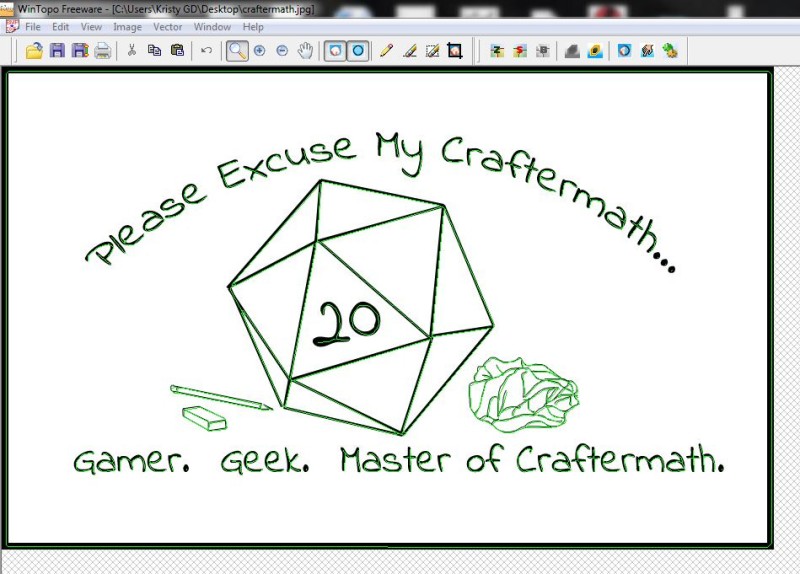
And just to see it now, here’s the image imported int Silhouette Studio.
Comparsion
So here’s the big question: how do these three programs (Illustrator, AutoTrace, and WinTopo) stack up against each other? Let’s start with a Studio picture with all three of the traced images.
And now for some Pros and Cons.
Illustrator Pros
- Provides lots of options to fiddle with the image.
- You can edit the path within Illustrator if it’s not quite right.
- Creates a really nice and accurate trace.
- Live preview of the changes where you can see the whole image
Illustrator Cons
- The software isn’t cheap.
- There are lots of options, which means it can get confusing.
Autotrace Pros
- Smooth Trace
- Available online without a download
Autotrace Cons
- Lots of extra lines to delete
- Had some problems with the “f” in my image
- Controls are unintuitive, and it’s hard to easily “undo” and try a new option.
WinTopo Pros
- Intuitive
- Easy to test different options
- Small preview window
WinTopo Cons
- Most disjointed of the three
Where does that leave me with recommendations? Well, I’ll be sticking with Illustrator because I have it. But, I think the other two are viable options so long as you’re aware of their limitations. And of course, different images will create different results, so definitely try several things! What works for one might not work for another. Happy crafting!
**Note: This might not work as well with wider fonts.
Here are all of the overviews:
]]>And now for today: it’s challenge day! This month’s challenge is Fabric! I decided to tackle a rather intricate freezer paper stencil. And what should I choose for my inspiration? Why nothing but the best! Sherlock’s wallpaper!

Sherlock Season 2 Wallpaper by Spigot
Don’t know much about Sherlock? It’s a BBC television show based on the Sir Arthur Conan Doyle books. Moffat stays pretty true to the books, and I love the interplay between Sherlock (played by Benedict Cumberbatch) and Watson (played by Martin Freeman). If you haven’t seen it yet, I highly suggest it. Right now there are 3 series (seasons) out, and each series has 3 episodes. Be aware ahead of time that the episodes are 90 min. long (not including commercials). It’s really great because they cram a lot of story in there, but does require that you set aside some time to watch them. You may find yourself wanting to watch them all together as well, which can be dangerous. As a side note, if you are in the US, Series 1&2 are available on Netflix, and Series 1,2,&3 are available on Amazon Instant Video and in the iTunes store. Rumor mill has it that series 4&5 have been confirmed, though there was a 2 year wait between series 2&3.
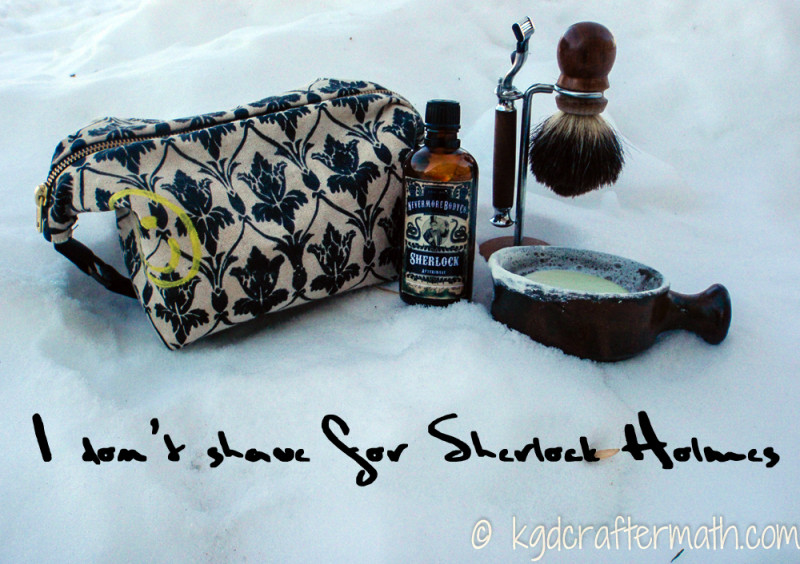
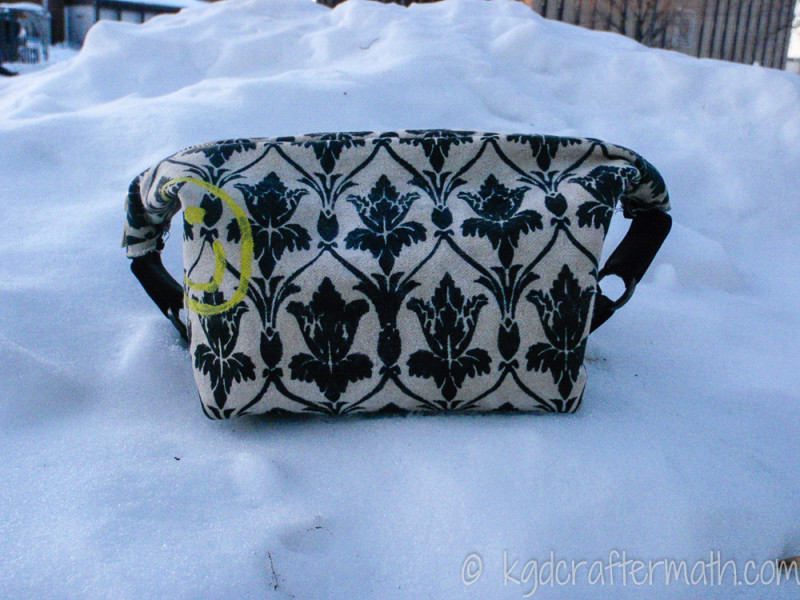
Anywho. On to the crafting portion of this post! Even if you’re not a Sherlock fan, you should enjoy this post. It’s useful to anyone who wants to do freezer paper stencils, and particulary to those who are wondering about intricate patterns! This post is part of a multi-post project. The final product is a toiletry bag, which I made as a Christmas gift for my Husband. The rest of the shaving gear are gifts from Christmas past. They include a hand turned razor and badger hair brush by Run of the Mill, a ceramic shaving mug by Andersen Pottery, tweed scented shaving soap by Dirty Deeds Soap, and Sherlock aftershave by Nevermore Body Company.
I’m not going to go over working with the image to get it to be a stencil, but here’s a basic rundown of the steps:
- Use a graphic editing program you are familiar with
- Make sure you have a continuous design. All of the parts you won’t be putting paint on need to be touching (for me, this was the white section).
- For a repeating pattern, you can fix up the part that repeats, and then copy/paste it until you fill the area you want.
- Make sure that all of the parts you’re keeping (white, in my case) have sufficiently thick lines. These don’t need to be really thick, but they shouldn’t be so close to the black that you see grey pixels up close.
- When tracing in Studio, err on the side of having the lines inside the actual border of the image instead of overflowing.
- Use the internal offset feature if you feel your lines are still too thin.
Got it? Let’s cut and stencil!
Download the FREE cut file here!
Materials:
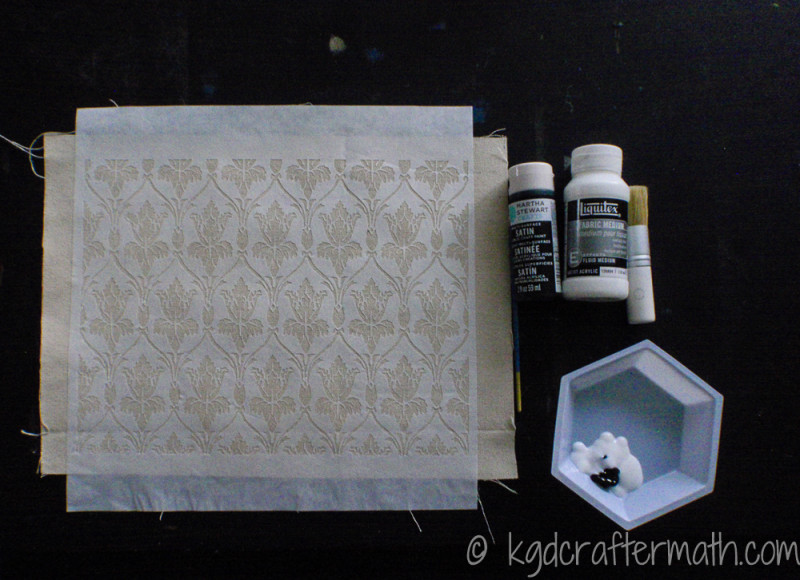
- 12×12 piece of freezer paper
- Brayer (not shown here)
- Black and Yellow acrylic paint (or fabric paint)
- Fabric paint medium
- Pouncing brush
- Mixing pots and mixing brush
- Canvas fabric (at least 12×12)
- Straight edge, cutting mat, and rotary blade (for cutting the freezer paper to size – not shown here)
- Iron and ironing board (not shown here)
- Silhouette cut file (download it for free here!)
**If you do not have a silhouette, you can try to use the same process I outlined for cutting vinyl without a machine. There is a .pdf file in the download above. However, as this is a very intricate pattern, be aware that, while possible, it will take a good amount of time and dexterity to produce similar results. There are resources that talk about how to print directly on freezer paper. I have not tried these, and have seen some instances where this can screw up your printer, so print at your own discretion. **
Step 1: Preparing your Freezer Paper
Ok, here’s the thing with working with delicate stencils. Use a new mat and blade - or at least one as close to new as you can get. When I tried this with an older mat and blade (which were still in really good condition), it didn’t stick and started to tear. I now have a mat and blade set aside specifically for delicate patterns.
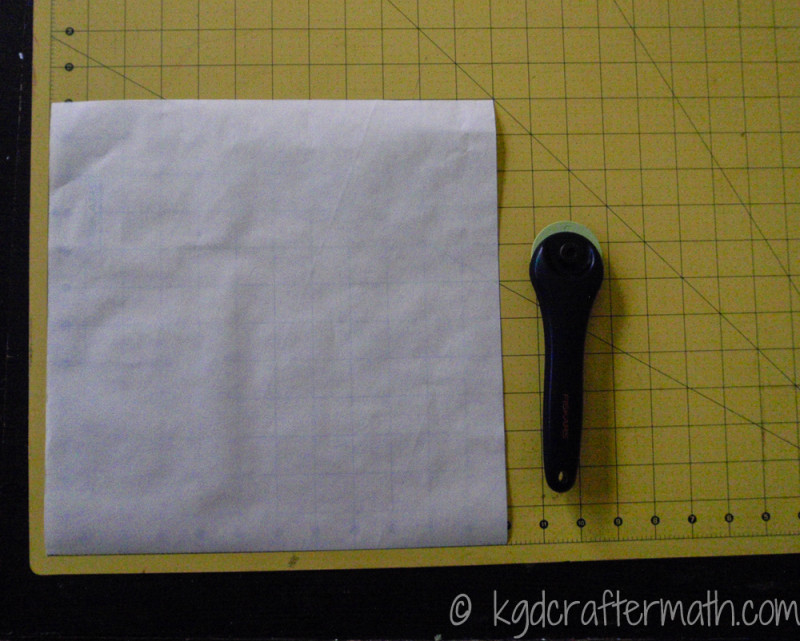
To cut your freezer paper, use your rotary blade and cutting mat to achieve nice, straight lines. This isn’t necessary, you could just use scissors, but I like nice straight lines.
Next up, use your brayer to press the freezer paper firmly onto the mat with the shiny side up. This will give you a nice strong hold as well as help press out any of those pesky bubbles.
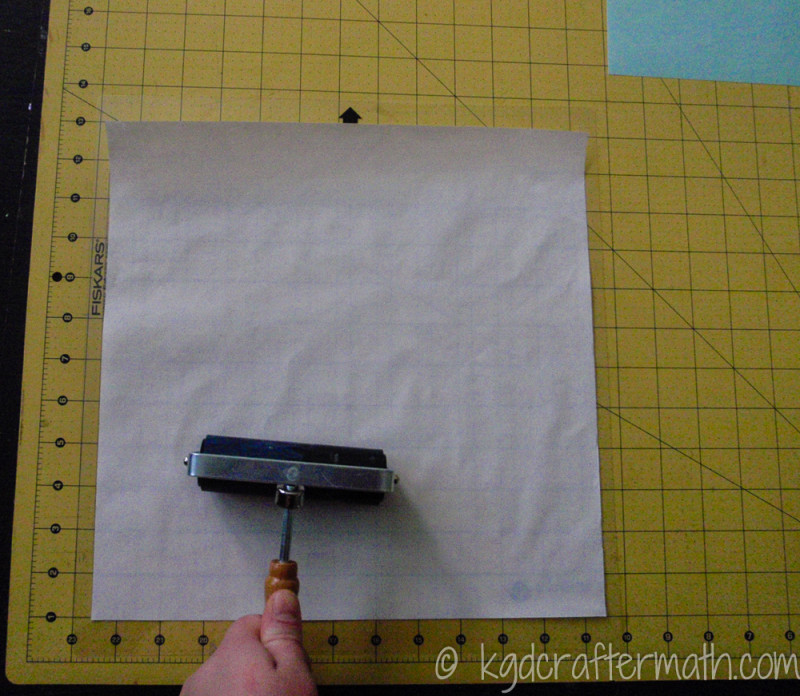
When you’re done, you’ll want to have it adhered nice and flat like so:
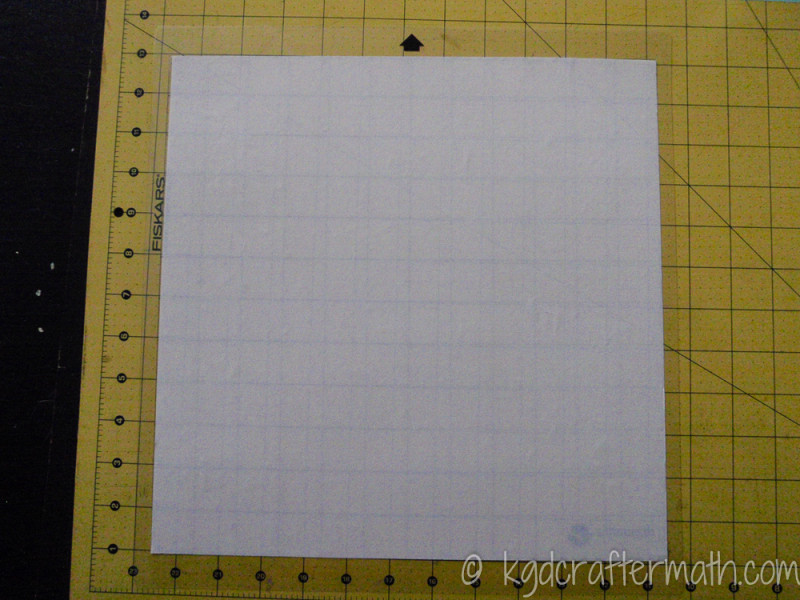
Step 2: Cut
Open up your file in Silhouette Studio. I have the design sized to maximize the 12×12 sheet, but you could rotate it and scale it down for 8.5×11 if you have a Portrait. The design is 11.5×8.725. I started with a larger design to fit a piece of cloth 11×14, which is around some of the sizes I had seen in other dopp bag tutorials. Then I sized it down to fit the paper. I’m happy with this smaller size: he doesn’t travel with much (and I travel with even less). **NOTE: if you’re not using a mirror image (mine is one – where mirroring produces the same image), make sure to choose Object – Transform – Flip Horizontally.
Now, head over to your cut styles and select custom. Use the following settings: Speed 1, Thickness 10, Blade 3. For regular freezer paper designs, I use a speed of 3. Don’t forget to change the actual blade as well before cutting. And remember, you’re cutting with the shiny side up. (You’ll note that I now have a freezer paper setting. You can save your own custom settings by hitting the plus sign in the lower left hand of the settings lists. Thanks to the Silhouette Challenge Facebook Group for that tip!). Go ahead and hit cut. Then, make yourself a warm drink and curl up with a book for about a half an hour or so. This will take a while….
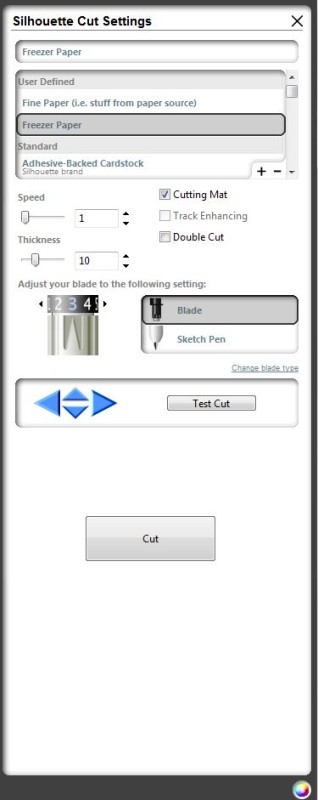
Step 3: Weed
Oh, weeding. I have a love/hate relationship with you. I should note that I started this project as an HTV project, but it didn’t cut all the way through the vinyl. I decided that the vinyl was still good, so I’d just hand weed it and use my xacto knife to cut through the parts that weren’t fully seperated. Yeah. 15 hours of weeding later, I gave up and switched to freezer paper. Have you ever had a moment where you know you’ve been spending too much time on something, but aren’t willing to give up? Yeah. Me to.
Never fear, weeding the freezer paper won’t take that long! It will take a while though. Plan on putting something on TV or starting up an audio book. This took me half an episode of Sherlock to weed.
When weeding this project, you’ll want to choose your tool carefully. Even though it’s a bit more dangerous, I decided to use a blade for weeding. This let me get into the little nooks and crannies without worrying about tearing the design accidentally. I also found that if I worked in ‘rows’ it helped me feel like I was making progress.
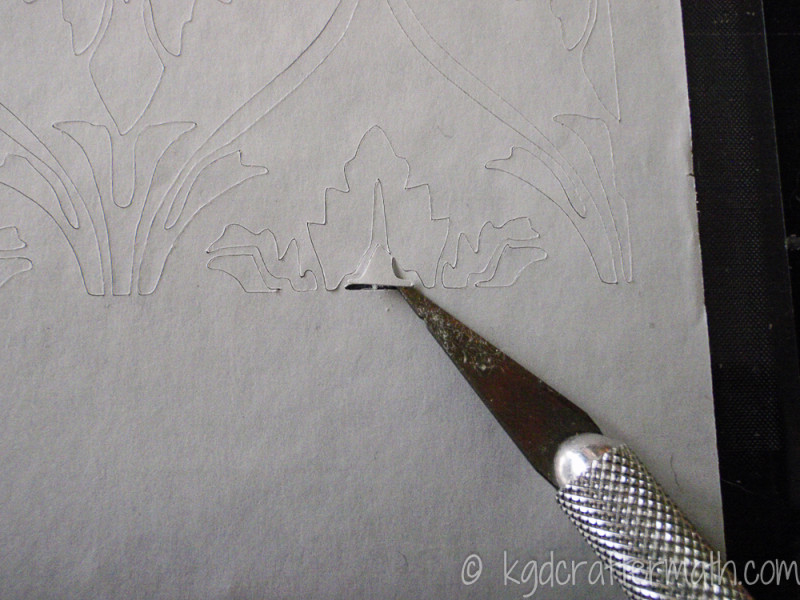
Don’t forget – be careful with that blade!
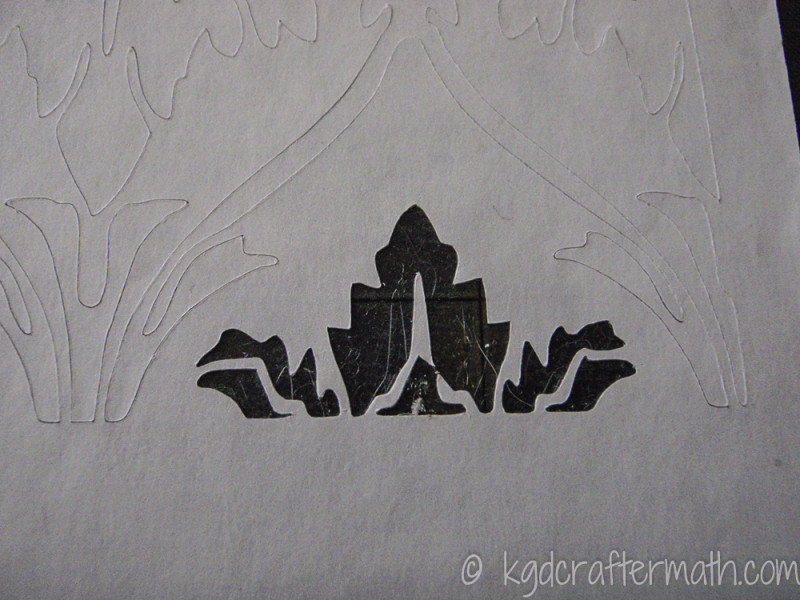
A nice clean weed!
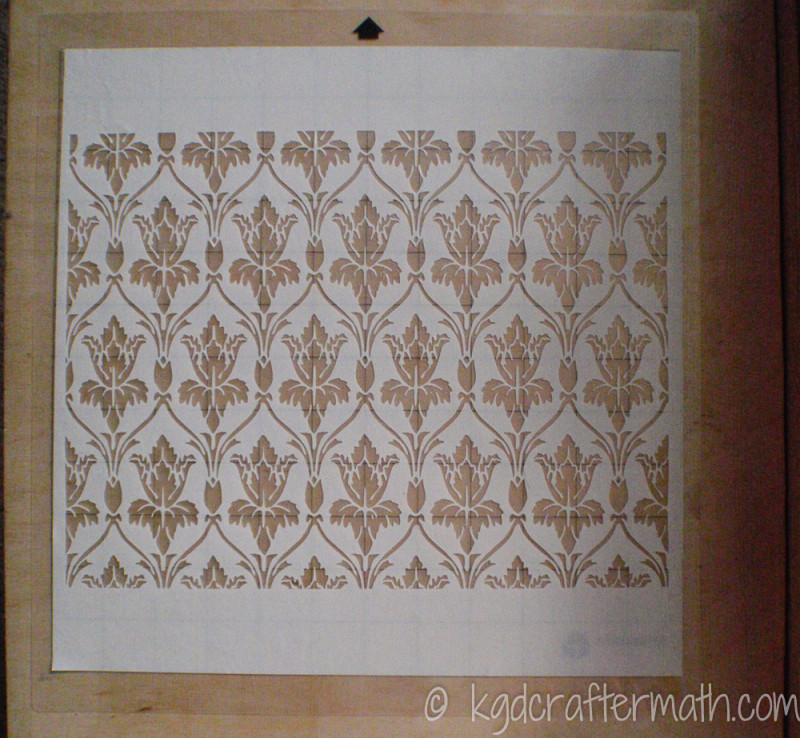
And about 40 minutes later you’re done.
Craftermath alert! This is what my shirt looked like afterwards. It’s almost like large snowflakes! So pretty! And yet I’m still finding bits in my carpet and couch.
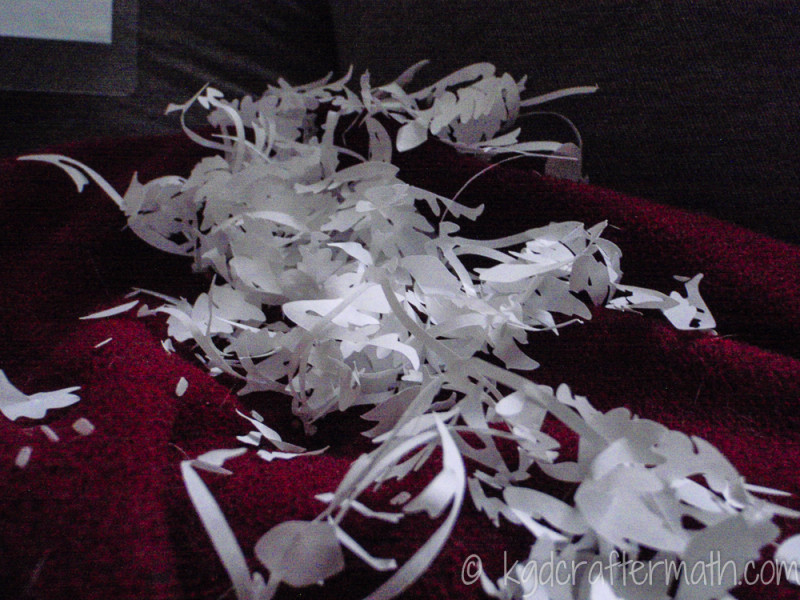
Step 4: Peel
Don’t get all excited and just rip that sucker off! You’ll actually rip it, seriously. Some of that freezer paper is still pretty delicate! So, here’s where we go back again. Using the exacto knife, slowly go row by row (about an inch or so each) and peel up the pattern. Carefully and slowly. In fact, this took up the second half of the episode of Sherlock I was watching. (Note that I had already done the first one, so I had a system down.)
Step 5: Iron
Ready to break out your iron? Good. Set it to the cotton setting. Next you’ll be *carefully* and *slowly* pressing each piece into place. Iron the freezer paper shiny side down. This is the part of the paper that will adhere. You want to spend time making sure that every little piece is adhering properly. If not, you’ll get some paint under the freezer paper. I didn’t get any blotchy paint, except where the freezer paper wasn’t sticking down fully. Remember to go slowly and press, don’t glide over it until you’re all done, or you might rip your freezer paper. This is another good place to go in rows.
Step 6: Paint
*Phew* We’ve made it to the painting part! Go ahead and mix your paint to about a 50/50 mix of paint and fabric medium. I usually err on the side of more medium. (You see the yellow below, but I did the same thing with the black).
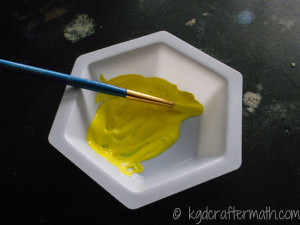
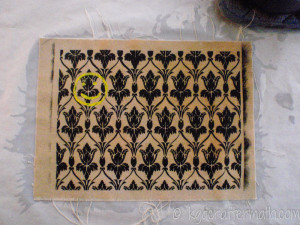
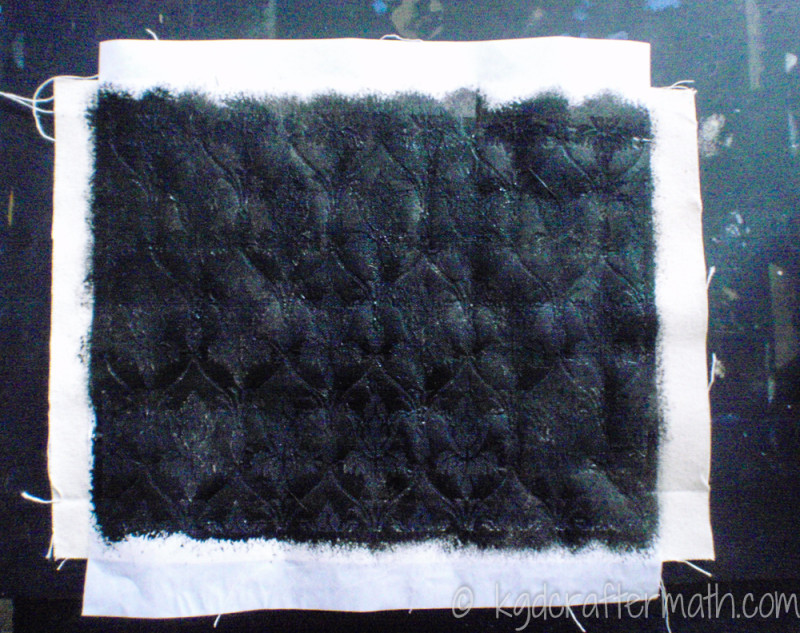
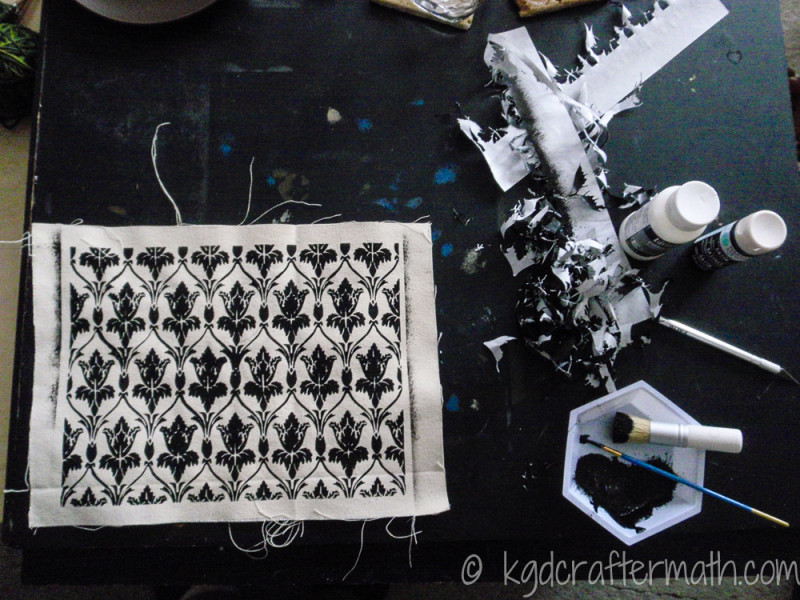
Then, using your pouncing brush to pounce over the entire sheet. Don’t worry if you go over the edges of the paper, we’ll be trimming down the canvas during the sewing phase for this project anyways.
Here it is all painted up!
Now you just need to peel up all the freezer paper. And guess what? You can go wild here, because it doesn’t matter if you rip it anymore! Just make sure you go through and get any pieces that might be hiding in the pattern.
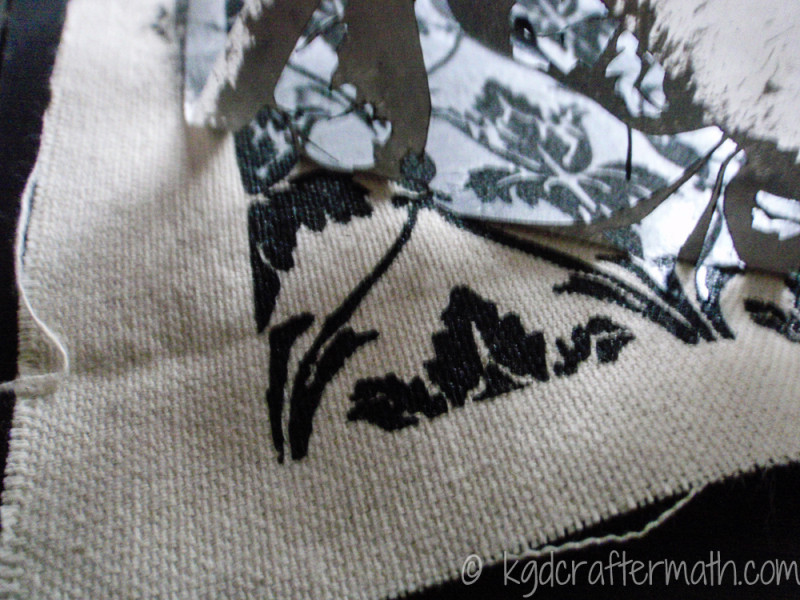
Here it is, almost finished:
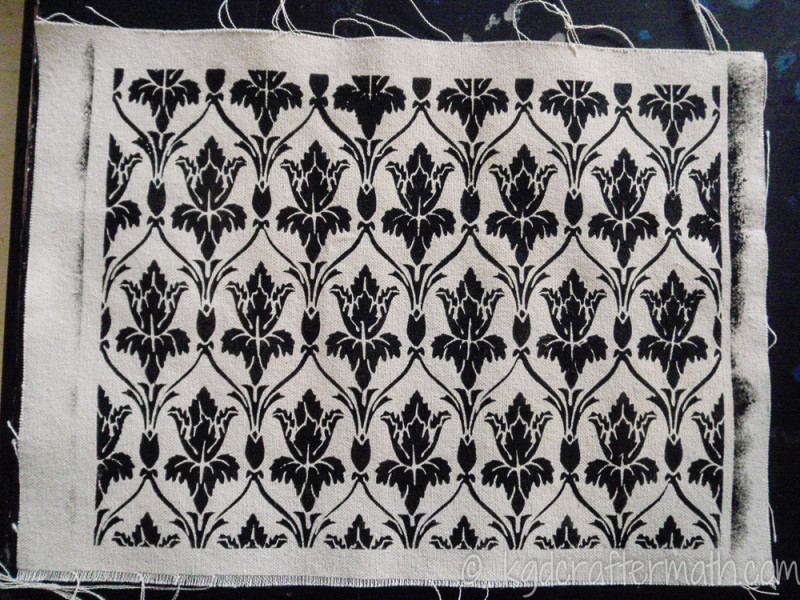
Some of the pieces came out really great, and others are crooked or have a bit of extra paint. This appears to have everything to do with how much time I spent on the ironing portion.
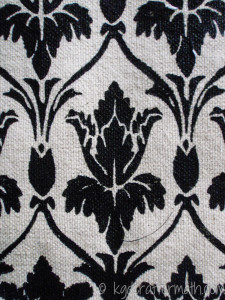
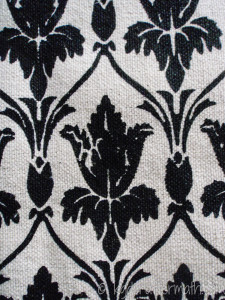
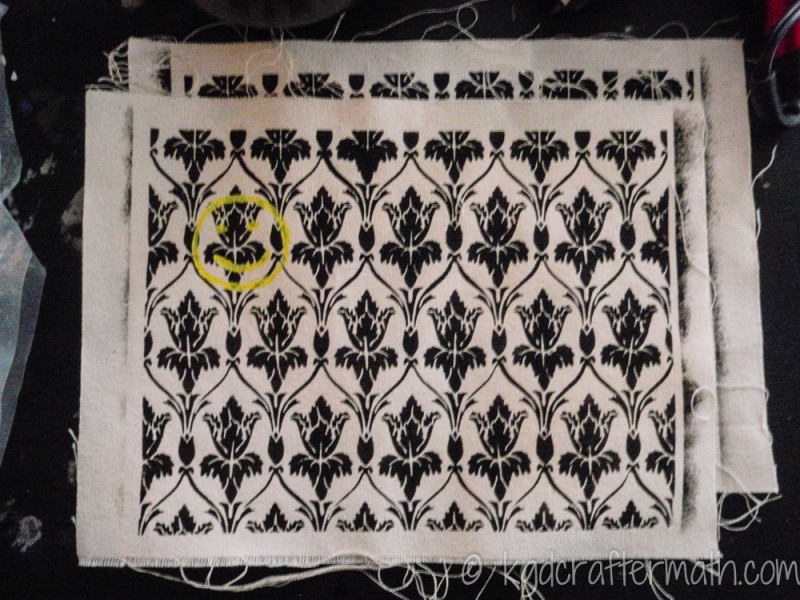
And then, of course, since it’s Sherlock, we need to add the smiley face to the wallpaper. You see, he got bored one day. *shrug* What can I say, it’s Sherlock! I just hand painted these on. I wish I had moved them over to the right a little more, so that the whole face would be on the front of the bag at the end, but they’re still mostly visible, so I’m ok with it. I also should have gone back and put another layer of the yellow on. Oh well, live and learn!
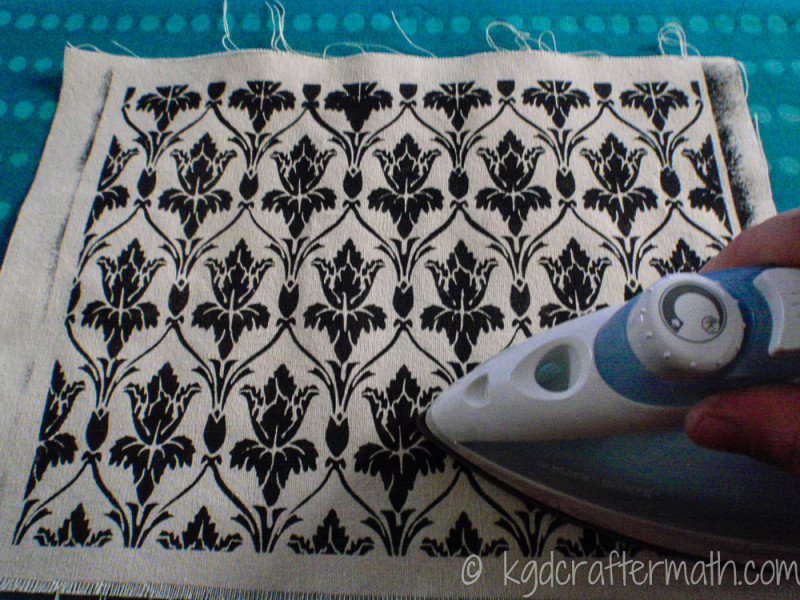
And finally, don’t forget to heat set your paint!
Well, that’s it for today’s post. I’ll leave you with a reminder of what the finished project looks like and a bit of craftermath. Next Monday I’ll post the directions for how to sew the bag.
Want to Check Out More Silhouette Projects?
My Silhouette Challenge buddies and I are all sharing projects on our blogs today, so peruse the projects below for a wealth of Silhouette inspiration!
Some of us are trying something new this month! Click on any of the numbered pictures in the image below to go straight to that project. You can still click on the text link at the bottom as well. I’m so excited to see some of these myself!
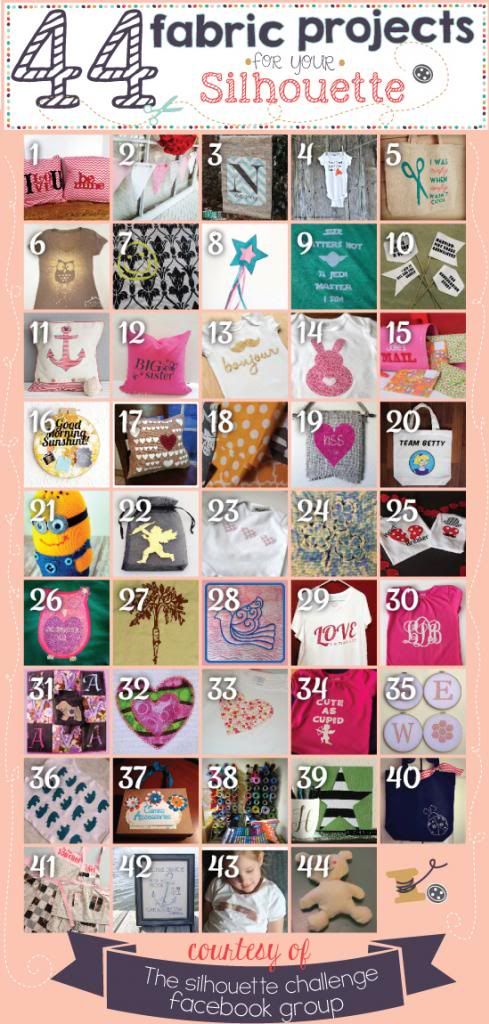
1. A Tossed Salad Life // 2. unOriginal Mom // 3. The Turquoise Home // 4. It’s Always Craft Time // 5. Weekend Craft // 6. Practically Functional // 7. Please Excuse My Craftermath… // 8. Cutesy Crafts // 9. Architecture of a Mom // 10. Black and White Obsession // 11. Lil’ Mrs. Tori // 12. Creative Ramblings // 13. Essentially Eclectic // 14. Adventures in All Things Food & Family // 15. From Wine to Whine // 16. Tried & True // 17. My Paper Craze // 18. Dragonfly & Lily Pads // 19. Whats Next Ma // 20. The Thinking Closet // 21. Create it. Go! // 22. Getsilvered // 23. Create & Babble // 24. Bringing Creativity 2 Life // 25. The Frill of Life // 26. My Favorite Finds // 27. Chicken Scratch NY // 28. Terri Johnson Creates // 29. Simply Kelly Designs // 30. Pitter and Glink // 31. Fadville // 32. The Sensory Emporium // 33. DailyDwelling // 34. crafts, cakes, and cats // 35. Life After Laundry // 36. It Happens in a Blink // 37. Cupcakes&Crowbars // 38. feto soap // 39. McCall Manor // 40. Ginger Snap Crafts // 41. TitiCrafty // 42. Clever Someday // 43. Mabey She Made It // 44. Work in Progress //
Do you like nerdy home decor?
You might also like some of these other projects that I’ve done!
]]>
Autotrace
Autotrace is an online application where you upload your photo, play with some options, and then it runs the trace and outputs your file for you. Of the two freeware options, I think it comes out with the better results. However, the options are a bit non-intuitive, and there is no preview. So you’ll have to try it a few times to get the results you are happy with. It also outputs a bunch of extra lines that you’ll need to delete in silhouette. Here’s the steps for the trace:
Step 1: Upload and Choose your options.
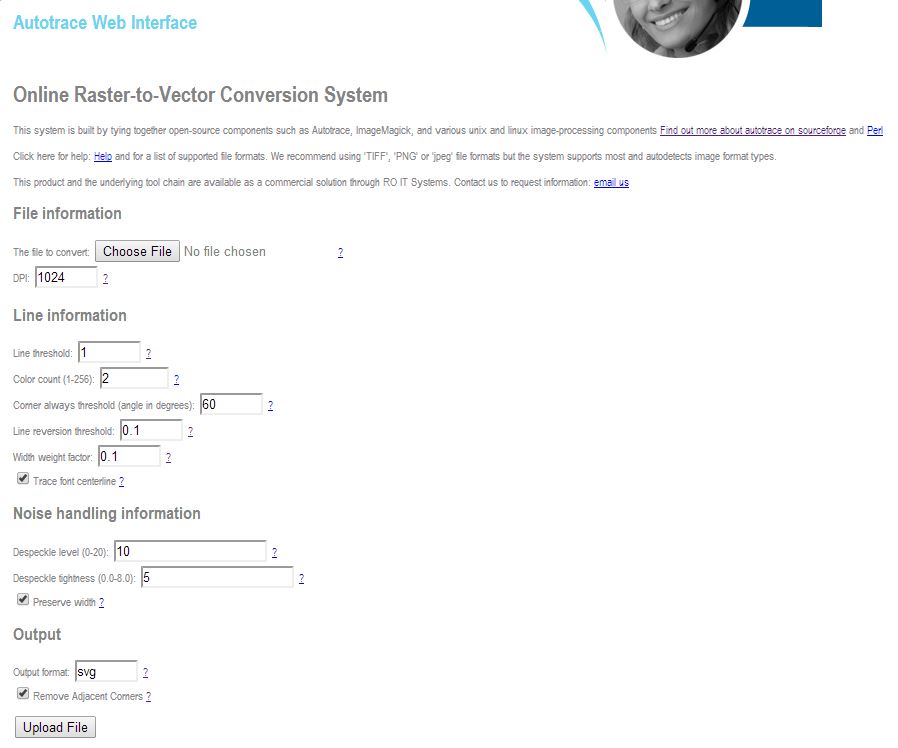
Here’s what the web interface looks like with a few changes to the default options:
Color count determines how many different shades there are. For black and white, I’ve found setting it to 3 is what works best. From there, I just fiddle with the options to something that feels right. You can hover over the question marks next to each option to get an idea of what they mean. Also, make sure you check the box next to “Trace Font Centerline”.
Step 2: Test your Options
Once I’ve got some options that seem right, I always create an svg first. This file displays online, so I can get an idea of what the trace looks like. So, with all the options (and svg output selected), hit the “Upload File” button. It will show you your image and then take a while to process it. It’s hard to figure out when it’s done the very first time, but you’re just looking for the link that says “Retrieve the svg output you created” to appear on the bottom in *really* tiny print.
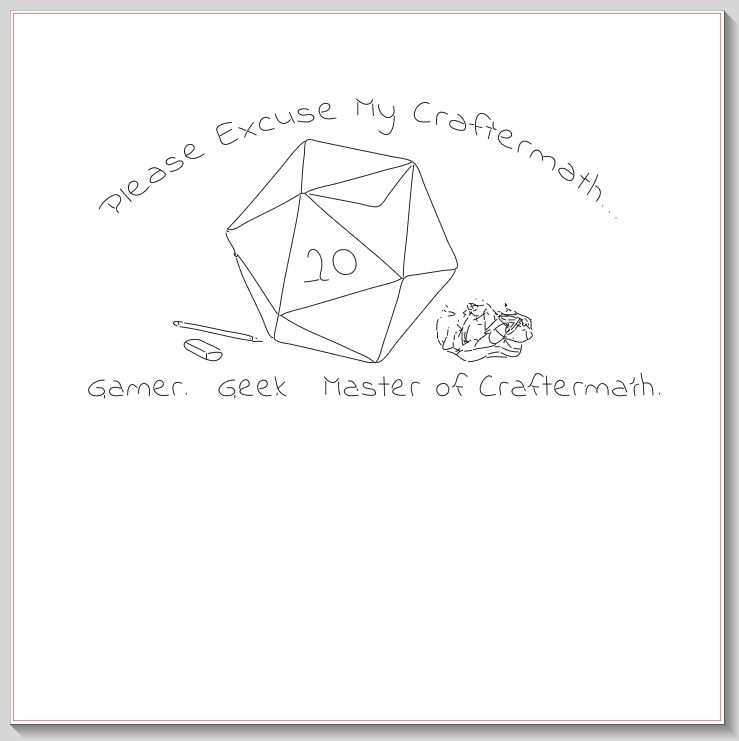
Click on that link, and you will see what the trace looks like.
Not too shabby! If you’re happy with the option, go ahead and right click to “save as”. If not, re-test your options until you find something you like. This was about the best I could do with this particular image. Still, pretty good I’d say for freeware!
Step 3: Import and cleanup
This is where I was unpleasantly surprised. You see, the image really isn’t as clean as it looks. Open it up in Silhouette studio, then, with your object selected, choose a line color of black (or whatever other color you want. This is what you’ll see:
Not a pretty site. You’ll need to ungroup all the lines and then delete all the extraneous ones. It took me about five minutes to get to this:
You’ll notice that I didn’t bother too much with the crumpled paper. Not too bad, but certainly a shock if you’re not expecting it. And yes, if you set it to cut without realizing all those lines are there, it WILL cut everything. So as long as you’re careful about that, it’s not too bad.
Comparisons
Here’s the Illustrator trace next to the Autotrace trace:
Autotrace is on the top, and Illustrator is on the bottom. As you can see, there are a few inconsistencies, but over all they both produce a usable image. I do like the Illustrator version better, and because I have the program I’ll continue to use it. However, I have no compunctions about suggesting Autotrace as a suitable replacement. You just need to be aware of those hidden lines. Have fun with it!
**Note: This might not work as well with wider fonts.
Here are all of the overviews:
]]>The first thing I’ve done is create a schedule in my Google calendars. Here’s a tiny snippet:
You can see that I’m planning another post for today! And of course, tomorrow is the Silhouette Challenge day, so there’s something there to. I’m not going to show you the rest of the schedule yet though, since I want to make sure that it all works as planned.
The second thing I’m doing is thinking more intelligently about what types of content I like to write, what you (my readers) like to read, and how much effort it takes me to produce a good quality blog post. I want my tutorials to be things that you’re interesting in working with. I know that my software tutorials are particularly popular among many of you. So here’s what I think I can commit to. (Yes, you heard me right, commit): 1 thorough walk through a week. This might be a craft, or it might be software. I can’t really juggle both at the moment, but at least I can commit that you’ll have one a week. These will usually come on a Monday.
Outside of that one post, I’ll still be trying to post an additional 2-3 times a week. What will these posts be? Well, they might be my simple silhouette posts, or they might be a crafting hour, or even a small, quick project. And of course, I still have finished crafts around my house that I can show you which don’t have tutorials associated since they are pre-blogging. I might even do more ramblings about how I fit crafting into my life! Notice that some of these will still include tutorial like information? That’s because these are intended to be things I can write quickly, and there are tutorials I can write quickly! So things like “Simple vinyl cuts” and “weeding vinyl” are things that I can do pretty quickly and write short little posts about. This actually helps work towards the goal I have of being able to showcase the crafts by linking back to mini tutorials showcasing different techniques instead of loading lots and lots of information into a single post.
I’m also branching out into social media a bit more, and I’m trying to figure out how best to use these things. I know I said earlier I didn’t want a twitter or an instagram (<– link to my accounts!), but you’ll notice, I have them now! I’m still trying to figure these out, but I’ll get there in time. I’ve already decided that instagram will come in hand amazingly for my crafting hour posts. So, here’s the deal with the crafting hour. I’ll now be taking all my photos through the instagram app and posting them there *as they happen*. That’s right! You can see my progress in almost real time! Don’t worry though, I’ll still post them here, but I’ll wait until I have 10 hours of a project to post it. That should create some consistency to how I post those projects.
Finally, I’m working on some back end for my page. I’m in the process of re-configuring my about page, writing up a policies page, and streamlining my categories. Plus, I’ll be adding some more permanent links to either the top or the side bar to collect some of the projects and walk through’s that I have for easy access. I’m also working on making the site more accommodating to mobile devices. Finally, don’t be surprised if you start seeing ads on the site or projects that are done in collaboration with companies. Of course, I’ll have guidelines for what is and isn’t acceptable here. It’s something I need to start thinking about if I want to make this site sustainable. I chose to work on the platform I’m using so that I can get into the nitty gritty code of the site, but it does have the drawback of paying for hosting.
So to recap, here’s what to expect for content from me going forward:
- 1 well written, complete tutorial a week (usually on Monday)
- an additional 1-2 shorter posts of a variety of types
- Crafting hour progress posted to Instagram
I’m still working on how best to utilize my Facebook and twitter accounts. Sadly, my drawing challenge has dropped off the radar a bit. I’ll try to get that back in swing this upcoming week! Thanks for dropping by, and keep your eye out for that second post to come in some time this evening!
]]>