
Just as a warning, Photoshop has a very high learning curve. I’ll only be dealing with the particular tools that I use for these processes, and even then I’ll be simplifying it. My goal is to put out a step by step that you can follow without having to know everything about Photoshop. If a window pops up that you don’t see here, you probably clicked something accidentally. Just close the window, re-orient yourself with where you are in the tutorial, and then try again.
Now that we’re all on the same page, I wanted to tackle the one thing I do more than anything else for the Studio: creating silhouettes from an image for studio. Today I’ll just go over a simple silhouette. Next time, I’ll tackle multi-color images. Do you want to play along? You can download the high res photos I used here, along with the .psd files and the studio cut files.
Step 1: Find your image
You can use just about any image you want, but the more cluttered the image is the more difficult it will be to get a clean separation of the colors. I’ll be using some of my own photos for this tutorial as examples. Be aware that if you use photos or images other than your own there are potential copyright issues.
Since I needed some appropriate pictures, I thought I would use Mr. Bug, our dog, as a model. He was dubious at first…. but a treat and a blanket to sit on convinced him to pose for me. Here are just a few of the photos I was able to capture along with some notes on thoughts about the photo composition for taking silhouettes from them.
Create a folder to keep all your files together, and save your image to that file. The image of Bug in front of the kitchen door produced my favorite silhouette, so I’ll be using that one from here on out. I will also provide silhouettes from the other photos as well.
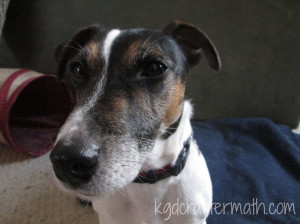
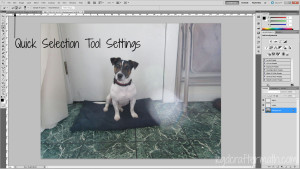
Bug is dubious about a photo shoot….
There is some decent definition between Bug and the door, but most of my photos here had nasty lens flair. If the shadows hadn’t set him off from the white, it would be difficult to separate him from the door.
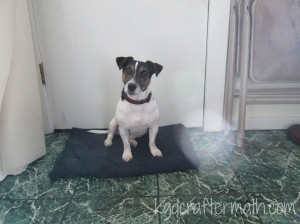
The color background helps here, but the darks are quite muddled.
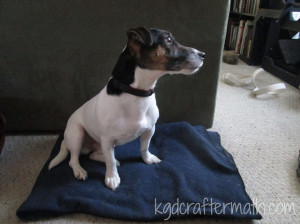
This is the busiest of the photos here, and therefore the most likely candidate to create problems.
Step 2: Import your image.
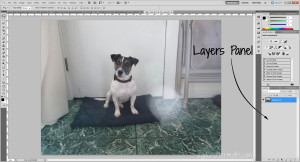
My favorite method of importing is the drag and drop method. You open up the folder your image is in, click and hold on the photo, drag it into Photoshop, and drop it. Then the file will open. (Click on any image to embiggen)
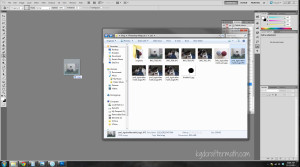
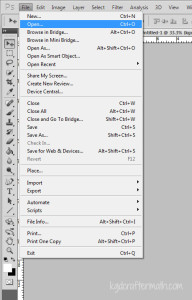
Alternatively, you can use the File-open command and navigate to your file through the file window.
(Optional Step) Changing your file size
You may want to change your file size from the original size, as camera pictures tend to be quite big. You can do this at the beginning. If you find that your shape isn’t smooth enough at the end, shrinking the image at the beginning will help. You can also do this at the end, or not at all. It’s totally up to you.
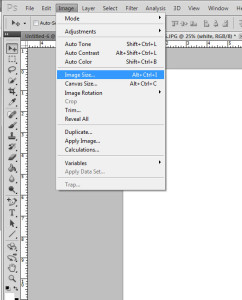
First, go to Images-Image size in the top options.
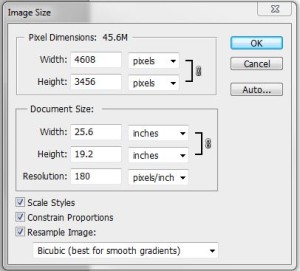
Then, a pop up box will appear. You can change the pixels (usually sub 1000 is fine) or the width and height, if you know what the final dimensions of your shape will be. I used a 50% reduction for the two images of Bug by the couch, but did the one you see here at 100%
Step 3: Create your layers
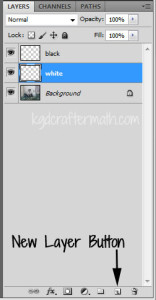
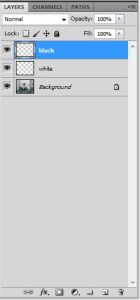
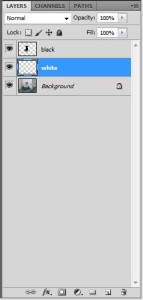
I always create my layers right away. I also try to name them so they make sense. To create your layers, hit the button that looks like a folded over page in the lower left hand of the layers panel. If you are using the default Photoshop layout (which I will assume you are for the tutorial), this will be on the left. To rename the layer, double click on the text of the name. This will allow you to type in your new name. If you click too fast, a pop up might appear. Just close it and try to click a little slower (but not too slow, or nothing will happen). You’ve got to get your clicks *just right*. For this silhouette, I created 2 layers. One for the silhouette of Bug (I made this black) and one for a white background.
Step 4: Select the part of the image you want to make into a silhouette
There are two ways to do this: with the magic wand or with the quick selection tool (see, even Photoshop calls it magic!). The quick selection tool uses breaks in the image, like shadows, to choose the area. The magic wand uses straight color. For a photo like this, where there are all sorts of gradients, the quick selection tool works so much better. If you are working with an image that is made up of simple colors, like a piece of clip art, the magic wand is probably better. For this first tutorial, I’ll be using the quick selection tool. I will show you the magic wand in the multi-color tutorial, which will come later.
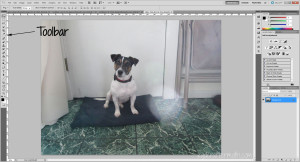
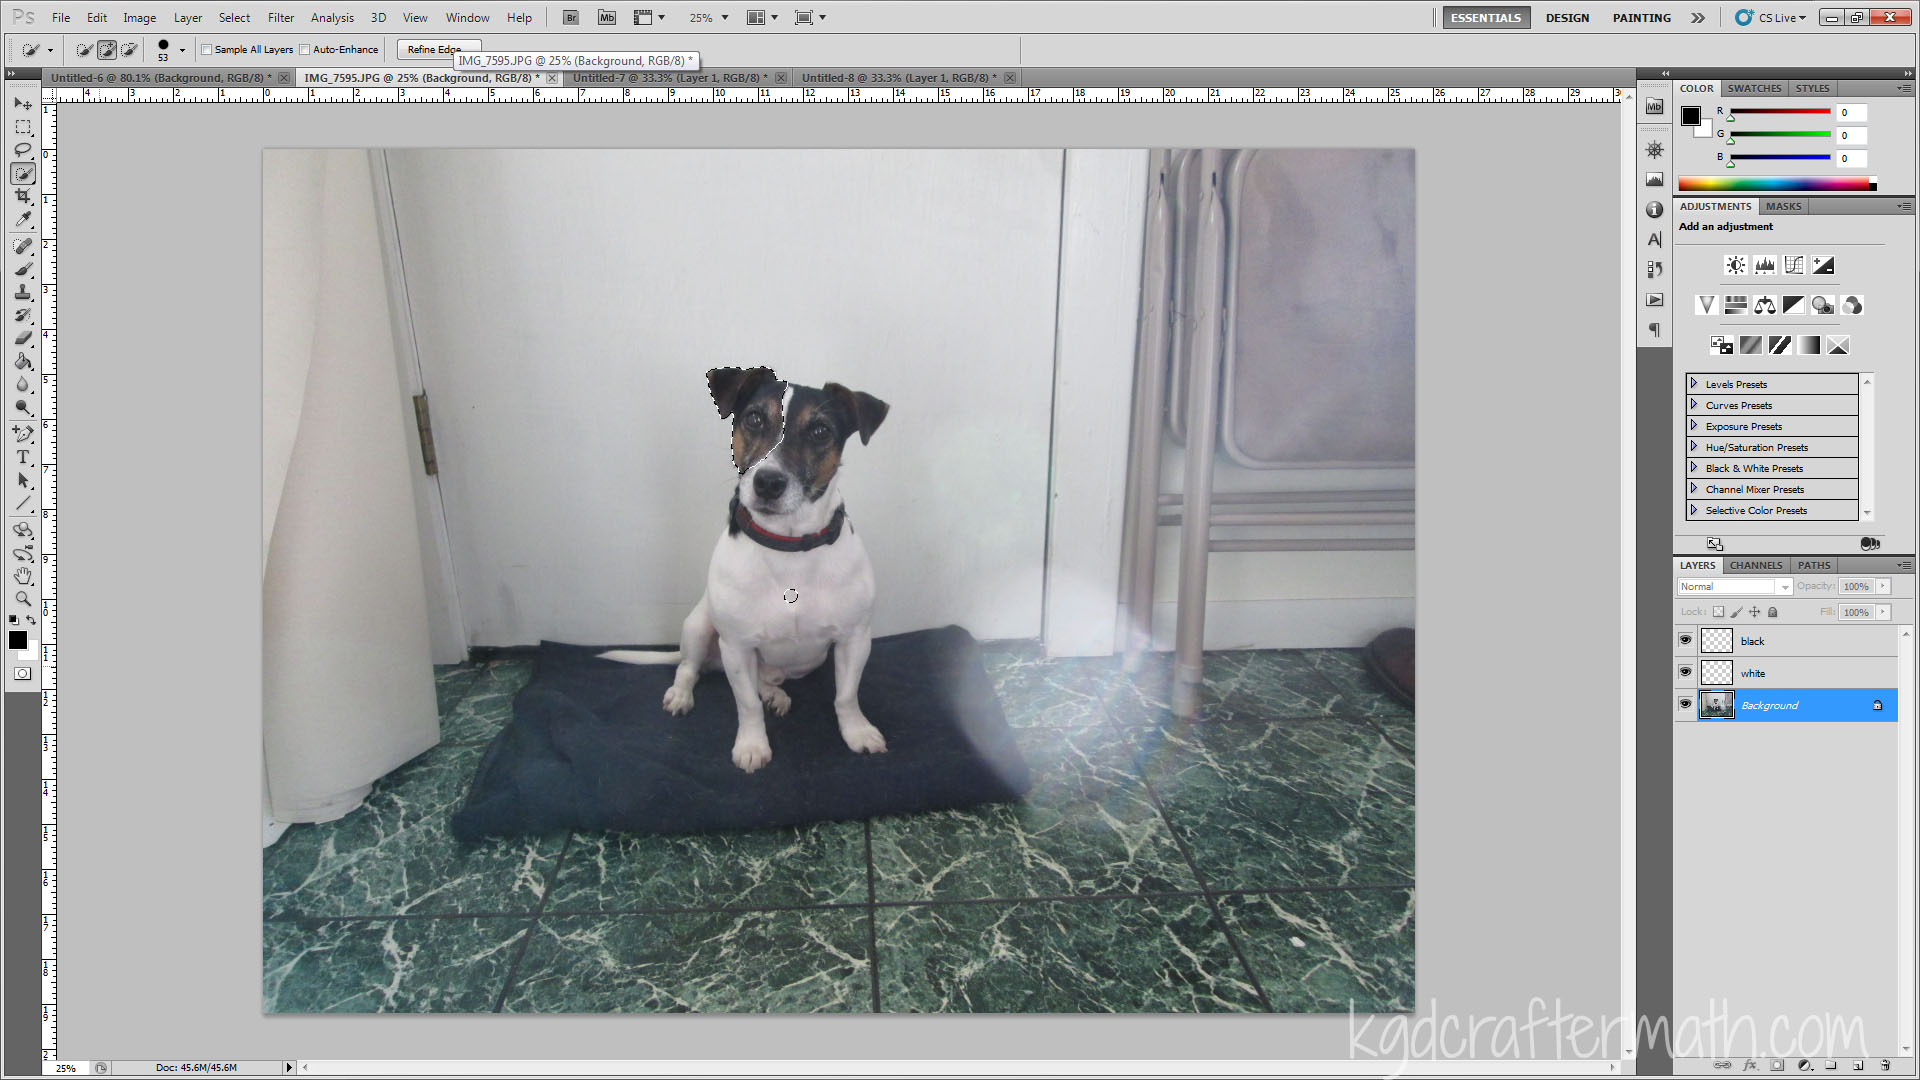
So, now that we’ve decided to use the quick selection, let me show you where it is. The quick selection tool is the fourth tool down on your toolbar, which is on the left of your screen.
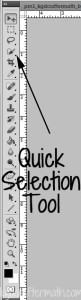
This is also where your magic wand is. So, make sure that the image looks like this: ![]() (quick selection) and not this:
(quick selection) and not this: ![]() (magic wand). If the wrong tool is there, don’t panic, just right click to choose the correct tool.
(magic wand). If the wrong tool is there, don’t panic, just right click to choose the correct tool.

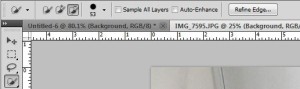
Next we want to set up our quick selection tool settings. These are just above the tool bar. Make sure that you have the + icon selected, and set your pixel width to something appropriate for the image (use the down arrow to change that setting if necessary). I’m using a full resolution image from my camera, and 53 px is just about the right size to hit all the parts of Bug. You also want to make sure that your background is highlighted in blue on the layers panel (as seen in the photo below). Edited to add: you can also drag your mouse like you’re painting the image, but I find that I have more control by selecting around within the part of the image I want.
![]()
Now that the tool is selected and all your settings are set, just start clicking around the image in the areas that you want to be part of the silhouette. You can see some of the process in the images below. The dancing dotted outline will tell you what’s selected. At first, you’ll get a few disjointed circles, but Photoshop will realize what you want and pick out the parts of the image you want. It’s automagical! Don’t worry if it picks up something you don’t want, we’ll deal with that in a moment. You may need to embiggen the images below to see the dotted line.


Let’s take a step back for a moment. If you’re having problems selecting what you want, and need to embiggen within Photoshop, You can use the magnification tool. It’s near the bottom of the tool bar on the right. There are a few useful options – like fit screen and actual pixels that I use quite often. The magnification tool settings will appear in the same place that the quick select tool setting are when that is selected. In fact, this is true for all your tool settings.


Ok, now back to getting your selection correct. If you take a look back at the picture of Bug, some of the blue blanket he’s sitting on accidentally got selected. That’s ok, with the quick tool selected go back up to the tool settings. Now select the “-” option and select part of the blue blanket. Be careful with your selections, and you might want to make the pixel size lower, just so you don’t accidentally take his leg off. Now Bug is properly outlined.

Step 4: Refine your edge
You could keep your edge as it is, but I like a smooth edge for the silhouette. This is really easy to do. Up in the quick select options, you’ll see a button called “Refine Edge”. Clicking on this button will turn the background white temporarily and bring up the pop up window below. Just slide the slider for Smooth up to 100 and hit ok.

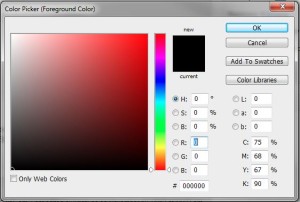
Step 5: Set your fill color
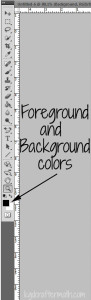
Before we create the sillhouete, we’ll make sure our fill color is black (or whatever color you want). On the bottom of the tool bar, you will see 2 boxes of colors. The top color is the foreground color. It will be the fill color. If you don’t like the color it is, you can click on that box and choose your color by hex, with the color wheel, or with the color picker. Set your foreground color to the fill color you want and the background color to white (#ffffff).
Step 6: Create your black layer.
To create your black layer, first you need to head over to the layers panel on the lower right and make sure the layer you created labeled “black” is highlighted in blue. You should still have your dancing dotted line around Bug at this point.
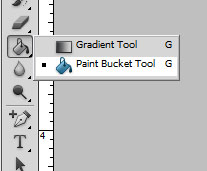
Now, head over to your tool bar (on the left, remember?) and choose the paint bucket. It may look like a gradient (![]() ) If that’s the case, just right click and choose the paint bucket.
) If that’s the case, just right click and choose the paint bucket.

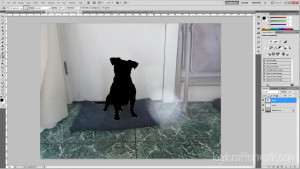
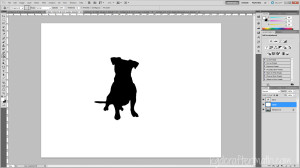
Once your fill bucket is selected, head over to the dog and click inside your dancing dotted line. This will fill that area with black on the “Black” layer.
Step 7: Give the dog a white background.
Ok, now head over to the color boxes and hit the arrow button to switch the black to the background color and the white to the foreground color.
![]()
Click on the white layer to highlight that in the layer panel.
To clear the selection hit ctrl+D, or go to Select- Deselect in the top menu. There are other ways to do this as well, but I won’t over burden you with choices. With the paint bucket selected, click anywhere on the layer, and your layer will be flooded with white.
Step 8: Save as
Silhouette studio can’t open a .psd document, so you will need to go to File-Save as and save the file as a studio compatible file. I usually just use .jpeg, but .png or .tiff also work (among others). You may also want to save the file as a Photoshop file so that you can play around with the layers more later (.psd).
Wow, that was a lot of knitty gritty details! I hope it all made sense, and please feel free to ask questions! Here are the three silhouttes I made using this technique. It took me less than 10 minutes to make all three.

You can download a .zip file containing the .psd, .jpg, .studio, and original .jpg files here if you are so inclined.
Next up in this series: I’ll show you how to go from the silhouette to a cut file, and then we’ll switch to multiple layers for a multi-color image. I don’t know when I’ll do the next one, but I”ll try to make it sooner rather than later. I hope you found this easy to follow and informative!
]]>