You may remember a while ago I told you about a project I was working on for a friend of mine. He has a special affinity for the Hobbit, as he’s been reading the book with his daughter. For Christmas, he had me paint up a miniature to look like Smaug for her. You can see the first three hours in my earlier post here. Since I hit the Christmas rush, I stopped paying attention to the time and just tried to finish everything. I did, but just barely hit the deadline. Here are a few in progress pictures along with the steps I took to get there. I spent about a day and a half straight painting in between packing for my trip back home.
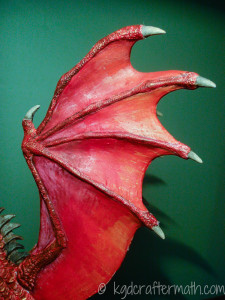
Painting the Wings
After I had the base coat down, I tried a few different techniques to see what Eric would like best. We agreed on a wet blending technique using crimson red, phoenix red, and fire red. For the blend, I used a mix of 1/2 crimson and 1/2 phoenix to create the darkest part of the wing. Then I blended out to phoenix, and finally to fire red. Once the wings were done, I lined the edge between the wing and the ‘fingers’ with crimson.
Shading the Scales
Shading the scales was a four step process. First, I washed the scales with crimson red. Next, I dry brushed with phoenix red to bring the base color back out again. I wanted a tinge of gold, so I added another dry brush of new gold. Since the new gold was a bit too prevalent, I finished off the scales with another dry brush of phoenix red to finish off the layering affect. (Sorry for the slightly blurry pictures, I need to avoid last minute rushes in the future).
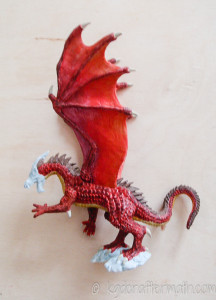
Shading the spikes
I wanted the spikes to be a dark brown like the fur from the early cartoon movie, so that was the direction I headed here. This was a quick wash of walnut brown followed by a dry brush of stained ivory. You can see a close up here.
Painting the head
For the head, I mostly just did layers of thin washes in fire red, marigold yellow, and sun yellow with a bit of walnut brown and phoenix red mixed in. This picture doesn’t have the mouth or the eyes, but the mouth was painted in crimson red, the teeth in stained ivory, and the eye was sun yellow with a true black slit down the center.
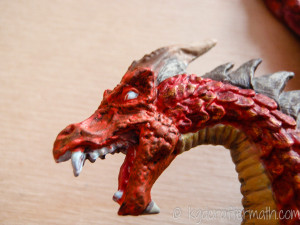
Talons and spikes
For the remaining talons and spikes, I did a ring of sand brown near the bottom with stained ivory for the tips, and then I wet blended them together to create the look you see above.
Basing
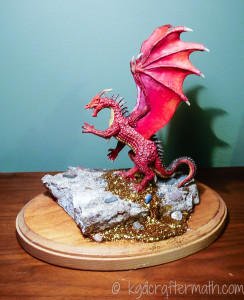
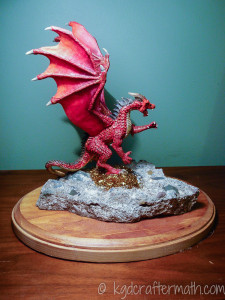
I had a bit of fun with the basing. The concrete rock was provided by Eric. I attached it to a stained piece of wood with some goop. After I trimmed the feet, the dragon was attached with some zap-a-gap. For the gold pile, I used hot glue and large glitter pieces. I also tossed in a few bit pieces (though I wish I had had time to properly paint those up instead of the slapdash job I did).
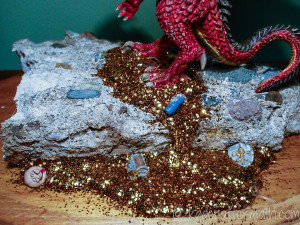
Finished Job
Overall, I’m really pleased with how this came out. What’s better, so is Eric. I haven’t heard about his daughter’s reaction yet, but I’m sure I’ll hear about it soon.
Here are some closeups of the finished piece:
And finally, the piece in all it’s glory:
Thanks for following along with this paint job! I’m excited for more painting to come in the new year!

I like to link up here.
Affiliate links help me keep this blog running. Thanks for using them!
All opinions expressed on this blog are always my own.

This is stunning! Such beautiful craftsmanship, I know his daughter will be overjoyed
Thanks Vincent! I really appreciate the comment.
I saw him the other day and was told her eyes lit up with glee when she saw him. He couldn’t stop talking about it, so it must have gone over well!