

First – some blog maintenance stuff. I’ve decided that trying to do the exact Mon/Wed/Fri posts I want to do on time is becoming slightly problematic for me. So, I’m changing my schedule to three times a week. I’ve got four running series now, so this will give me the ability to work around busy school days and fit in different posts from my series without feeling like I have to cram things in. Plus, most of the projects I’m working on right now are Christmas projects, which is making Finished Fridays hard to do every week. So, there’s that, to read more you can check out my about page. Onward to the post!
So you’ve read part 1 of the series and you’re all ready to start cutting out multi-color cut outs! Great! For this part we’ll stick to a simple 4 (or 5) color piece. The eagle you see below is the file I’m working with. The clip art comes from a free clip art site that I visit somewhat frequently called Clker. I chose this image because there are only a few parts, we can use it to demonstrate the use of layering and negative space, and the simple color scheme lets us work with the magic wand this time. Ready? You can download the files here to follow along. If you forget how to open a file in Photoshop or where your tools are, head back to the first tutorial for a review. Let’s get started!

First off, I had a question last time asking for help in explaining the concept of layers. Here’s the answer I gave:
Each layer has a different image on it. The layers are kind of like different pieces of paper, except that with layers, you can also have parts that are transparent, so you can see through different parts of your ‘papers’. As you add shapes to layers, those parts will overlap the layers (or sheets) that are underneath them, kind of like overlapping card stock pieces on a card.

Step 1: Figure out what layers you want for your final cut.
Ok, this is both easier and harder than it sounds, so let’s go through this step by step. First, you want to figure out how many colors you want in your final cut. I’m going to assume this will be cut in vinyl, but it could really be any medium. Off the bat we have an off white, a very light grey (by the eyes), another grey, a black, and two shades of yellow. I don’t feel the need for two shades of grey and will treat the yellow as a single shade for this tutorial. That gives us four colors: white, grey, black, and yellow. Great, we’ve got our colors down!

Now, let’s count the pieces we want. On first glance, we’ll want one piece of white, two pieces of yellow, 4 pieces of black, and 6 pieces of grey. But really, do you want to have to align all that when you’re done? And can you image having to make all those bits match up? Yeah… me neither. So, we’re going to break this down into just 5 pieces: 1 white, 1 grey, 1 black, and 2 yellow. Basically, we’re going to use cut outs in the pieces so that first you put down the black, then the grey, then the white, and finally the two yellows go right on top. Got it? If that doesn’t make sense just yet, don’t worry, you’ll get it by the end of the tutorial. And if you don’t, just ask me questions in the comments!
Step 2: Create your layers
Go ahead and open your image in Photoshop. First, we’re going to increase the white space around the eagle to make life a little easier. In your option tools across the top, go to Image-Canvas Size.

In the pop up box that appears, go ahead and set the width and height to 4.75 and hit OK, this will bump our borders out a bit.

Now, remember where they layers panel was before?
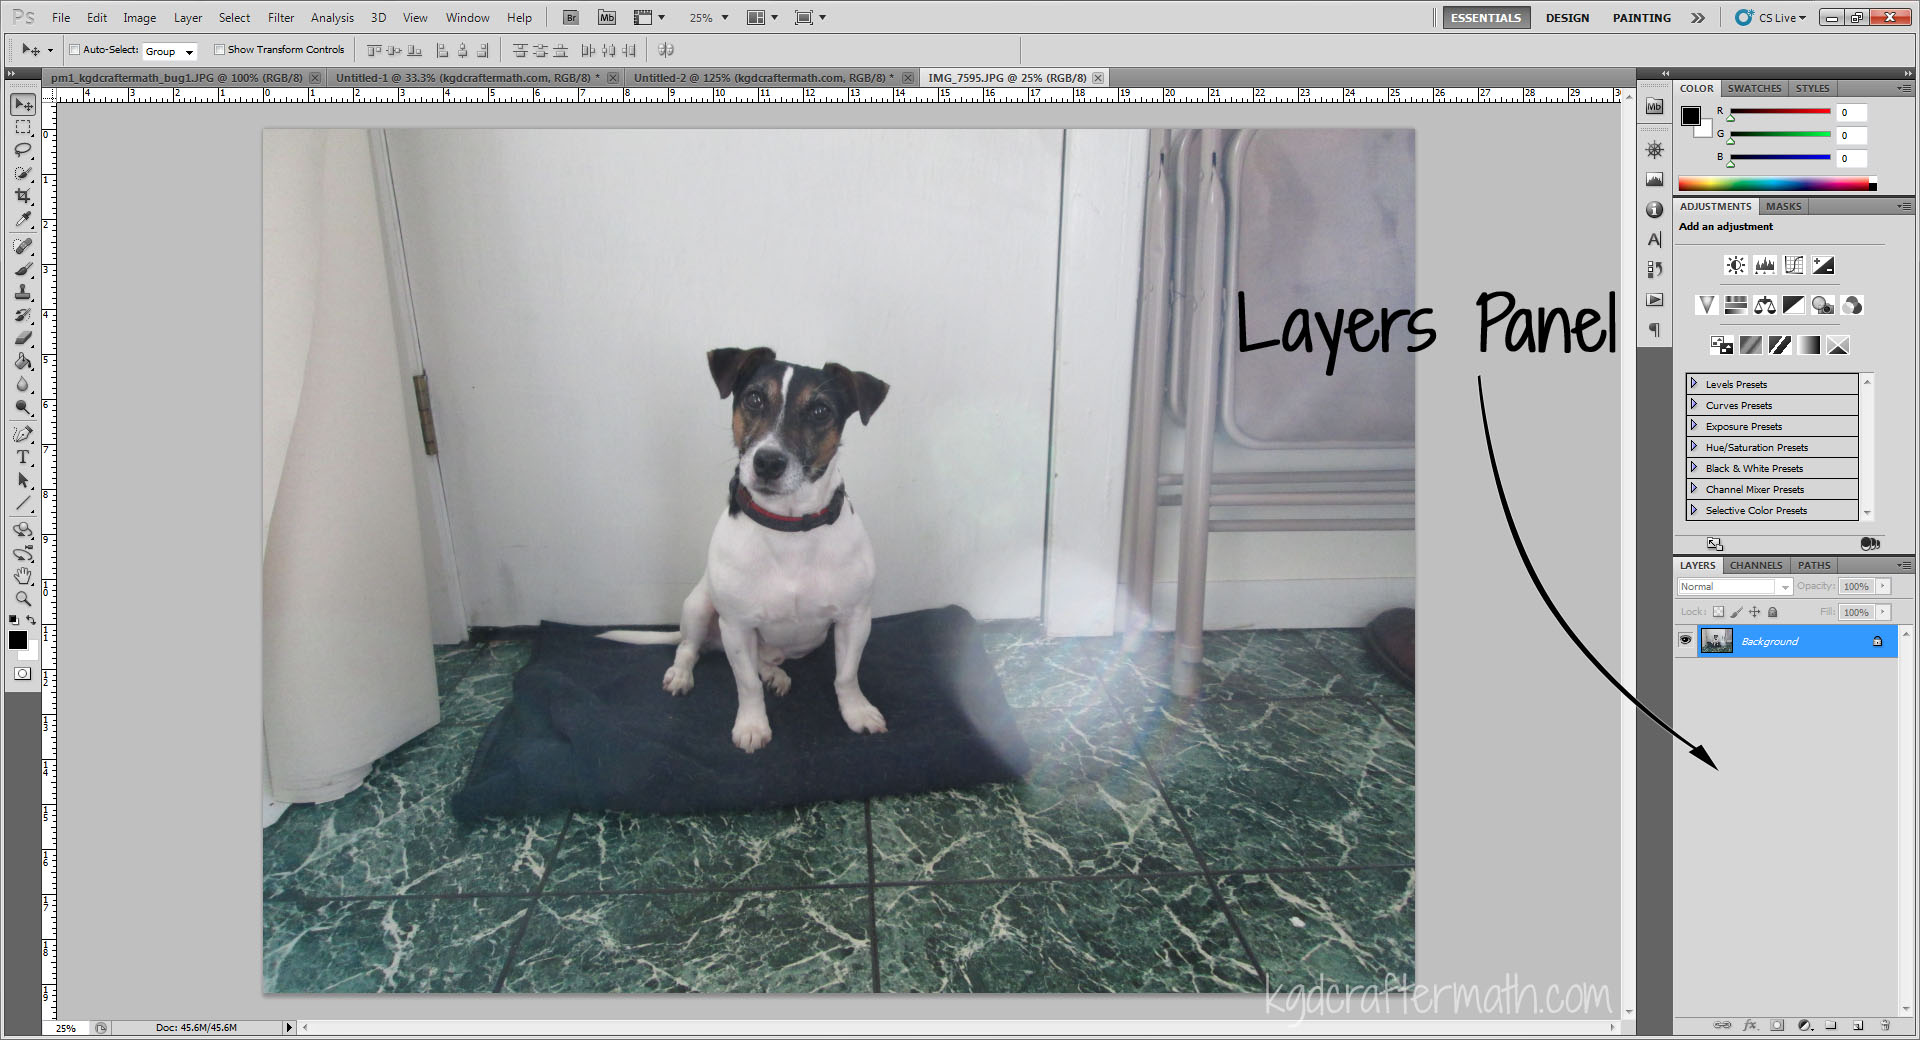

Well, it’s still there! And now we’re going to create a new layer for each color. So go ahead and hit that new layer button four times and rename them to your colors. Make sure your layers are in the top to bottom order that you’ll be layering your vinyl (so black on bottom, then grey, then white, and finally yellow). I’ve added a layer at the very bottom as a background. I used the fill bucket and the color picker to give it a blue Here’s what your layer panel should look like after you’ve created your layers:

Step 3: Create your black layer.
Ok this step has 2 parts to it, so bear with me here. First you need to select everything you’re going to cut out in black. Here’s the trick here: you want to cut out everything! This will let you do those negative spaces in the white and help with the alignment process. For this tutorial, we’re going to use the magic wand to do our selections. This tool is found in the same place as your quick select tool, but looks like this:![]() . The magic wand tool works very well when you’re working with images that are composed of blocks of color. As a reminder, here’s where you find the quick selected and magic wand tools, you right click to choose between the two:
. The magic wand tool works very well when you’re working with images that are composed of blocks of color. As a reminder, here’s where you find the quick selected and magic wand tools, you right click to choose between the two:


Now, on to making your selection. Because I want everything to be a part of this black layer, I’m actually going to select the area outside the design. First, let’s set up our magic wand options (these are in the upper left hand corner. I want my tolerance to be pretty low so that it doesn’t pick up the off white/ light grey that will be my white. Some trial and error showed that 1 works just fine for this image. I also want the “contiguous” box to be checked, just in case there’s some white in the center of the image.

Now, click just outside your eagle and you’ll get a dancing box that looks like this (you may need to enlarge it to see it properly):

Go to select – inverse to select the inside of that part. This is the part that we’ll be filling.

Now, head over to your layers panel and make sure you have your black layer selected (if not, just click on it) and then set your foreground color to black in the tools panel, choose the fill bucket, and click anywhere inside your eagle shape (check out the first tutorial if you need a refresher on this). It should look like this:

Great! We’ve got one layer down already! Hit the eyeball next to the black layer (in the layers panel) to turn it invisible so that you can see your eagle again before heading to the next step.
Step 4: Create your white layer.
This one’s pretty easy. Make sure the layer with your eagle (Layer 0 in my case) is selected. Then, click on the magic wand tool to select it. Click on the white part of your eagle head. You should see something like this:

Uh oh! There are some spots missing. That’s ok! Hold the shift key down and click on those spots. That will add it to your selection, and it will look like this now:

Great! Now we need to add this to the white layer. We’re going to change up the color though so that studio can see it when we import into studio later. I chose a darker blue. *shrug* I don’t know why, I just did. So just like before, select your white layer, set your foreground color, select your fill bucket, and click inside the dancing dotted line. You should have something that looks like this:

You can go ahead and hide this layer by hitting the eye button for the next two steps.
Step 4: Create your yellow layer.
For the yellow layer we are going to do exactly the same thing as we did for the white layer, except selecting the yellow color instead of the white. So, let’s go through those steps. First, make sure you have the layer with the eagle highlighted in blue in your layer box.
Select your magic wand too, click on one of the yellow sections:

And then, with the shift key held down, select the next layer:

Now, choose your yellow layer, change your foreground to yellow, select the fill bucket, and click inside the dancing dotted line. Clicking in either one of the selected areas should fill both of them.

Set the layer to invisible, make sure your eagle layer is highlighted in the layers panel, and head on down to step 5!
Step 5: Create the grey layer.
Ok, this layer is a little bit trickier than the others, so I left it for last. We’ll start out by selecting all the border outside and inverting the selection using select-inverse just like we did for the black.
Now, go up to your magic wand settings, bump the tolerance to 25 and un-check contiguous.

Right click on the black at the bottom and choose “subtract from selection”

Right click on the yellow beak and choose “subtract from selection”

Now, go back up to the top and click on contiguous again. We’re going to get rid of that bit of grey in the beak, but if we have contiguous checked it will remove all the dark grey, which we don’t want. Done? Good. Now right click on that little bit and choose “subtract from selection”.

Great! This will be our grey layer. You know the drill. Highlight your grey layer in the layers panel, change your foreground color to grey, choose the fill bucket tool, and click anywhere in the dancing dotted line to fill in your grey.

Step 6: Check your work.
Go ahead and hide the eagle image and show every other layer using the eyeball. If everything went well, you’ll have something that looks like this. (You may also want to click outside the image with the magic wand tool at this point to get rid of the dancing lines)

Step 7: Export your images.
Ok, now what you’re going to do is hide all the layers (including the background) except the black one. It will look like this:

Go to File-Save As and save it as a .jpg file. I named mine “Eagle-black”.

Do the same for the grey layer

The white layer

And the yellow layer.

This will give you 4 separate images that you can import into Studio and use the trace feature on. The final studio file, along with the .psd and all the jpegs can be downloaded here.
Great! I feel like we’re making progress! Next up, I’ll show you how you can turn your photos into multi-color shapes like the one above. We’ll be re-visiting Bug’s photo shoot for that one. 🙂


I like to link up here.
Affiliate links help me keep this blog running. Thanks for using them!
All opinions expressed on this blog are always my own.
Great tutorial for those not familiar with photoshop. The version of Silhouette I am currently using (2.9.45d) will read in photosop files but you will only see what was visible at the time of saving. Also on importing, the scale is WAY too big, take note of the dimensions of the original. Instead of the paint bucket, you can just say fill with foreground / background.
Another photoshop trick is to use one of the supplied scripts which saves each layer as a separate file. I am sure there would be a variation on this to save each layer as a jpg…..
Regards,
Allan Thorne
Yes, I’ve noticed that the scale is way off when importing. I have found that saving as a .png has helped with making sure that the scale is true. Thanks for the tip on filling, and I’ll definitely have to check out the supplied scripts! I’ve made my own, but for some reason I haven’t bothered to play around with the ones they provide.
Thanks for the comment Allan!