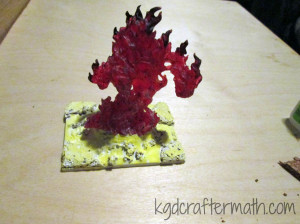
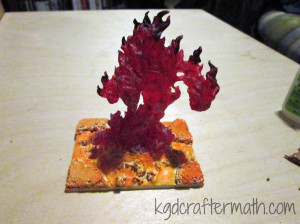
I did it! I finished my mini! This is a mini that I made for the Reaper Terrifying Fall contest. Well, it’s a contest, but really, it was just an excuse for me. This is what I’ve been doing in between writing my grant proposal to keep myself sane. Let’s start with some pictures, shall we? Here’s what the finished mini looks like:
Now, it didn’t start that way of course! Since I took pictures along the way, I thought I’d show you the WIP (work in progress). Please bear with this image heavy post. I’m not sure why I feel the need to tell you all that though, since most of my posts are… Oh well!
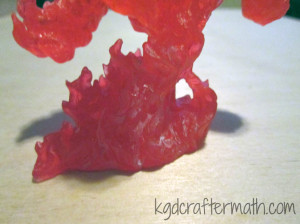
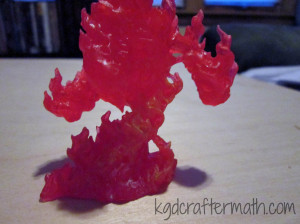
The mini I painted is Reaper’s Large Fire Elemental. It’s made of a translucent red plastic. For the lighting effected, I used a cheap halloween LED tea light.
I wanted to take advantage of the transparency and use some light, so I did some fiddling around. I played around with a Halloween led candle from Target. I also played around with a few other leds, but I found that the target one was the brightest. The only problem is that the light doesn’t penetrate the mini fully. With the non-target led, I placed it at various points behind the mini to see if I could get better spread, but it didn’t look like I could. I did drill a hole into the mini so that the led would go up a little bit, but I didn’t go so far as to de-solder the led from the board to make it longer. I might try that with my other fire elemental, but I didn’t do it here. It did help a little bit, but I would still like to get more light through overall.
The very first thing I did was painted the elemental. Bones, that’s the plastic the mini is made out of, is super hydrophobic. I wanted to keep the transparency, so I knew I wanted to do a thin wash of paint. Normally you would make a wash with water and paint, but the material is hydrophic, remember? So I made my washes with isopropyl alcohol. Fire goes from really light in the center to red. I added the black sooty stuff on the outside to help with the fact that the led didn’t shine through the whole thing. I used a low ISO photo above to help determine how to paint the mini in accordance with the light spread.
First up: a coat of pure white around the bottom

Next: a coat of sun yellow just above the white

Then: a coat of fire orange above that. Note that these coats only go up to about half of the figures. That’s where the light mostly ends.
Next, I dry brushed a bunch of black on.
Then, I dry brushed some crimson red around the bottom. I didn’t want the bottom to be as dark as the top, though you’ll noticed I changed my mind on that later down the line. Somehow I forgot to take pictures of the last three stages, but, you can still see how it came out in the next few steps.
Once the mini was painted, it was time to add the LED light. First, I removed all the casing from the candle. This left me with the board, the bottom housing, the led, and the battery.
I had already drilled a hole into the fire elemental that went in as far as the led would go. This is where I could have done a bit more. I decided I didn’t want to deal with de-soldering and lengthening the led. This would have allowed me to put it further towards the middle of the mini and potentially have gotten a more even lighting throughout the mini. I should note that I wanted to keep the board because it flickered and it had an on/off switch. Sure, I could have done those myself, but it was much easier and cheaper to use the led candle.
Now the electronics and the mini fit together! But… they need a base. I placed it all on a 2×3″ base. Why that size? Well, it’s what they had at my local shop. So there you go. Once I traced out where I wanted the led casing to go, I marked where the switch was. That was where I drilled a hole. You need a pen or something to turn it on and off, but at least you can.
Then it was down to decorating the base. I knew that I wanted to hide the electronics. Also, I wanted a lava effect, so I started by sculpting a crater like thing around the LED strcuture with some milliput. Milliput is also a very strong adhesive, so this keeps the mini attached as well. I like to imagine that the fire elemental is emerging out of the crater.
For the raised bits of pumice and other refuse in the lava, I used some cork. There is a larger piece of cork on each corner and then some crumbled cork that I added around the crater. All the cork is adhered using zap a gap super glue. I used the tutorials by Dark Art Studios and Fantasy Games as inspiration and for help in figuring out how to get the look I wanted.
Once the cork was down, I flooded the base with Elmer’s glue. And waited for it to dry. And waited. And then gave up waiting, and hit it with a blow dryer until it was at least dry enough for me to paint on it. Bonus! Since the glue wasn’t entirely dry, I ended up smudging it some along the way. This gave the lava a swirled effect in some places, which was kind of cool.
Then I started layering on the color. Most of the color is dry brushed or just sort of haphazardly splattered about.
First: a (mostly) solid True White coat.
Dry brushed sun yellow

Dry brushed marigold yellow
Dry brushed lava orange

Dry brushed crimson red
Dry brushed blood red
Added a layer of walnut brown to the top of all the cork (I left a little of the red showing). I also added a ring of brown just underneath the elemental.
Added a layer of black to the tops of the cork (I left some of the brown showing). Finally, I decided I wanted to dry brush some more black onto the main figure. That’s it!
Then it was into the light box for some photos!
It took me evenings, one for the electronics, sculpting, and mini painting, and one for the base construction. Not including drying time, I think it took me 3-4 hours to complete. I hope you enjoy it! I’ll probably apply the same treatment to my other large fire elemental, except try to get better lighting by drilling a deeper hole. I’ll be sure to post it here if I do!

I like to link up here.
Affiliate links help me keep this blog running. Thanks for using them!
All opinions expressed on this blog are always my own.
