Update 11/25/13: You can now download all the studio and .pdf templates here, and check out my second post which lists all the boxes you need for each expansion here!
Update 4/6/2014: The files now include folders for sleeved cards. Read more about it here.
My apologies for the delay. I had an impromptu night out with a friend of mine, which was really fun but impeded my ability to post last night. All that means is that this week’s finished Friday is on Saturday. And have I got a fun gaming / organization / silhouette treat for you!
If you play Dominion, you are familiar with the storage issue. Currently there is the base game plus 8 expansions, and a secondary set of base cards. This translates to 8 large boxes (12x12x3). So, you can imagine how much space that takes up! Thankfully, many people more organized than I have come up with storage solutions that cut that space down. My favorite diy solution is Drew’s Dominion Storage Solution. I started doing this once before with Earl, but we ended up abandoning it because it was just too much hand cutting. All the artwork here is Drew’s, but he’s expressed permission for people to create cut files in the past. Here’s where the silhouette comes in! I created a cut file for each of the boxes so that I could have my Silhouette do all the cutting! It still takes a long time, but much less than before.
This tutorial is uses the print and cut feature of the silhouette (which I LOVE), but you can also download the original .pdf version of the files by Drew here. I am working on creating print and cut files for all the templates along with sticker templates. For now, You can find .studio files for all the folders and the small box here. The sticker templates are annoying and forthcoming. I will defeat them!
This project was done over 4 evenings that ranged from 2-6 hours (not counting the time to create the silhouette file). So, it’s hard for me to estimate how much time it took, but it was totally worth it! I don’t have all the expansions, so I can’t confirm that all the expansions will fit in the original box this way. I think that at some point, we may switch to a different box, but for now I’m happy with the original box. Note that these are not sized for sleeved cards, though I might modify the templates if I have time for that in the future.
Materials
Cardstock. The amount you need will depend on which expansions you need (see step 1)
Double stick tape roller / glue stick / double sided tape (any adhesive really)
Printable sticker paper (I highly recommend the silhouette sticker paper, more on that below)
Step 1: Print everything you need
How much do you need? Well, that’s a really good question that depends on which expansions you have. Here is a list of what I needed. If you are using the .pdf versions, go ahead and print out that number through your .pdf reader (at 100% size) now. Make sure to print the labels on sticker paper. If you are using a silhouette, we’ll cut in the next step with the print and cut feature. I am working on a guide that will include all the expansions
Dominion (20 sheets total + boxes): 2-60 folder (copper, starter decks), 1-40 folder (silver., randomizer + trash), 1-30 folder (gold, curse), 2-12 folder (2 x estate, duchy, province), 12-10 folders (24 action cards)
Alchemy(9 sheets total + boxes): 2-12 folder (vineyard, randomizer), 6-10 folder (11 action cards), 1 20 card (potion)
Hinterlands(17 sheets total + boxes): 1-30 folder (randomizer), 4-12 cards (farmland, silk road, tunnel), 12-10 cards (20 action cards, 3 treasure cards, blanks)
Do yourself a favor and buy extra paper. I wouldn’t print extras unless you mess up and need to, but I needed to that and it’s better if you don’t have to go out and purchase more paper when you are in the middle of your project.
Step 2: Print and Cut.
Now can I gush about the silhouette studio print and cut? It’s awesome! I’ll be doing a tutorial later on how to turn a paper cut project into a print and cut , but for now you can just have the tiniest taste. In your studio file, you should see some weird hash marks, a box in the upper left, and then some corners. These are your registration marks. If you don’t see them, make sure to hit the registration button ![]() and check “Show Reg Marks”.
and check “Show Reg Marks”.
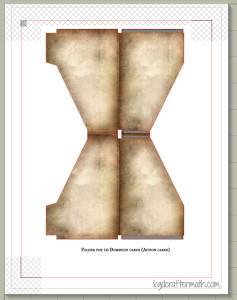
Once your registration marks are showing (oh my!), go to File – Print and send your file to your printer from within the studio program. If your cardstock is not coming from the regular paper tray, make sure to fix that by choosing printer preferences and selecting the appropriate choice. Mine feeds from the back tray. Since every printer’s options are different, I can’t really guide you too much here.
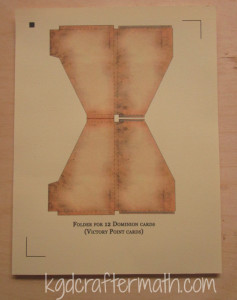
Now adhere the paper to the cutting mat, load it into your silhouette, and send the file to your machine. I highly recommend watching it register. I had a few mis-registrations that cut the paper in the wrong places. If you catch it early enough, you can pause and cancel the job. If this happens: check to make sure the lines printed correctly, turn the machine off and on again, and restart the program. It’s usually only one of the above problems, but by doing all three at once you don’t have to stop it again if you chose the wrong fix. After you remove the excess paper, you will be left with your piece! Note that all but the 60 folder template will create 2 boxes per page.
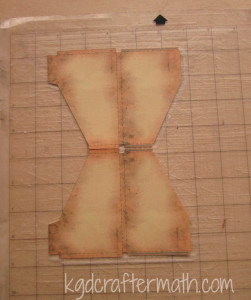
Rinse and repeat until you have all of the folders that you need. You may need to re-stick your cameo mat during this process. For the 40 card folders, the cut lines bleed outside of the registration marks. This means that you will need to finish the cut yourself either by hand with an x-acto blade, scissors, or your favorite cutting tool. I also suggest using coverstock or a heavier cardstock for the boxes that will hold all your folders.
Step 3: Assemble the Folders
Now for the mostly easy part! The print and cut file has already perforated your fold lines, so fold everything up and inwards, slap some adhesive on those grey bits, and stick it together!
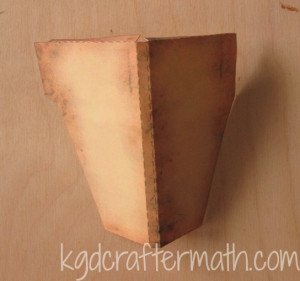
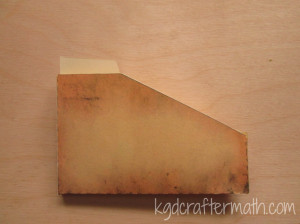
Step 4: Label the Folders with the Stickers
Here’s the thing with the labels, if you are are a stickler like I am, you want everything to be alphabetized and alternating just so. This means that the templates need to be arranged depending on what expansions you have. I’ve been working on making the sticker templates for each individual expansion and for all the expansions, but I can’t customize for each and every possible combination. So, when I do finish the sticker templates, be aware of that. You’ll notice in my final image, I still need to fix my sticker templates to fit the expansions I have!
Actually adhering the stickers though is really is. It’s just a sticker, after all. I really liked the silhouette sticker paper because the clear sticker has some weight to it, so that even when the backing is pulled off the sticker is still nice and strong. Here’s a labeled folder to go with all that chatter!
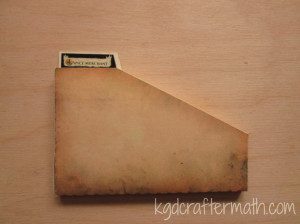
Step 5: Organize and Oggle!
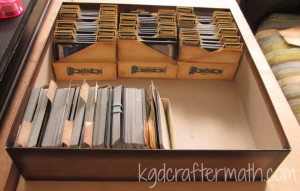
Or, if you are like me, organize it and figure out that you need to re-do all the stickers so that everything looks better! Never fear, when I get those downloads down you won’t need to do the perfectionist re-thinking things. Dominion storage = conquered!
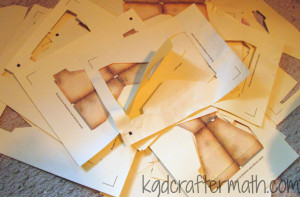
And what about the craftermath? Well, this project mostly makes a bunch of excess paper. What you see here is a pile of all the excess bits plus the bad cuts/prints. I had quite a few :(. I like to shred mine and keep it as bits. I’m hoping that one day I’ll have enough bits to try my hand at making my own paper!
I’ll be back next Friday with downloadable templates and an even prettier picture of my own Dominion organization. See you all soon!

I like to link up here.
Affiliate links help me keep this blog running. Thanks for using them!
All opinions expressed on this blog are always my own.


This is epically awesome, Kristy! Now, I’m inspired to buy the expansion sets for Christmas, just so I can make this! It’d definitely be a worthy time investment…and the finished product looks so purdy. Also, I love your craftermath photo; one of my goals for 2014 is going to be to show more “mess” photos. Gotta keep things real!
Thanks for sharing!
So glad to be an inspiration, especially for you! I will warn you though, be prepared to use up all the sticky in your mat. I had two mats, and had to restick each of them by the end. I should hopefully get all the stickers up soonTM.