Good Morning! Today is something special. Normally I would do a crafting hour on Mondays, however this Monday I’m participating in the Silhouette Challenge! What is this? Well, it’s where a bunch of crafters get together and each do independent posts on something new they’ve tried with their Silhouette. This could be a new technique, a new material, or just a new project they’ve never made before. There are 22 of us this month! After I show you my new project, then go ahead and check out every one else’s links at the bottom. I know I will!
For my challenge I wanted to work with vinyl since every one says how wonderful it is. While I’ve read that the silhouette vinyl is much nicer than other vinyls, I used Oracle indoor vinyl as they have a better color choice. And that mattered for my project! I was inspired by a pin I pinned on pinterest (too many pins?) of a vinyl back splash. It’s a really pretty quarter foil print done by Landeelu.
Step 1: Inspiration
But, I couldn’t just stop with a simple repeating back splash, could I? Nope. I had to go for something a bit more… me? nerdy? fun? All of the above. Since back splashes are long and thin, I immediately thought of side scrolling video games. And what’s more iconic than Mario Bros.!? So, off to work I went, hi ho, hi ho, and all that. I decided to work with just the first level of Mario Bros., so I went and found myself a screen shot of the level. You can see the image below, but I didn’t need nearly that much for my back splash. So I sized it to the right height and cropped out everything I didn’t need. It worked wonderfully, since I only needed up to the first drop off in the game!

Step 2: Photoshop Wizardry
Once I had a screen shot, it was off to Photoshop I went. (See what I did there?) I won’t bore you with the details, but suffice it to say that the original Mario is an early 8-bit game, so it uses pixel blocks and relatively few colors. I just separated out shapes by color and spent some time thinking about negative space. Why negative space? Well, it turns out it’s easier to use negative space and layer than to make all those little bits separately. You’ll see what I mean in a bit. Here are all the shapes that I needed for my Mario back splash:
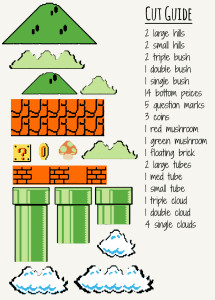
You can see how I simplified some of the shapes a bit, such as removing the light orange on the bricks. I was just worried that that I was doomed to failure with that particular layering trick.
The colors there are also based on the vinyl colors I chose, which were pretty close to the originals, but not quite exact. I used either Oracle 631 or Mactac 12×24# vinyl sheets, all of which I purchased from Just For Crafters. By using those colors in my shapes, it was easier for me to lay out my shapes by color in Silhouette Studio. The yellow below is the only Mactac sheet I used.
Step 3: Silhouette Layout
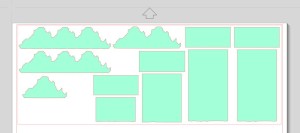
I had 10 Colors, which means 10 sheets of vinyl! I purchased 20 though, just in case I messed up. Thankfully, I didn’t need any. To lay out the images in silhouette, I first made a master file of all my shapes. This consisted of saving each layer in my Photoshop document as a different .jpg, importing it into Studio, and using the trace feature to create the shape. Once I had all my shapes in studio, I set it up just like my Photoshop file. Then, I created a separate studio file for each color and made sure to put as many of each shape into the file as I needed. I also cut a box around each group of shapes to make weeding easier. The only one that came close to needing two sheets was the black. Here’s what my light green file layout looked like to give you an idea:
Side note: I keep waffling back and forth about whether or not I want to share my silhouette files with you. Mario Bros. is copyright of Nintendo (with which I have no affiliation), but they are one of the companies that are generally more accepting of fan art, which this is. They state on their copyright page that while they have a blanket policy to deny permission to use their work, they don’t have a problem if you do so long as it fits within relevant laws. They also appear to have stated in an interview that they don’t want to punish people for doing things out of affection for the company. They’ve also been known for cracking down on you tube videos, so, it’s kind of all over the board for them. For the moment, I have decided that I need more time to think about sharing this particular file since I can’t change my mind once I put it out there. That might change in the future, but for the moment please accept this explanation of why.
Step 4: Cutting the vinyl
For the most part, cutting the vinyl went as smooth as pie. The only hiccup I had was with the black detail for the bricks. I was able to pause the machine and slow down the speed to 4, and that worked beautifully. I only had to re-cut the one piece. Well, that and I forgot to tell it that the yellow vinyl wasn’t on the cutting mat, and so it cut all the way through the vinyl! Another easy fix, as I just cut off the bad part and started again. At least I caught it right away! Please excuse the lack of picture here, I lost the SD card with the pictures of the cut vinyl on it. :(
Step 5: Layering the vinyl.
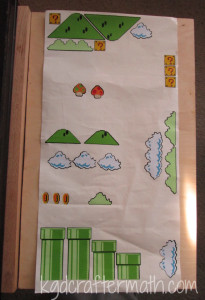
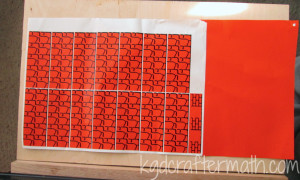
Next up came layering. I’ll show you how I layered each piece so you can get an idea of what I meant by negative space before. This is better done with pictures, so I’ll keep my chattering to a minimum here. The only ones I don’t have are the black and red, where the black detail was layered on top of the red block. I used my transfer tape a lot for this part.
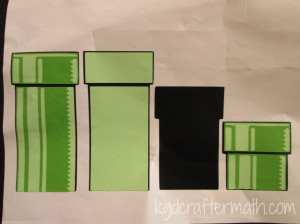
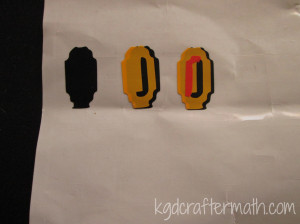
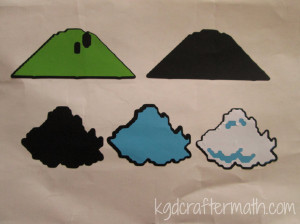
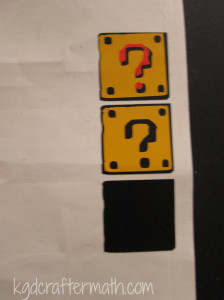
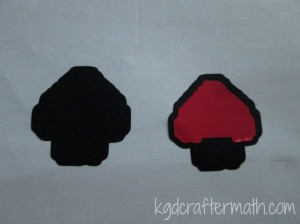
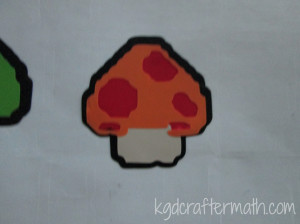
Once you have all of the vinyl layered, you will have 2 sheets of vinyl that look something like this:
Step 6: Prepping the wall
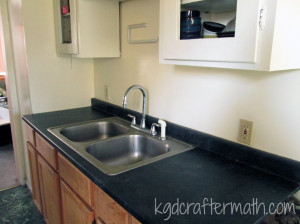
Once all the vinyl is done, it’s time to clear the counter tops and clean the wall. So bonus, this project means you clean your counter tops!
Step 7: Placing the bricks
I started by using the transfer paper, but realized that I didn’t need to since the shapes were pretty solid. After placing the first piece, we realized that we needed to use a string level since our counter tops themselves weren’t quite level. So, my engineer husband got to have fun with measuring. Goody!
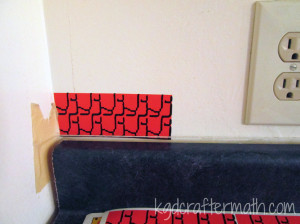
For the outlets, we simply cut around them carefully with an X-acto knife while it was on the wall. With some careful measuring, I could have had the cameo do this for me. I like this way better though, so you have some wiggle room in alignment.
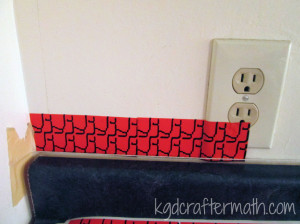
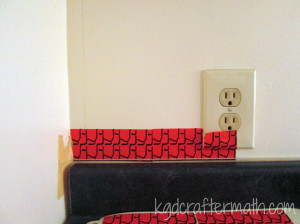
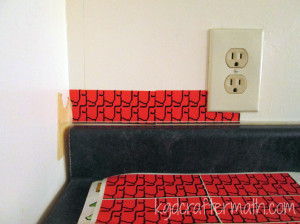
Step 8: Ground cover
This next step got a bit tedious, but thankfully I had Earl to help. He counted the number of bricks on the image and told me where to place each ground piece. The first one was easy, since it was right at the start! We only had 1 piece that started on an outlet, and we were able to count back from the end since it was so close.
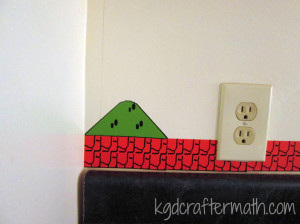
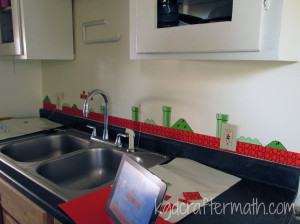
Step 8: Stuff in the air
The best thing to do here was to align things in relation to pieces that were already down. The first set of bricks was in line with the height of the second tube. Then, some of the extra blocks were aligned with the largest tube. I’m not sure how Earl figured out where the lower clouds were, but hey, it worked! And the final cloud cover aligns with the middle of the first cloud cover. You can see some of the alignment process below, note the continuous use of that string from before!
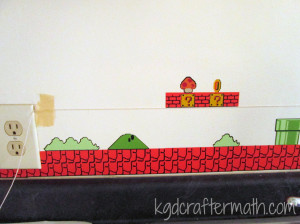
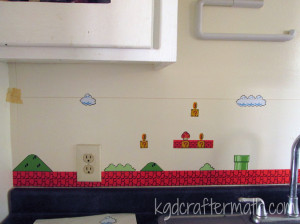
Step 9: Enjoy! (And put everything back!)
And then we were done! I was surprised that it only took about an hour to put it all up. That’s not counting the time I spent designing, printing, and layering the vinyl, but I still expected it to take longer!
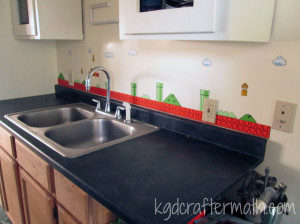
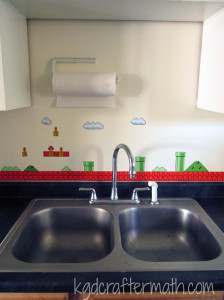
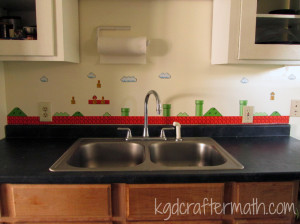
Here are some before and after shots of my kitchen to give you an idea of the difference:
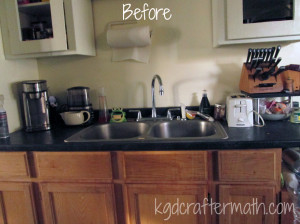
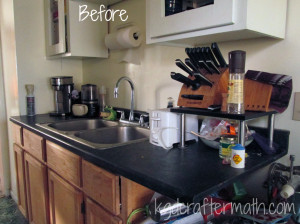
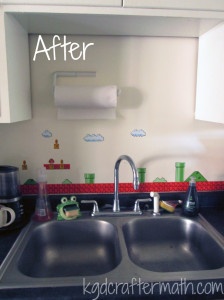
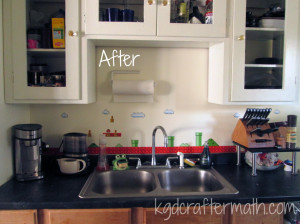
It was a ton of fun and adds a bit of personality to my apartment. Plus, the vinyl comes off clean (I already tested this), so it’s really landlord friendly!
Ready for more fun? Head over to these other Silhouette Challenge posts!
Crafting with Glitter Just Got Easier by Create & Babble
Birthday Invitations Homer Simpson Style by Black & White Obsession
DIY Planner Dividers by The House on Hillbrook
3D Haunted Forest by Chicken Scratch NY
Pumpkins and Peacocks Fall Mantel by joy & gladness of heart
DIY Cheers Garland by Rain on a Tin Roof
Wedding Gift Wrapping by It Happens in a Blink
Glitter Monogrammed Pumpkin by unOriginal Mom
Halloween Family Rules by Tried & True
Faux Stitched Speech Bubbles by Get Silvered Craft
Halloween Spooky Eye Luminaries by A Tossed Salad Life
Addressing Invitations with a Silhouette Cameo by My Favorite Finds
Halloween Party Treat Bags by The Thinking Closet
“Create” Wooden Pallet by Lil’ Mrs. Tori
Spooky Halloween Bats Garland by TitiCrafty
Decorated Pumpkins by Tanya’s Creative Space
Cute Wedding Card by Zanaree
Learn to Tie Your Shoes by From Wine to Whine
Fussy Cutting Making You Fussy? by My Paper Craze
Cut Fabric With Your Silhouette by Cutesy Crafts
Cookie Lee Jewelry’ Gift Bags with a Purpose: Sharing Thankfulness by An Elegant Touch
Halloween Banner by Sowdering About
Interested in joining us for our group posting event next month? We’d love to have you. Simply fill out the new member request form, and Lauren from The Thinking Closet will get you squared away.
Do you like nerdy home decor?
You might also like some of these other projects that I’ve done!

I like to link up here.
Affiliate links help me keep this blog running. Thanks for using them!
All opinions expressed on this blog are always my own.



This has to be one the coolest and original ideas I have ever seen! I’m just speechless. This is SO AWESOME!!
*Blushes* Thanks Stephanie! I had a ton of fun making it. I’m glad that you like it!
Stopping over from the Silhouette Challenge.
Mario is the King of Video Games, I’ve been drooling over Mario tattoos for years.
Your backsplash is just the touch of nerd we all need in our homes! Long live the nerds!
Much love,
Trisha D.
Yes Trisha, Long live the nerds! Truth be told, I think we are all nerds in our own way.
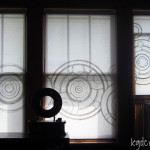
I love adding little touches of geekery in my home decor (see my Gallifreyan blinds for another example). I definitely recommend adding your own touches of nerd in your decor if it’s your thing. It always manages to add a smile to my day just by looking in the right direction.
What a fun project! Love your results!
Thanks Glenna! I was a little surprised at the results myself. I was worried that I’d screw up the alignment somewhere or that it would look hokey, but I think the minimalist style of Mario Bros. helped with both of those problems. It did take a bit of re-positioning and select words on my part to get some of that alignment right though!
WOW!!!! This turned out so cool! The time it took for you to layer, you must have all the patience in the world. I have never done any kind of layering because I’m too chicken! Kudos!
Crafting brings a whole new meaning to “Patience is a Virtue”! I do have to say though, since I made good use of negative space, none of my pieces have more than 3 parts to them (even the green on the pipes). This made the layering SO much easier! You should try it sometime, it might not be as hard as you think!
Amazing! I love Mario – I I spent hours on the game as a kid! You did such a great job on the layering! Everything really! Awesome project!
Tori, me too! Though, I must admit that most of the time I was relegated to watching my brothers play… or break the NES. They went through 3 of them! It’s fun to find bits of popular culture that bring us all together.
That is seriously awesome! This would be so fun in a kids’ bathroom or playroom. Love it!
Carrie – When Lauren asked me what my idea for a back splash was earlier I prefaced it by saying “My husband and I refuse to grow up.” So I see this as perfect for a big kids kitchen! It would go great in a bathroom or play room as well too! Best thing about pixelated art: it’s easy to size up without weird distortion.
This is A-MAZING! Great idea, great work, great great great!!!!!
Thanks Randi! I’m still getting used to the pop of color in my otherwise washed out kitchen.
Oh my gosh! My husband would love this! lol
Mine does! Of course, he helped me make it, so he better! I love your ‘lol’ at the end – it’s exactly the kind of response I have every time I step in there now.
This make me smile! Great job, and way to think outside the box!!!
Glad to hear it Dee! I like having ‘hidden’ smiles around my house.
Wow, Kristy. This post and this project are just oozing with creativity. I am so impressed, first by your courage to take on such an ambitious project for your first foray into vinyl, second that you thought outside the backsplash in a major way, and three that you created something so true to you and your love of Mario! I grew up playing Nintendo games, so Mario is dear to my heart.
Oh, and if you haven’t done this already, you need to share this project with some Mario fan pages on FB (I’m sure there are some). I have a feeling the Mario fans would be ALL OVER THIS!
Soooo delighted to have you and your creative self with us in The Silhouette Challenge. You’re such an inspiration!
Awww, thanks Lauren! I have a bad habit of getting in over my head when it comes to taking on big projects without learning through little ones first. Sometimes it turns out great, other times… not so much.
I haven’t had the chance to share this with the gaming community yet, but I might try a few outlets. Thanks for the suggestion!
I’m glad to be here, and excited that tomorrow I’ll *finally* get the chance to read through all the other posts!
This is really amazing. Love what you’ve done with it – bet you look forward to doing the dishes now!
Thanks! I have a dishwasher, so I always look forward to doing the dishes! It does add a needed smile in the kitchen after a long day though! I also have a ‘hidden’ smile outside my bathroom – it’s an art piece that say’s “You look nice today”. So that’s what I wake up too, and then I get to see Mario while cooking. It makes me happy.
what a fun idea! it is so cute and so smart for your apartment! great idea!
Thanks Kelly! I have to admit, I was a little worried about it sticking to the wall at first. I did put some test vinyl up for a week though, and it didn’t leave a mark!