

Disclaimer: I received free product to use for this post. Rest assured, any and all opinions shared on my blog are always my own, and I never work with companies or products I wouldn’t otherwise recommend.
Hi! You might have thought I forgot about this little blogging space I have here. Nope! I’ve just been super busy! I do admit; I did forget about my travel posts – but those will be back soon too. I didn’t want to overwhelm you with too much all at once. I’m also getting caught up with my Project of Doom quilt – so expect a post on that tomorrow! Today is more about a bit of St. Patrick’s day fun! Also – stick around to the end – there’s a giveaway!
I received a mystery box full of crafting goodies from I love to create to jump start and inspire a project. Lots of green this month! Here are the goodies that came in the box:

So. Much. Green! I had to do a bit of thinking here to decide what it was I wanted to do. I liked the buttons the most (there were plenty more than shown here – I just used them all for my project!). With some consultation from Earl, we went from a button on corsage for your pocket, to shamrock wine charms, to cut out shamrock wine charms. What do you think?! I love them! Best of all – they only took me about 30 minutes to make!

Want to learn how to make them? Read on my friend!
Materials
*Some of the following are affiliate links. Thanks for supporting this blog!

From the box, I used the following materials:
1 sheet 9×12″ Apple Green felt (I only needed about 3×12″ in total)
Assorted Green Buttons
Liquid Fusion glue (not shown above)
From my stash I used:
3×12″ piece of 4/5 oz leather (cut down from a larger hide I purchased from Tandy Leather)
Assorted Lumiere by Jacquard paints (Sunset Gold, Metallic Silver, Metallic Olive Green, and Pearl Turquoise)
16 gauge green wire
2 jewelry pliers (optional)
Cricut Explore (see details below if you don’t have one)
Step 1: Cut
To create my cut-out, I used the 4/5 oz leather and my Cricut.
Don’t want to use leather? Use chipboard or cereal boxes instead! It will give your charm the added structure. You could even cut out several layers of cardstock and stack them. Add a bit of dimensional mod podge to the top of it provide a barrier for those inevitable splashes of wine. If you’re planning on painting, do that before adding the mod podge.
Don’t have a Cricut Explore? If you’re using leather, my best suggestion is to trace the shape you want onto your leather and cut it out using a swivel knife. If you’re using an alternate material, try using a shape punch!
If you’re using one of the alternates above, feel free to skip ahead to the next step. If you’re going to use your Cricut Explore to cut out the leather charms, here’s what you’ll want to do.
First pick out your cut-out shape. I used Stephanie Meyer’s shamrock icon from The Noun Project. I especially loved that I could download the file in .svg format! Perfect for uploading into Cricut Design Space!
To upload into Cricut Design Space, I just choose Upload Images and did a Vector Upload.

Next, I inserted a circle shape from the free images and duplicated it so that I had 3.
Tip: Make sure your filter is set to only show Free images, so you don’t accidentally pick a circle you have to pay for.
You should have 3 circles and your shamrock on the screen now.

Using the Edit tab on the right, select the top circle and change it to be .15″. Change the bottom two circles to be 2″ in diameter.
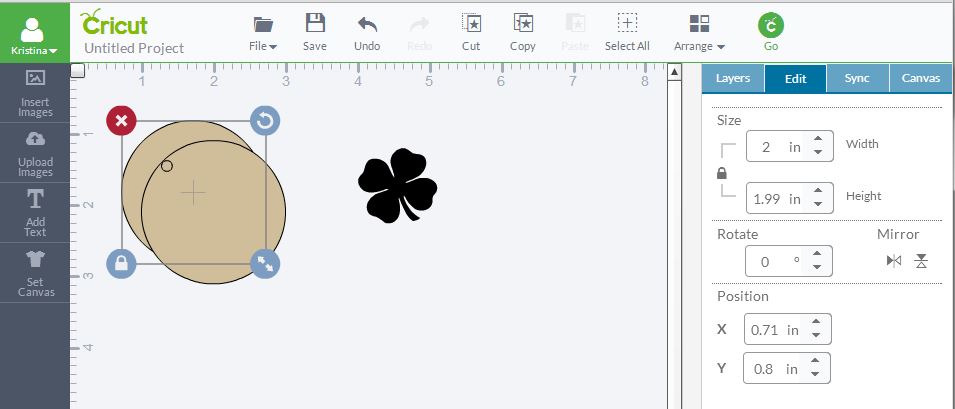
Move one of the big circles out of the way. Position the clover and the hole where you want the cut-out to be. Enlarge the shamrock if you want at this point.
Tip: It is easier to move the big circle around to “re-position” the little circle.
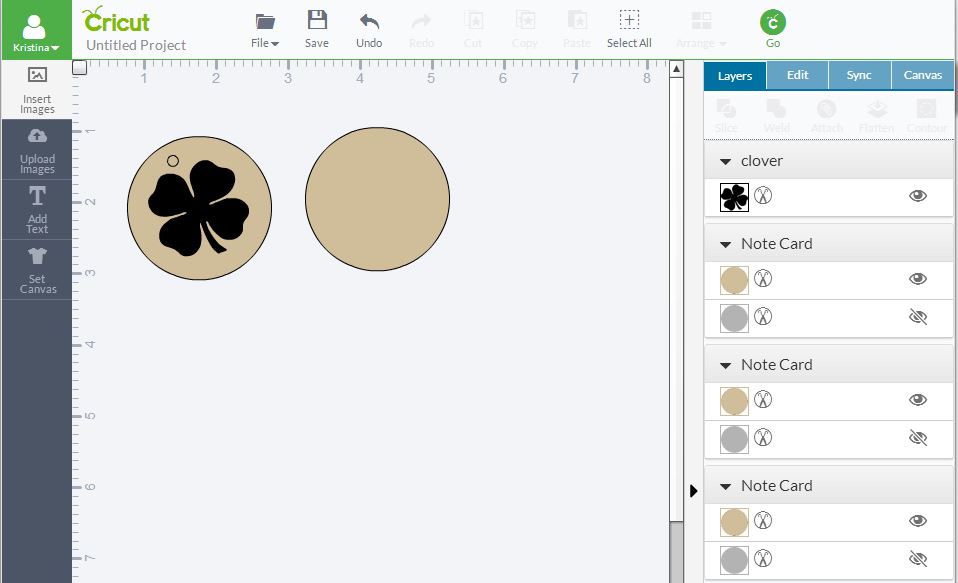
Drag your mouse so that a box appears around the big circle, little circle, and shamrock. Click the slice tool in the layers toolbar. You will end up with three shapes – a little circle, a shamrock, and a big circle with both of those images cut out. Delete the little circle and the shamrock.
Tip: If the sliced tool is greyed out, do the little circle and the big circle first. Then do the big circle with the hole in it and the shamrock.

Once you’ve deleted all the images you don’t need, you’ll have two circles (one whole and one with the cut out). Change the color of the whole circle by clicking on the tan color in the layout toolbar.

Now hit the “go” button up top and get ready for your cuts! Cut out as many as you want. A strip of 3×12 can make 5 charms at the 2×2 size (including padding). The mat with the cutout is for your leather, and the green is for your felt. For cut settings – I have a custom leather setting that has the max pressure, the max number of cuts (x7) and uses the deep cut blade. For felt, use Cricut’s cut settings and the regular blade.


Step 2: Paint
This step is easy peasy. All you have to do is paint your leather cut-outs (or whatever else you choose to use). I choose green, gold, silver, and blue. I figured it fit the St. Patty’s day theme.

Step 3: Glue
Now it’s time to add the felt backing. All I did was follow the inner and outer edges with the Liquid Fusion glue and then press the felt down onto the glue. The bottle suggests you can apply heat to speed up drying, but I didn’t find that I had to.

Now there’s a nice soft back to the leather, AND my shamrocks are all green!

Step 4: Assemble
Almost every project I have has an assemble phase – and this is it! First cut your wire to about 4 inches long and bend it into a U-shape.

Now you’re going to poke it through the felt backing the hole in the leather.
Tip: Hold the edge together to avoid accidentally pulling the felt off and to provide extra leverage as you push the wire through.

Add your buttons.

Fold the ends of the wire back. You can do this by hand or use your pliers. These need to be able to hook into each other so they can go around the wine glass stem. It also keeps the buttons and leather charm from falling off.

And you’re done!
See! Easy Peasy! It took me longer to write this up than to do the project itself – and that’s only because I wanted to show you exactly the steps I used to create the Cricut cut file.

Giveaway!
I love to Create is giving $50 of product and a $10 gift card to Starbucks! Enter below for your chance to win!
More Projects to Peruse

I like to link up here.
Affiliate links help me keep this blog running. Thanks for using them!
All opinions expressed on this blog are always my own.
Such a cute project to get ready for St. Patrick’s day.
I don’t have a Cricut, but you make me want to get one!
Samantha recently posted…If I Have To Say That One. More. Time.
Thanks, Samantha! I had a blast making these, and they are so easy that I can see myself modifying the image to fit so many themes! To be honest, buying a cutting machine was one of the best craft purchases I’ve ever made. I actually own two (the Silhouette and the Cricut) and love them both for different purposes.
Very cute idea! This lends to such a variety of wine charms.