
Just as a reminder, I am not affiliated with either Cricut or Silhouette. All opinions here are my own and are based solely on my own experiences (as they would be even if I were affiliated).
So now, here’s the real question. What can it cut? And can it cut it well? That’s what this post is all about.

First, a few things to know about the cutting process. The machine is quiet. Like, really really quiet. We have a running joke over on my Silhouette Challenge Facebook group about how R2D2 sings to us through the Cameo. I was expecting a similar sound. It’s really not there. I think my printer is actually louder. I was, and still am, speechless. This is, of course, assuming that you don’t hear the quiet high pitch whine it’s constantly putting out. If I get the chance, I’ll try to make you a video.
Now onto cut settings. Where possible, I stuck with the factory settings. In general, I felt like it was going a little fast, but then, I usually slow my cuts down. The speed didn’t seem to affect the cuts in any adverse way. The dial has the following options: Paper, Vinyl, Iron-On, Light Cardstock, Cardstock, Fabric, Poster Board, and Custom. There is an intermediary step between each setting, so you can bump paper up or vinyl down if you need to. You can’t change these pre-set choices. If you switch to Custom, you get a drop down menu with another set of presets. You can see that menu here: (Note: I added in the “Heavy Leather” setting).

Just underneath that drop box and to the right of the back button, there is a button called “Material Settings”. Clicking on this brings you to the screen with all of the different material settings. For each material, you can see (and set) the cut pressure, if there is a multi-cut (up to x5), and what the blade type is (regular or deep cut). You can override the dial settings, but I find the override doesn’t seem to save properly. Sometimes it won’t save at all, sometimes it will only work for the cut you are on, and other times it saves for the next cut. I’m not really sure what’s up with that. You can, however add your own materials as well. I like having this type of control for when I feel I need it.

Ok, let’s take a look at this list of materials the Cricut can supposedly cut now. I found this list on several blogs, but I’ll give you a link to the Cricut forum post here, since that’s where I took this one from. I’ve compressed it into a comma separated list, instead of a line each to help save space. I wasn’t able to try and cut everything in this list, but I’ve bolded the things below that I did try. For each of those materials, I’ll give you a summary below of what I found.
Acetate, Adhesive Backed Foil, Aluminum Metal, Balsa Wood, Birch Wood, Burlap*, Canvas, Cardstock (solid core), Cardstock (white core), Chipboard, Construction Paper, Copy Paper- Flocked Paper, Cork Board, Craft Foam, Cricut Chalkboard, Vinyl, Cricut Lite Iron-On, Cricut Magnet, Cricut Stencil Material, Cutting Mat Protector, Denim*, Duck Tape, Epoxy Mulberry Paper, Fabric*, Faux Leather, Felt*, Foil Mulberry Paper, Glitter Cardstock, Glitter Craft Foam, Glitter Epoxy Printed Paper, Glitter Iron-On, Heavy Chipboard, Heavy Leather, Kraft Paper, Light Glitter Paper, Light Leather, Light Printed Paper, Office Paper, Parchment Paper, Plastic Packaging, Polyester, Poster Board, Printed Paper, Shimmer Faux Leather, Silk*, Soda Pop Can, Tight Woven Burlap*, Transparency, Vellum, Vinyl, Washi Tape, Window Cling
*stabilizer needed
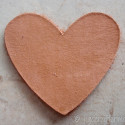
You may notice that I chose to test some of the less traditional materials for a cutting machine. This was not by accident, but rather the reason I was interested in the Explore to begin with. While I have tried to cut some of these materials on the Silhouette, I have not tried to cut all of them. This is not meant to be a comparison between the two (though that is coming), but rather an overview of whether or not the Explore can cut some of these thicker materials. For each material, I’ll give you a photo of the cut, the thickness of the material where applicable, the cut settings, and some general thoughts. The thickness measurements are in mm, because that’s what my calipers measure in and is the norm in my field. Each image can be clicked to view it larger. I chose to cut a heart because it’s got points, abrupt turns, and curves. The heart is 2″ tall and 1.75″ wide. At this point, the test is just to see what the machine can and cannot cut, rather than how well it does intricate cuts (though I will do that as well in an upcoming post). Ready? Good, let’s get to it!
Acetate

Thickness: .5mm
Cut Setting: Transparency (x2)
For this cut, I used some Archiver’s plastic paper. It’s not sold anymore, but other companies sell similar products. I was excited about this, because I’ve used it before to create permanent stencils. I have cut this on my Cameo before, and it cuts much easier on the Explore. On the Cameo I needed to run it through the cut cycle at double cut 3 times, and even then it would go through some places all the way and not entirely through others. This often led to me cutting the mat. On the Explore, I started with the Transparency setting (x2 cut). That wasn’t enough, so I ran it through with the same settings a second time. The cut removed easily and didn’t cut through the mat. I was actually really impressed and excited with this cut.
Balsa Wood


Thickness: 3.3mm
Cut Setting: Custom – Deep Blade, highest pressure, multi-cut x5.
As you can see, I found my self frustrated with this cut. I tore some of the wood off of the size so I could see how deep I was able to go, and it ended up being 2mm deep. The cut does go through like butter, and is a very clean cut where it went through. I just can’t get the clean results that Mandi from Vintage Revival got with thicker wood. I’ve reached out to her, and will report back to you if I’m able to get a better cut. Needless to say, I’m a little disappointed here. Not heart broken, as it could still be user error and is still cutting well where it does, but disappointed nonetheless.
Cardstock

Thickness: .5mm
Cut Setting: Heavy Cardstock
I figured I’d cut some cardstock because, well, why not? The cardstock I cut is “curry” coverstock from The Paper Source. It cut nicely and didn’t chew up the cardstock.
Cork Board

Thickness: 1.5mm
Cut Setting: Light Leather
I choose the light leather settings since the cork had a bit of width to it. I also had a piece of cork tile that was 4mm thick, but it was too deep for the machine. The cork I was able to cut was Canvas Home Basics adhesive corkstock {affiliate link}. It’s backed with a sticker backing that I wasn’t able to get to stick to the mat if I used the whole sheet, but if I cut the sheet down to a smaller peice it stuck well enough. Having cut cork before, I was impressed how well the cork stayed together with the clean cut. I’m not sure if that’s a reflection of the material or the cut, but I suspect it’s both.
Craft Foam


Thickness: 2.4mm (uncompressed)
Cut Setting: Felt
I started with a light leather cut and the deep cut blade, but the cut turned out horribly jagged. So I switched it up to the regular blade and switched to a felt setting, and that worked well. For the foam, the cut goes almost, but not quite, all the way through. Then you use scissors to snip right up to the line and tear the piece out. You can see the process here. It works really well.
Edit to add: Nathan from the comments did some of his own experimenting and found that the following settings (used with the deep cut blade) work well as a custom setting for craft foam: Multi-cut of 4, cut pressure 10. If you buy the sticky backed foam, it will even leave your sticky backing in tact! Thanks for the tip Nathan!
Denim*

Thickness: .9mm (uncompressed)
Cut Setting: Canvas
I just thought cutting up an old pair of jeans would be fun. Turns out it is! Even though it says I need stabilizer, I was able to cut this out on the heavy stick mat without any problems. And now I want to go make all sorts of stuffed animals out of old jeans, like this whale pattern from pinterest. We can check this one off on as “happy”.
Duck Tape

Thickness: -
Cut Setting: Duck Tape
Another one I tried for fun. The machine did come with 2 sheets of patterned duck tape, but I just took some of the black tape I had and stuck it right on the mat. It cut like a charm, the excess pulled away easily, and I stuck it on a piece of foam board. I have no idea what I’d do with this one, but it was kind fun to cut. The Cameo could probably do this just fine, I’ve just never thought to try before.
Fabric*

Thickness: .7mm
Cut Setting: Fabric
I added some Pellon fusible featherweight interfacing to the fabric. The cut came out pretty well, but you can see that there was a bit of a hiccup near the top point in the heart that created a run in the fabric. A few of the strands didn’t cut, so I needed to go through with a scissor afterwards to cut those few and avoid more runs.
Felt (Tru Wool 100% wool)*

Thickness: 1.4 mm (uncompressed)
Cut Setting: Felt
I was really happy with this felt cut. The felt cut really cleanly, and I didn’t need to do any prep work other than adding the interfacing. I know that you can cut felt with the Silhouette, but it cuts better if you flatten it first (check out Jessica’s post at Cutesy Crafts to learn more). Here, I had a nice clean cut, and all I needed to do was interface it and use the pre-set. I haven’t tried it with freezer paper backing yet, but I’ll be sure to let you know when I do.
Felt (Acrylic)*

Thickness: 1.7 mm (uncompressed)
Cut Setting: Felt
This is a bit thicker than the other felt. It cut just as well, even though the quality of the felt isn’t as high, and it was thicker. I did back it with the featherweight interfacing. Again, it was a nice clean cut and came out right away.
Heavy Leather (Belly Cut)


Thickness: 2.5 mm
Cut Setting: Custom – Deep Blade, highest pressure, multi-cut x5.
I was really excited about the leather, so I cut a few of the leathers I had on hand. Let’s just say this probably isn’t the heavy leather they were thinking of. For each of these cuts I only ran it through the machine once. The right most photo is the back of the piece after the cut. I’ve subsequently run them through a second time (without removing the mat), and for some of the leathers this cut all the way through. Not always, but I’m actually ok with that. I have a swivel knife that I can run along the cut to clean the rest of the cut out, or I’ve also got some nice leather scissors. The side profile used scissors to cut out the extra. You know how you’ve got your fabric scissors and your paper scissors? Well, I’ve also got my leather scissors.
Heavy Leather (Single Shoulder)


Thickness: 3.2 mm
Cut Setting: Custom – Deep Blade, highest pressure, multi-cut x5.
The shoulder cut was actually the nicest cut of the bunch. You can’t really see in the back photo just how much cut out, but I was pretty happy with the cut. Now, I’m not saying that I’m a master leather worker or anything. I’m not even saying I’m good. I just like to dabble.
Heavy Leather (Belly Cut – pre-stained)


Thickness: 3.6 mm
Cut Setting: Custom – Deep Blade, highest pressure, multi-cut x5.
It’s really hard to see how well the black cut because of the color, but again I was fairly happy with the cut. I’m really hoping to use the ability of the machine to do most of the cutting for me and start doing some more leather working. I even picked up some new tools!
Heavy Leather (unknown cut)


Thickness: 3.3 mm
Cut Setting: Custom – Deep Blade, highest pressure, multi-cut x5.
This leather was a more pliable leather than the others, and closer to a tooling weight. I bought it a few years back and had some extra laying around. Now… what should I make next with my new found leather cutting abilities? Well, I’ll leave that thought for another day and head onto the next material.
Soda Can


Thickness: .4 mm
Cut Setting: Transparency (x2)
Yep. I cut a soda can. I had no idea where to start with this one, so I used the transparency settings. Turns out if I run it through twice, it cut nicely. There’s a point near the bottom tip where it got caught up a bit, but in general it cut pretty nicely. I suspect I’ll be creating a custom setting which uses the same properties as the Transparency, but doubles the cut from the factory settings. Seems like that will be a useful one to have on hand. And my apologies to my friend Rob. You see, we don’t drink soda, but we have some Dr. Pepper on hand for whenever he comes over. I sort of dumped one down the sink to do this trial… so, yeah… sorry ’bout that.
Wrap-up
So where does that leave me with it’s ability to cut? Impressed. I can’t get over how well it cut through the leather. None of that leather would even load in my silhouette. Now, these aren’t fancy cuts or anything. Nothing too complicated. But for the most part, it lives up to the promise to be able to cut these materials. I fiddled with the leather a bit to figure out just how far I could stretch it. Those pieces are really at the edge of what it can do, and even then you need to make sure the piece is stuck down to the mat well and not sticking up anywhere. If it is, it could get stuck on part of the cutting mechanism and gunk things up. I’ll be interested to see how the leather does with a whole 12×12 sheet of it instead of just a small patch. And you can see the issues I had with the balsa wood. I know some of you are crying out loud that I didn’t try to cut burlap, but the truth of the matter is I didn’t have any! I know, blasphemy, but it’s the honest truth.
Overall though? It’s mighty impressive. I cannot get over how well it cut what it did. And there wasn’t much fiddling involved. For the most part, I stuck with factory settings. But, I’m repeating myself now. I think that’s good for today. Tomorrow I’ll give you my overall opinion of the machine, the impressions it’s left on me, and a nice bullet pointed image of the pros and cons (in my opinion). Plus I’ll throw in a mini assessment of whether you should consider getting the Explore or the Silhouette if you’re looking to purchase. I say mini assessment, because once I’m done with that I’ll be doing this series all over again with the Silhouette, and once that’s done I’ll do an honest to goodness comparison of the machines, including cut comparisons. Till next time, stay shiny my friends.
This post is part of a series. Go ahead and click on one of the links below, you know you want to!
Cricut Explore: First Impressions
Cricut Explore: The Machine
Cricut Explore: The Software
Cricut Explore: Cutting Materials <– You’re here!
Cricut Explore: Conclusions

I like to link up here.
Affiliate links help me keep this blog running. Thanks for using them!
All opinions expressed on this blog are always my own.
Fabulous, Kristy! Thanks for sharing. I’ve got cork I’m getting ready to try on the Silhouette and I’ll let you know how it goes.
Sharon Rexroad’s Bringing Creativity 2 Life recently posted…How-To Create a Custom Pillowbox on Your Silhouette Machine + Free Cut File!
Oh!! I’m so excited to know how it goes!
Wow! I’m amazed at all the materials you have tried out already – - especially the unconventional ones! Thanks for sharing so many details and snapshots of your experimenting so we can get a true sense of all the Explore can do, as well as its limitations. Looking for the wrap-up to this series as well as the 2 series to follow. You are going to help SO many people with these posts, Kristy. SO MANY!
Lauren @ The Thinking Closet recently posted…Instagram-Themed Graduation Party {In a Box!}
Yay! I’m helping, I’m helping! And even though no one will get the reference, it will make Earl laugh. Adding the pictures was really important to me. When I first saw some of the pictures of what it could cut, I really wanted to make them larger and see the sides so I could really get an idea of whether it was a harder material, a thicker material, or both. I’m glad you appreciate seeing them!
Girl, I’m sure this was no easy task to test out all the materials, photograph, and report back, but THANK YOU!! I’m surely going to pin + reference this ‘cut guide’ like a mad woman once I land a Cricut.
Initially, I skimmed thorough the materials list- because I’m impatient like that- and lets just say the soda can took me by surprise. At first, I thought you walked around your house trying to find stuff to cut up– which would have been impressive as well!!
We have even more in common 1. we don’t drink soda either. We try to have some on hand for unsuspecting guests but it usually spoils. 2. Although you don’t have burlap just lying around, we do. It was scored from a conference last summer and still don’t have a clue what to do with it. Guess it’s just not my ‘thang.
Trisha D. recently posted…Custom Blogger Redesign + Branding for The Glittered Barn LLC
To be honest, I don’t think I actually set down and read the list in full until I was actually looking for things to cut. Randomly finding stuff at home to cut would be a blast! And I’m so excited at the possibility of having you as a Cricut buddy AND a Silhouette buddy.
I love it that we’re finding more and more in common!
Thanks for doing these tests! This is exactly what I have been waiting for. Safe to say I won’t be getting the explore for its thick cutting abilities. I have a cameo but I might still get the explore someday.
Venisa, I’m glad that they are useful to you! I do have to say I still love my cameo. If there’s anything else you’d like to see cut or tried on the Explore, feel free to let me know!
Thanks for doing this. It really helps with deciding which machine to buy. I was set to get the cameo until I heard about this. My main concern is, will cricut follow through with print then cut? I guess I can always print then cut by hand. Also what happens when they come out with new machines and change the software? Will that render the cricut junk?
They say cloud based programs will become the norm for all software soon.
I plan to use the machine to cut my own designs to use in my mixed media paintings (digital and canvas). So it’s good to know I can cut thick artist grade paper. Just wondering about more fiberous paper or thin paper such as origami paper. Could you try that and post the results?
The main concern I would have for follow through is the cloud software. Having seen where gaming has gone and where they have backed off, as well as how other suites such as Office have gone, I don’t agree that everything will be fully cloud. I do think that it is likely that there will be aspects of the cloud in a lot of software, but the drawbacks for when there is not a strong enough internet connection are just too great until we can get a more ubiquitous connection. Anyway, I could go on for way to long on that point.
The real point here is that unlike software you keep on your computer (which never really stops working, it just becomes unsupported and you may need an older operating system), once the company stops supporting the website, the machine is no longer usable.
I am hoping that they will follow through with print and cut, as it’s one of my most used features on the Silhouette.
I have some fibrous paper on hand I can try out this week when I get a moment, but I don’t have any origami paper. I’ve got a convention this weekend, so I’m not sure when I’ll be able to give it a go, but I’ll definitely try it for you! I have cut fibrous paper on the Silhouette as well as some thicker paper meant for alcohol markers, so hopefully the Cricut will behave similarly.
Hey there! What a helpful tutorial. I work with a lot of leather and it was the deciding factor for going with the cricut. May I ask what stabilizers or interfacing you used for the felt and leather? I would love to avoid the trial and error, if possible, and I’m new to the die cut world ;).
Thanks so much!
Nikki recently posted…Shabby Chiffon and Tulle Ruffle Headband by southernAdoorNMENTS
I didn’t need to use any interfacing on the leather, though it did muck up the mat quite a bit. I wonder if using interfacing would help with that. *ponders* I’ll give it a go sometime this week and let you know. For the felt, I used some Pellon Featherweight interfacing that I had on hand. I know that Wonder Under is another favorite among my Silhouette using friends, though I haven’t tried it yet.
Thank you so much! Im using the Pelion now. I haven’t tried it on the leather or the wool felt yet. Excited to test it!
Nikki recently posted…Shabby Chiffon and Tulle Ruffle Headband by southernAdoorNMENTS
This list is great but I just thought I would throw in about how I got the best results with the craft foam. I bought sticky back craft foam and every time i used deep cut with any of the presets it cut way to deep and just tore up the foam, but after a lot of experimenting I got really good results making a custom setting I did a:
Foam
Multi-cut of 4
Cut pressure 110
it cut very well and left the sticky paper intact.
Thanks for the tip Nathan! I also found that the deep cut blade didn’t work too well. Do you mind if I share your settings above in the blog post?
No I don’t mind but I was not entirely clear those settings were with the deep cut blade that I had the best results with those custom settings.
Oh, you’re right! I did misinterpret that. Thanks for the tip!
[…] show how different kinds of felt cut. And go take a look at this post from my friend Kristy at Please Excuse My Craftermath where she tests out what the new Cricut Explore can cut. I’m very interested in this […]